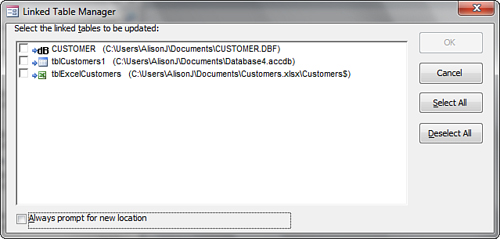
The Linked Table Manager is an important
tool for working with linked tables. It allows you to move tables to
another folder or another drive and then update the link to that table.
Move and Update Table Links
To move and update table links, follow these steps:
1. | Choose
Linked Table Manager from the Import & Link group on the External
Data tab of the Ribbon. The Linked Table Manager appears (see Figure 1).

|
2. | Select the linked tables you want to update.
|
3. | Select the Always Prompt for New Location check box.
|
4. | Click OK.
|
5. | Select the folder or drive to which you have moved the table.
|
6. | Select the table, and then click Open.
|
7. | Click OK.
|
You
might at some time have a link that you no longer need. For example,
you might import data because it is no longer necessary to use the
legacy system that you have in place. The following are the steps
necessary to remove such a link:
1. | Select the link you want to remove.
|
2. | Press the Delete key. The dialog box shown in Figure 2 appears.

|
3. | Click Yes to remove the link. The link is removed.
|
It is important to note that this process does not remove the linked object. It just removes the link.