Whenever you create a new section in
your notebook, it will automatically contain one blank page. You can
click anywhere on the page and start typing notes. You don’t need to
worry about any constraints like those in other programs as the OneNote
canvas is a completely flexible environment, much like a sheet of paper.
With OneNote, nothing is set in stone, and you can freely change and
move items on the page after you’ve created them.
As was the case with sections, it makes sense to first give the pages in your notebooks meaningful titles.
Adding a Page Title
Whenever a new section is
created, OneNote creates a blank, untitled page in that section. To
begin using this page, first type a page title into the designated area
at the top of the page.
Page titles are useful for
labeling your pages with meaningful descriptions that will make your
notes more easily identifiable when searching your notebooks and seeing
your pages in a results list.
To add a page title, follow these steps:
1. | If necessary, click the page tab of the page to which you want to add a page title.
|
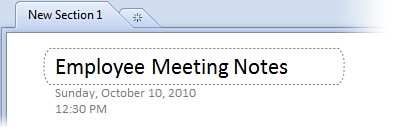
2. | At the top of the page, click inside of the dotted outline and then type a page title (see Figure 1).
|
The
page title you enter is also shown in the corresponding page tab on the
right and in the title bar at the top center of the OneNote program
window.
Changing a Page Title
If the content of a page changes
over time and its page title is no longer accurate or descriptive
enough, you can easily change it at any time.
To change a page title, follow these steps:
1. | If necessary, navigate to the page you want to rename by clicking its page tab.
|
2. | At
the top of the page, click inside of the dotted outline, select the
text that’s there, and then overtype it with a new page title.
|
When a page title is changed
in the page header area, it is also changed in the corresponding page
tab on the right and in the title bar at the top center of the OneNote
program window.
Deleting a Page Title
If you don’t care about page
titles for some reason, you can easily turn them off. However, doing so
removes both the title and the date and time stamp that indicates when
the page was created. This information is typically very useful when
searching your notes, so delete page titles only if you’re sure you
really won’t ever need this information again.
To delete a page title, follow these steps:
1. | If necessary, navigate to the page whose page title you want to remove.
|
2. | On the ribbon, click the View tab and then click Hide Page Title.
|
|
Although the Hide Page
Title button on the View tab works like an on/off switch that lets you
hide or show the page title area at will, clicking the selected
(orange-colored) button again to stop hiding a page title will restore
only the dotted area where you can type a new page title. The original
page title is permanently deleted when you hide it for the first time,
and it cannot be recovered.
The one reprieve
from accidentally clicking the Hide Page Title button is pressing the
Ctrl+Z (Undo) keyboard shortcut immediately after you delete the page
title.
|
When you’ve hidden (deleted)
a page title, OneNote will use the first part of notes text on the page
as the label for the page tab on the far right of the OneNote window.
If you later unhide the page title area and type a new page title, that
new title will serve as the new page tab label.
Creating a New Page
There’s virtually no limit to the number of pages a notebook section can hold.
To create additional pages in the current section of your notebook, follow these steps:
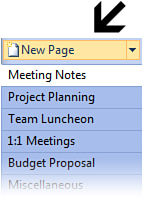
1. | At the top of the page tabs on the right side of the OneNote program window, click New Page (see Figure 2). OneNote creates a new, blank, untitled page at the bottom of the other page tabs in the current section.
|
2. | Add a page title by following the steps in the previous procedure.
|
|
If
a notebook section already has a large number of pages and you don’t
want new pages that you create to appear at the very end of all of the
other page tabs, you can use another method. Move the mouse pointer over
the existing page tabs where you want the new page to appear and then
click the floating New Page icon that appears just to the left of the
page tabs. OneNote will insert a new page in between the two page tabs
marked with a thick, black line.
|
Changing the Appearance of a Page
To simulate sheets of paper,
OneNote pages are typically white when you create them. However, you can
freely customize the appearance of a notes page to simulate taking
notes on a ruled notepad, on graph paper, or on sheets of colored paper.
If you change your mind again later, you can easily replace or remove
such visual page customizations.
To change the appearance of a page, follow these steps:
1. | Go to the page whose appearance you want to customize.
|
2. | On the ribbon, click the View tab.
|
3. | In the Page Setup group, click Page Color, and then click the page color you want to use for the current page.
|
To change the selected color
of the current page, repeat the previous steps and then make another
selection. To remove the selected color, click No Color on the pop-up
menu that appears when you click the Page Color button.
|
|
If you don’t care to change
the page color but would like the appearance of a ruled notepad or graph
paper instead, follow these steps:
1. | Go to the page whose appearance you want to customize.
|
2. | On the ribbon, click the View tab.
|
3. | In
the Page Setup group, click the Rule Lines drop-down arrow, and then
click the style of rule or grid lines you want to use for the current
page.
|
|
To
change the selected style of rule or grid lines for the current page,
repeat the previous steps and then make another selection. To remove the
selected style, click None on the pop-up menu that appears when you
click the Rule Lines drop-down arrow. To have OneNote automatically
create all future new pages with the same style of rule or grid lines
applied, click Create new pages with rule lines at the bottom of the
pop-up menu that appears when you click the Rule Lines drop-down arrow.
|
Changing the Size of a Page
Aside from changing the appearance of your notebook pages, you can also specify the physical dimensions of the page.
To change the size of a page, follow these steps:
1. | Go to the page whose dimensions you want to customize.
|
2. | On the ribbon, click the View tab.
|
3. | In the Page Setup group, click Paper Size.
|
4. | In
the Paper Size task pane that opens, change the Size setting to the
paper size you want. After you’ve made a selection, you can then further
customize the size and margins of the page.
|
Because OneNote is
primarily designed to replace all of your paper-based notes, you can
typically just accept the default settings that your notebook starts
with. Still, it’s nice to have these customization options available for
when you might need them.