4.2. Message Reading Windows
When you're working with a sent or received message, you work in a message reading window.
A message reading window.
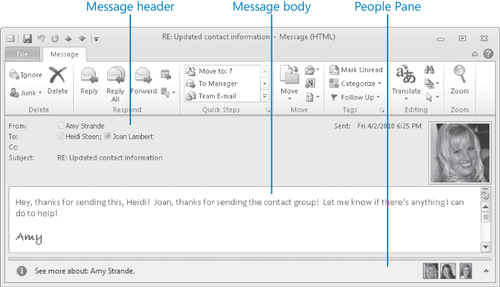
The message reading window interface includes the following elements:
Quick Access Toolbar
Provides access to the window-management menu (repre-sented by a
Received Message icon) and the same commands as it does in the message
composition window. The Previous Item and Next Item buttons are active. Ribbon
Includes the File tab and a Message tab that contains a set of commands
different from the commands on the Message tab in a message composition
window. Message header
Displays the name and online status (if available) of the message
sender and message recipients (those entered in the To and Cc boxes),
along with the message subject and any message notifications,
categories, or flags. Message body
Displays the content of the message. You cannot edit message content in
a message reading window (but you can copy content from the message
reading window to paste into another Office document). People Pane Displays information about the message sender and the message recipients, including you.
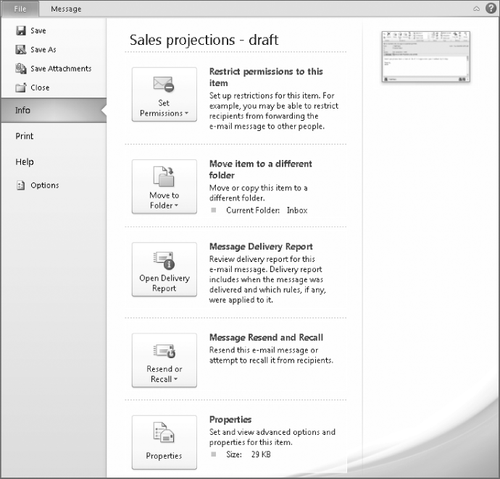
When opened from a
message reading window, the Backstage view includes the Set Permissions,
Move To Folder, and Properties commands that are available from the
message composition window, as well as commands related to viewing
delivery reports and recalling and resending the message.
The Backstage view of a message reading window.
Commands on the ribbon of a message reading window are organized on one tab: the Message
tab. This tab includes commands for working with the active message,
including deleting, responding to, moving, tagging, editing, and viewing
it. The Message tab also includes the Quick Steps gallery of command
combinations that enable you to accomplish multiple tasks with one
click.
The Message tab of the message reading window ribbon.

Note:
SET UP You don't need any practice files to complete this exercise. Display your Outlook Inbox, and then follow the steps.
 On the Home tab, in the New group, click the New E-mail button.
Note:
Keyboard Shortcut Press Ctrl+Shift+M to create a message.
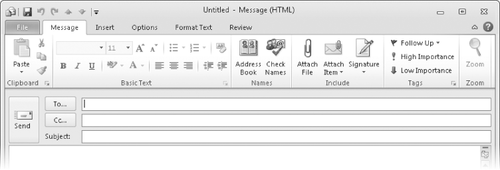
An untitled message window opens, with the cursor in the To box.
You can compose and send any standard e-mail message by using only the commands available on the Message tab.
Tip:
Only the buttons for commands that can be performed on the currently selected message element are active.
Click to insert the cursor in the message body. Additional commands on the ribbon become active. On the Message tab, review the available commands. Commands are organized into six groups: Clipboard, Basic Text, Names, Include, Tags, and Zoom.
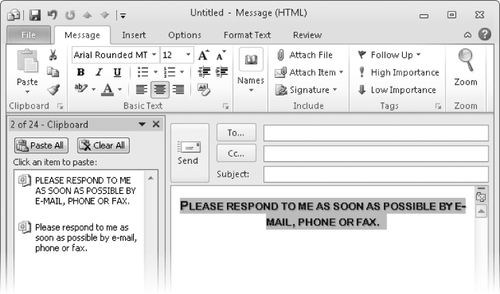
 In the lower-right corner of the Clipboard group, click the dialog box launcher.
 The Microsoft Office Clipboard task pane display cut and copied content.
The Clipboard task pane displays content cut or copied from any Office application.
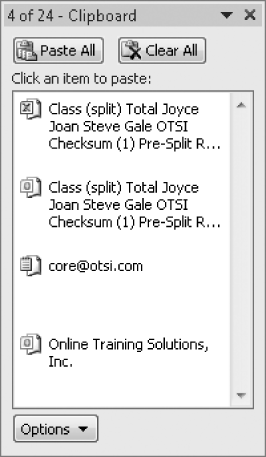
The Clipboard is shared by the Office 2010 applications installed on your computer and might display content cut
or copied from Outlook or from programs such as Word, Excel, or
PowerPoint. The content source is indicated by the program icon
preceding the content clip.
Tip:
You can control when and
where Clipboard elements are displayed by selecting from the list that
appears when you click Options at the bottom of the task pane.
If the Clipboard contains clippings that you don't need, click Clear All. You can remove all clippings from the Clipboard by using this command.
 In the message body, type Please respond to me as soon as possible by e-mail, phone, or fax. Select the text you entered, and then on the Message tab, in the Clipboard group, click the Cut button.
 The text
moves from the message body to the Clipboard and is now available to
paste into a text field of any Outlook item or into any other type of
Office document. Point to the clipped text, and then click the arrow that appears. A short menu of actions you can take with the selected clipping appears.
You
can insert and remove all clippings by clicking Paste All or Clear All,
or individual clippings by pointing to the item, clicking the arrow,
and then clicking a command.
On the clipping menu, click Paste. The text reappears in the message body but remains available on the Clipboard for later reuse.

Tip:
When you paste text into a
message, the Paste Options button appears at the lower-right corner of
the pasted text. Clicking this button displays the Paste Options menu,
from which you can choose to keep the original formatting of the pasted
text, match the format of the text into which you pasted, and set other
paste options.
 In the upper-right corner of the Clipboard task pane, click the Close button.
 In the message body, select the inserted text.
 On the Message tab, in the Basic Text group, click the Font arrow, and then in the Font list, click Arial Rounded MT Bold.
 The text changes to the selected font.

 In the Basic Text group, click the Grow Font button, and then click the Center button.
 The font size
increases from 11 points to 12 points, and the paragraph containing the
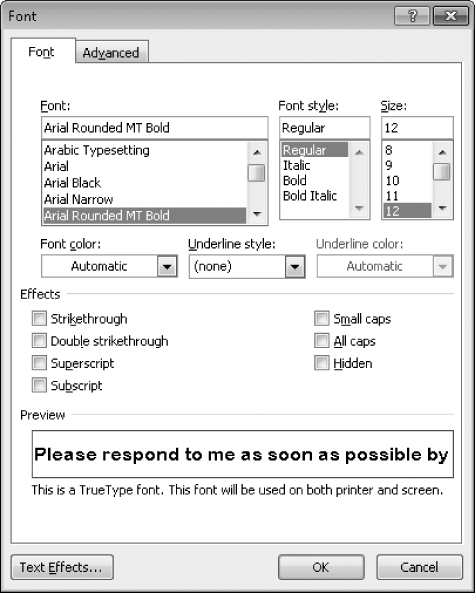
sentence moves to the horizontal center of the message content pane. Point to the other buttons in the Basic Text group, and note their functionality as described in the ScreenTips that appear. Then click the Basic Text dialog box launcher. The Font dialog box opens, displaying the Font page, which contains many additional font-formatting commands.
The Font dialog box includes settings that aren't available from the Basic Text group on the Message tab.
Tip:
You can't format the content of the message header fields.
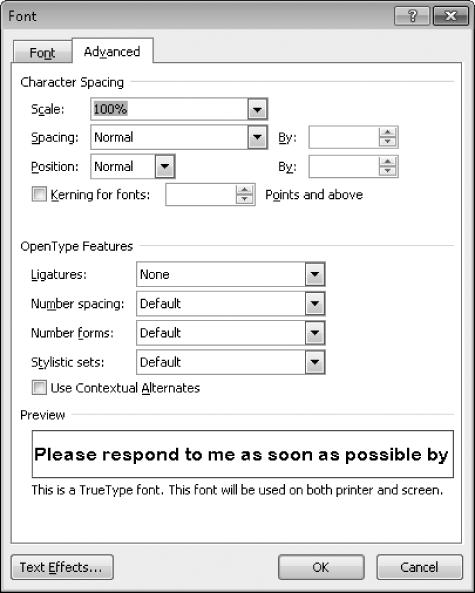
In the Font dialog box, click the Advanced tab. The second page of the dialog box appears. From the Advanced page, you can control character spacing and specific font characteristics.
The preview box demonstrates the effect of the currently selected font-formatting options.
In the lower-left corner of the dialog box, click Text Effects. The Format Text Effects dialog box opens. In the left pane of the Format Text Effects dialog box, click Shadow. The Shadow page of the Format Text Effects dialog box includes many options for adding standard and custom shadows to characters.
The Text Effects settings include many advanced options that add dimension to characters.
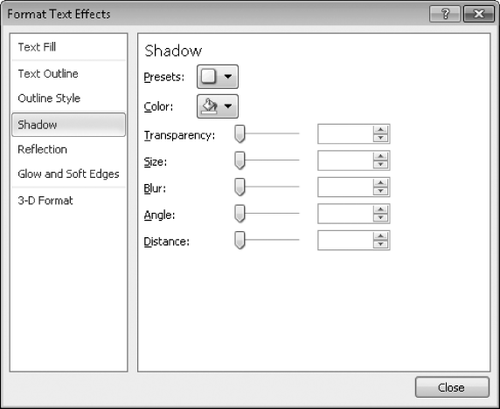
 Click the Presets button, and then click the first shadow setting in the Outer section (Offset Diagonal Bottom Right).
 Click the Color button, and then in the Standard Colors section, click the Red square. Then in the Format Text Effects dialog box, click Close.
 The Preview box displays the effects of the selected Text Effects options on the current text. Click the Font tab of the Font dialog box, and in the Effects section, select the Small caps check box. Then click OK. The message text changes to reflect your selected text formatting options.
 With the newly formatted text still selected, click the Clipboard dialog box launcher.
 The Clipboard task pane opens. It now contains both the original, unformatted text and the newly formatted version.
You can store multiple versions of the same text on the Clipboard.
Close the Clipboard task pane. Then explore the other commands on the Message tab and on the Insert, Options, Format Text, and Review tabs.
 At the right end of the ribbon, click the Minimize the Ribbon button.
 The ribbon collapses so that only the tabs are visible.
 On the Quick Access Toolbar, click the Undo button.
 The formatting you applied from the Text Effects dialog box is reverted.
 Click the Format Text tab one time, and then in the Font group, click the Clear Formatting button.
 The text reverts to its original font and size, and the Format Text tab returns to its minimized state.
Tip:
Clicking a tab on
the minimized ribbon temporarily expands it so that you can perform a
single command. You can collapse the ribbon without performing a command
by clicking anywhere away from it or by pressing Esc. Either
double-clicking a tab or clicking the Expand The Ribbon button
permanently restores the ribbon to its maximized state.
On the minimized ribbon, click the File tab. The Backstage view opens and displays the Info page, which contains information about the current message, such as its location (the Drafts folder) and size. In the left pane, click Close. Outlook prompts you to save or discard the draft message.
In the Microsoft Outlook message box, click No. The message window closes.
|