In addition to overall themes, which govern several
types of formatting, PowerPoint also provides many built-in color, font,
and effect themes that you can apply separately from your choice of
overall theme. So, for example, you can apply a theme that contains a
background design you like, and then change the colors and fonts for it.
1. Understanding Color Placeholders
To understand how
PowerPoint changes colors via a theme, you must know something about how
it handles color placeholders in general. PowerPoint uses a set of
color placeholders for the bulk of its color formatting. Because each
item's color is defined by a placeholder, and not as a fixed color, you
can easily change the colors by switching to a different color theme.
This way if you decide, for example, that you want all the slide titles
to be blue rather than green, you make the change once and it is applied
to all slides automatically.
A group of colors assigned to preset placeholders is a color theme.
PowerPoint contains 20+ built-in color themes that are available
regardless of the overall theme applied to the presentation. Because
most design themes use placeholders to define their colors, you can
apply the desired design theme to the presentation and then fine-tune
the colors afterward by experimenting with the built-in color themes.
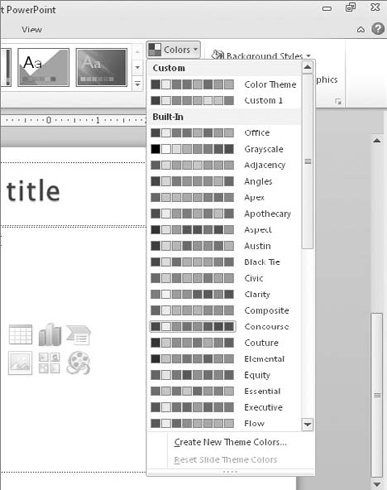
How many color placeholders
are there in a color theme? There are actually 12, but sometimes not
all of them are available to be applied to individual objects. When you
choose a color theme (Design =>
Colors), the gallery of themes from which you choose shows only the
first eight colors of each color theme. It doesn't matter so much here
because you can't apply individual colors from there anyway. When
selecting colors from a color picker (used for applying fill and border
color to specific objects), as in Figure 1,
there are 10 theme swatches. And when you define a new custom color
theme, there are 12 placeholders to set up. The final two are for
visited and unvisited hyperlinks; these colors aren't included in a
color picker.
2. Switching Color Themes
After applying the overall
theme you want, you might want to apply different colors. To switch to a
different color theme, follow these steps:
(Optional) To apply a different color theme to a slide master other than the default one, open Slide Master view (View  Slide Master) and click the desired slide master. Otherwise, the color
change will apply to all slides that use the default slide master. The
default slide master is the first one listed in Slide Master view.
Slide Master) and click the desired slide master. Otherwise, the color
change will apply to all slides that use the default slide master. The
default slide master is the first one listed in Slide Master view.
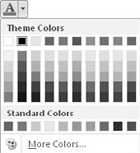
On the Design tab (or the Slide Master tab if in Slide Master view), click Colors. A gallery of color themes opens.
(Optional) Point to a color theme and observe the preview on the slide behind the list.
Click the desired color theme. See Figure 2.
3. Understanding Font Placeholders
By default in most themes and
templates, text box fonts are not set to a specific font, but to one of
two designations: Heading or Body. Then a font theme
defines what specific fonts to use. To change the fonts across the
entire presentation, all you have to do is apply a different font theme.
A font theme
is an XML-based specification that defines a pair of fonts: one for
headings and one for body text. Then that font is applied to the text
boxes in the presentation based on their statuses of Heading or Body.
For example, all of the slide titles are usually set to Heading, and all
of the content placeholders and manual text boxes are usually set to
Body.
In a blank presentation
(default blank template), when you click inside a slide title
placeholder box, you see Calibri (Headings) in the Font group on the
Home tab. Figure 3
shows that the current font is Calibri, but that it is being used only
because the font theme specifies it. You could change the font theme to
Verdana/Verdana, for example, and then the font designation for that box
would appear as Verdana (Headings).

In some font themes, the same
font is used for both headings and body. In a default blank presentation
both fonts are Calibri, for example, and the Verdana/Verdana set is an
additional example. In many other font themes, though, the heading and
body fonts are different.
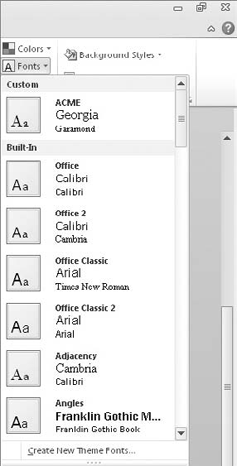
4. Switching Font Themes
After applying an overall
theme, you might decide you want to use different fonts in the
presentation. To switch to a different font theme, follow these steps:
(Optional) To apply a different font theme to a slide master other than the default one, open Slide Master view (View
Slide Master) and click the desired slide master. Otherwise, the font
change will apply to all slides that use the default slide master. The
default slide master is the first one listed in Slide Master view.
On the Design tab (or Slide Master tab, if in Slide Master view), click Fonts. A gallery of font themes opens.
(Optional) Point to a font theme and observe the change on the slide behind the list.
Click the desired font theme. See Figure 4.
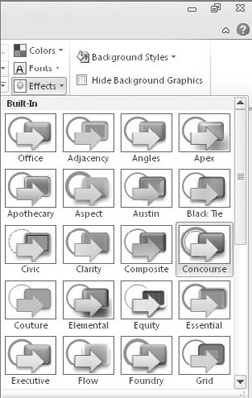
5. Changing the Effect Theme
Effect themes apply to
several types of drawings that PowerPoint can construct, including
SmartArt, charts, and drawn lines and shapes. They make the surfaces of
objects formatted with 3-D attributes look like different textures (more
or less shiny-looking, colors more or less deep, and so on).
To change the effect theme, follow these steps:
On the Design tab, click Effects. A gallery of effect themes opens.
(Optional)
Point to a theme and observe the change on the slide behind the list.
(This works only if you have an object on that slide that is affected by
the effect theme; see the sidebar "Setting Up a Graphic on Which to Test Effect Themes" to set up such an object.)
Click the desired effect theme. See Figure 5.
|
Effect themes are most evident when you
use colorful 3-D graphics, so do the following to construct a dummy
diagram that you can use to try out effect themes:
On the Insert tab, click SmartArt. Click Cycle, click the top left diagram, and click OK. On the SmartArt Tools Design tab, click Change Colors, and click the first sample under Colorful. On the SmartArt Tools Design tab, open the SmartArt Styles gallery and click the first sample under 3-D.
Now you have a diagram on which you can see the effect themes applied.
|