After you create a SmartArt graphic, you
can add, remove, change, or rearrange shapes to create a custom look.
For shapes within a SmartArt graphic, you can change the shape from the
Shape gallery or use familiar commands, such as Bring to Front, Send to
Back, Align, Group, and Rotate, to create your own custom SmartArt
graphic. If you no longer want a shape you’ve added, simply select it,
and then press Delete to remove it.
Add a Shape to a SmartArt Graphic
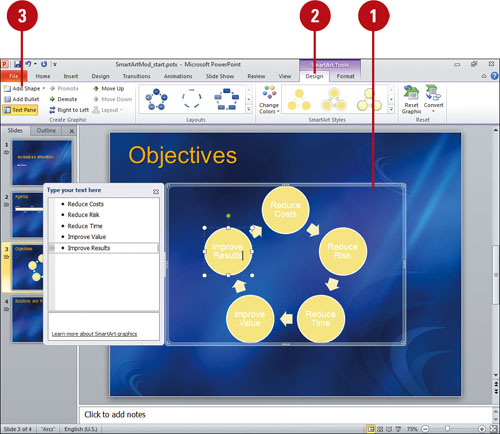
- 1. Select the shape in the SmartArt graphic you want to modify.
- 2. Click the Design tab under SmartArt Tools.
- 3. Click the Add Shape button to insert a shape at the end, or click the Add Shape button arrow, and then select the position where you want to insert a shape.

Change Shapes in a SmartArt Graphic
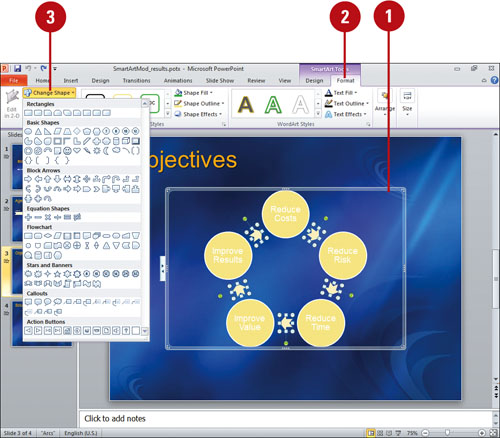
- 1. Select the shapes in the SmartArt graphic you want to modify.
- 2. Click the Format tab under SmartArt Tools.
- 3. Click the Change Shape button, and then click a shape.

Did You Know?
You can reset a SmartArt graphic back to its original state. Select the SmartArt graphic, click the Design tab under SmartArt Tools, and then click the Reset Graphic button.
|