The tools available on the Animations tab
should suit most of your animation needs. However, if you want to
customize your animations even more, you can do so on the Animation
pane. For example, you use this task pane to set animation effects for
text, charts, SmartArt graphics, and media clips.
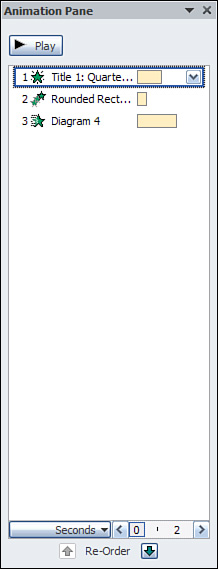
To open the pane (see Figure 1), click the Animation Pane button on the Animations tab.
|
Be aware that if you haven’t applied any animations yet, the pane will be empty and its features and buttons will be inactive.
|
Each animation you applied
displays in the Animation pane in the order in which you applied it. The
icon that precedes it tells you what kind of animation it is and
corresponds to the icons that display in the Animation group on the
Animations tab. The light yellow bar that follows it indicates the
duration of the animation. Pause the mouse over the animation in the
list to display more information, such as the start option and effect
type. If you have multiple animations in this list, the list is
numbered, and the numbers also display on your slide to show where the
animations are located. These numbers don’t display in print or during a
slide show, however.
Select an animated object in the list, and click the
down arrow to its right to open a menu of additional options, described
in more detail later in this section.
Click the Play button to see the animations in your
current view, or click the Slide Show button to see the animations in a
slide show.
Setting Additional Effects
To add additional effects to an animation listed in
the pane—such as directional, sound, text, and color enhancements—click
the down arrow to the right of an animation in the list and choose
Effect Options from the menu that appears. A dialog box opens with the
Effect tab selected (see Figure 2).
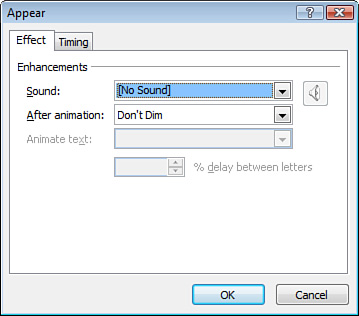
The
dialog box’s name and content depend on the kind of animation event
you’re customizing. For example, if you choose the Appear entrance
effect, the Appear dialog box opens. As an example, the Effect tab on
the Appear dialog box offers the following options:
Sound— If
you want a sound effect to accompany the effect, select a sound from the
drop-down list. If you don’t want to include a sound, choose No Sound,
which is the default option. For even more sounds, choose Other Sound to
open the Add Audio dialog box.
Volume— Raise or lower the sound effect’s volume level. You can also choose to mute the effect.
After Animation—
Specify how to end your animation, such as by displaying the object in a
new color or hiding it after animation. Options include
Standard Colors— Apply a color from the default palette, which changes the object’s color after the animation finishes.
More Colors—
Display the Colors dialog box from which you can choose any color. The
object changes to this color after the animation finishes.
Don’t Dim— Continue to display a static image of the object after animation.
Hide After Animation— Hide the object after animation.
Hide on Next Mouse Click— Hide the object when you click the mouse.
Animate Text— From the drop-down list, choose a method for introducing text: All at Once (the default), By Word, or By Letter.
% Delay Between—
If you choose the By Word or By Letter option, you can set how long
PowerPoint waits after starting to display one word or letter before
starting to display the next word or letter. Fifty percent means that
the previous word is 50% displayed when the next word begins to display.
Setting Timings
To set exact timing effects for your custom
animations, click the down arrow next to an animation in the Animation
pane, and choose Timing from the menu that appears. A dialog box opens
with the Timing tab selected, as shown in Figure 3.
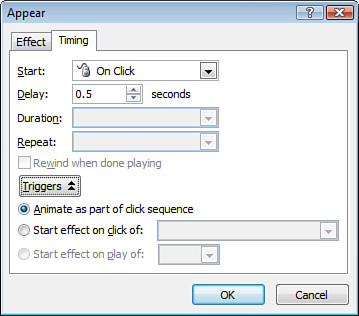
Remember that the name of this dialog box reflects
the type of animation effect whose timing you want to customize. On the
Timing tab, you can set the following options:
Start— Specify when to start the animation:
On Click— Start the animation when you click the mouse.
With Previous— Start the animation when the previous animation in the list starts.
After Previous— Start the animation after the previous animation in the list finishes.
Delay— Enter the delay in seconds.
Duration— Choose a duration—from very slow to very fast.
Repeat—
Indicate how many times you want the animation to repeat. Options
include none (which means that it plays once); two, three, four, five,
or ten times; until the next mouse click; or until the next slide.
Rewind When Done Playing— Click this check box if you want to return the animation to its original position when it finishes playing.
Triggers—
Click the Triggers button to display three more fields on this tab that
let you determine what triggers this animation to start:
Animate as Part of Click Sequence— Animate as part of the click sequence in the Custom Animation list.
Start Effect on Click Of— Choose a specific animation from the drop-down list on which to trigger this animation.
Start Effect on Play Of— Animate at the start of a media file.
Animating Charts
You can add more effects to a chart to which you’ve
applied an animation. To do so, click the down arrow next to the chart
in the Animation pane, and choose Effect Options from the menu. Figure 4
shows the dialog box that displays. Remember that the dialog box name
reflects the type of effect you’ve applied, such as Fly In or Fade.
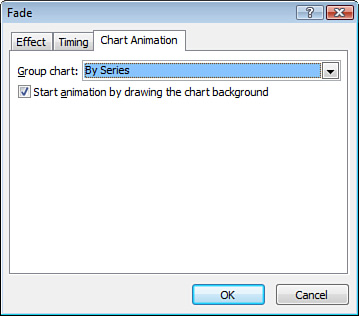
Click
the Chart Animation tab and, from the Group Chart drop-down list,
indicate how you want to introduce the chart elements. Options include
As One Object, By Series, By Category, By Element in Series, and By
Element in Category.
|
If you choose any option other than As One Object,
the Start Animation by Drawing the Chart Background check box activates,
letting you begin the animation with a chart background and then
filling it in.
|
Animating Text
If the object you animate includes text, such as a
text placeholder or text box, you can apply special text effects to your
animation. To do so, click the down arrow next to the object in the
Animation pane, choose Effect Options from the menu, and click the Text
Animation tab. Figure 5 shows this tab.
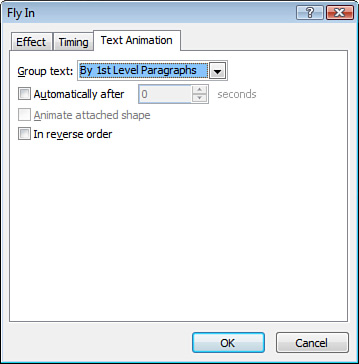
In the Group Text field, choose whether to animate as
one object, all paragraphs at once, or by the level of paragraph (from
1st to 5th). You can also choose to animate text automatically after a
certain number of seconds, animate an attached shape, or animate text in
reverse orders.
Depending
on the type of text you animate, all these options might not be
available. For example, let’s say that you want to animate a text box
that includes several lines of text or perhaps a bulleted list. By
choosing to animate by first-level paragraph, you can display each line
individually rather than allow your audience to see your entire list at
once.
Animating SmartArt Graphics
Animating SmartArt graphics is another animation
customization you can apply. To do so, click the down arrow next to the
graphic in the Animation pane, choose Effect Options from the menu, and
click the SmartArt Animation tab (see Figure 6).
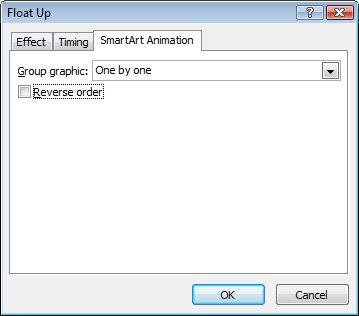
From the Group Graphic drop-down list, choose the way
you want to introduce the graphic onto the slide. The choices depend on
the kind of SmartArt graphic you animate.
Animating Audio and Video Files
You can also customize animations to media clips such
as an audio or video file. For example, to customize an audio clip
animation, click the down arrow next to the clip in the Animation pane,
and choose Effect Options from the menu. The Play Audio dialog box
opens, where you can customize audio effects, timing, and volume.
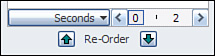
Viewing the Advanced Timeline
The
Animation pane also displays the Advanced Timeline, which lets you
further customize timings by dragging the timeline’s scrollbar. Figure 7 illustrates this timeline.
To close the timeline, click the down arrow
to the right of any object, and select Hide Advanced Timeline from the
menu that displays. To display the timeline again, select Show Advanced
Timeline from this same menu. (The wording of the menu option changes
based on whether the timeline is visible.)