One of the easiest and most obvious ways to
share a Word document is by attaching it to an email message. When you
send the message, the document goes with it. Anyone who receives the
message can open the document in Word.
Attaching a Document to an Email Message
When
you attach a document to an email message, you can send the file in
Word, PDF, or XPS format. All recipients gets their own separate copy of
the document.
Attaching a Document in Word Format
This method is the simplest way to share a Word
document. Word uses Microsoft Outlook—or your default email program,
whatever it may be—to create a new email message with the document
already attached in Word format (.docx). You just need to send it.
Here’s how:
1. | Make sure your document is ready to be shared; then save it. Keep the document open in Word.
|
2. | On the File tab, click Save & Send. The Save & Send page opens, as shown in Figure 1. The page displays options for emailing and faxing a document.

|
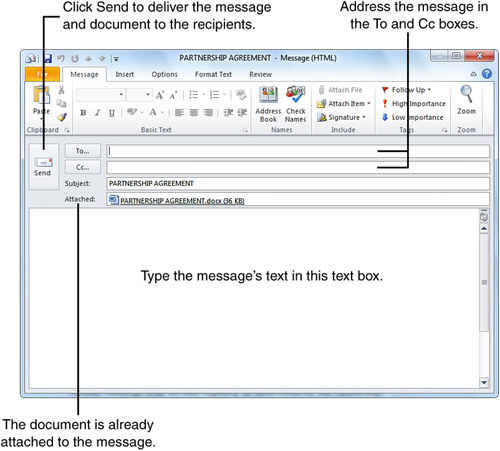
3. | Click Send as Attachment. A new Outlook message window appears, as shown in Figure 2.
|
4. | Click
the To box and address the message to the recipients. If you want to
“copy” the message and document to anyone else, click the Cc box and add
their addresses there.
|
5. | Click the composition pane (the large text box at the bottom of the message window) and type the message’s text.
|
6. | Click Send.
|
Sharing a document in Word format can cause problems
because others can easily open and change the document. You can protect
the document to prevent others from changing it , or you can simply send it in a different
file format that can’t easily be modified. Two such formats are Adobe’s
Portable Document Format (.PDF) and Microsoft XML Paper Specification
(.XPS). Special viewers are required to view documents saved in either
of these formats; PDF files can be viewed in Adobe Acrobat Reader, and
XPS files can be viewed in the XPS viewer built into Microsoft Windows
Vista and Microsoft Windows 7. Both PDF and XPS file formats maintain
all the document’s formatting characteristics. To attach a file in
either of these formats, repeat the preceding steps, but click either
the Send as PDF or Send as XPS button on the Save & Send page. Word
opens a new message window but attaches the document in the selected
format.
|
You
can also share a document by sending it as a fax, directly from the
Send & Share page. Just follow the preceding instructions for
attaching a document in Word format, but click the Send as Internet Fax
button. To send a fax, you must have an account with an Internet fax
service provider. If you don’t already have an account, click the button
to open a web page that enables you to set one up.
|
Emailing a Link to a Document
If the document is saved in a shared location, such
as a server on your company’s network, you can send a message containing
a link to the document rather than the document itself. This option
enables you to share a document without distributing copies of it. If
the message’s recipients want to review or mark up the document ,
they can all work in the same file and save their changes together,
making it easier for you to merge their revisions into the document.
Sending a Link to a Document
Before you can distribute a link to a document, the
file must be stored in a location that others can access, such as a
shared folder on a networked computer. (If you can’t save the file this
way, Word won’t even let you create a link to the file.) Recipients can
open the file by clicking the link in the message. So, assuming you can
share a document this way, here’s what to do:
1. | Make sure your document is ready to be shared, and save it to a shared location that the message’s recipients can access.
|
2. | On the File tab, click Save & Send.
|
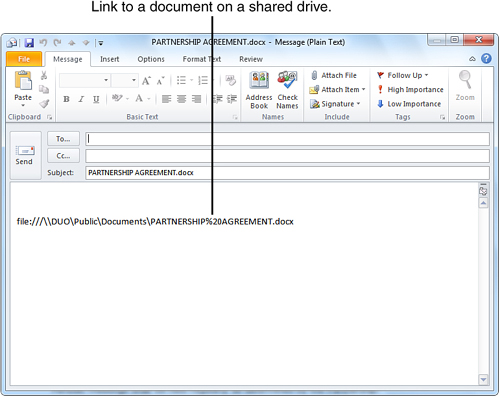
3. | Click Send a Link. An Outlook message window appears, as shown in Figure 3.
|
4. | In the To: and Cc: boxes, address the message to the recipients.
|
5. | In the composition pane, type the text for the message. Be sure not to change the link.
|
6. | Click Send.
|
By default, Word enables only one user to
edit the document at a time. If someone is working on the shared file
and someone else tries to open it by clicking the link, the second user
may see a dialog box warning that the file is locked. If this happens,
the second user can open the document in read-only mode (changes can’t
be made), save a copy of the file on a local disk (changes can be made
but must be merged into the shared file when it becomes available), or
ask to be notified when the shared file becomes available for editing.