4. Aligning and Distributing Shapes Using Position Functions
Just
to the right of the Auto Align & Space button is the Position
drop-down button, which contains elemental functions for aligning,
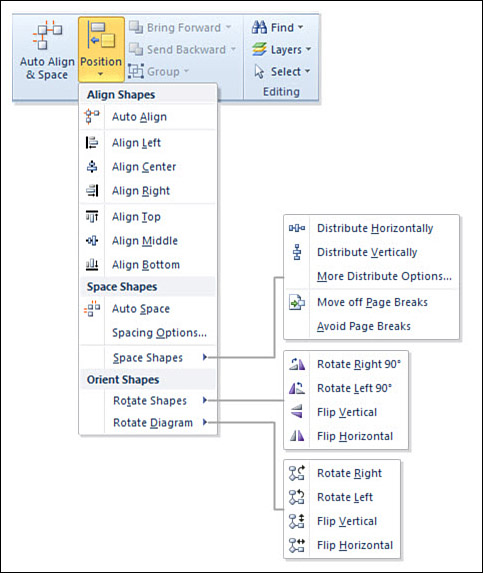
distributing, rotating, and flipping shapes. Figure 8 shows all of Position’s items and subitems.

Though Dynamic Grid, Auto Align & Space, and
AutoConnect decrease the need for many of these functions, some
diagrams are too complex for the Dynamic Grid. Also, some non-connected
diagram types, such as office plans, aren’t suited for Dynamic Grid,
AutoConnect, or Auto Align & Space. In these cases, the functions
under Position are especially useful.
Aligning Shapes
You can align shapes by their left, right, top, or bottom edges as well as their horizontal and vertical centers.
Practice Aligning Shapes
1. | Start a blank drawing and draw several differently sized rectangles on the page.
|
2. | When
you align the shapes, they can get bunched together so that some
obscure others. If you give them a transparent fill, you can still see
all the shapes, even if they become stacked.
Select all the rectangles, click the Fill drop-down, and choose Fill
Options at the end of the list. The Fill dialog appears, and lets you
select a color and set a transparency level among other things. Try
setting a 50% transparency for your rectangles.
|
3. | Shapes
are aligned to the primary selection, or first shape in the selection.
When you select multiple shapes, the primary selection is the shape
with the thicker magenta outline. You can explicitly control which
shape is the primary selection by doing this:
- a. Click the shape that you want to be the primary shape—the one that the other shapes will align to.
- b. Hold down the Shift key.
- c. Drag a selection rectangle around the rest of the shapes, or click each one individually while continuing to hold the Shift key.
|
4. | Drop-down
the Position button in the Arrange group on the Home tab. Slowly mouse
over the first seven menu items that deal with alignment (they are the
ones below the Align Shapes header in bold). Live Preview shows how
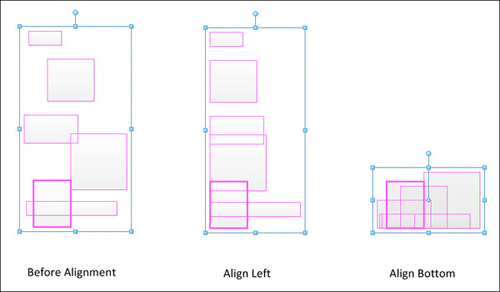
each alignment option will affect your shapes. Figure 9 demonstrates how two of these alignment operations work.

|