3. Installing SQL Server (Part Two)
After you’ve reviewed all the relevant information in the
previous sections and are at last ready to perform an initial
installation of SQL Server, follow these steps:
On the Installation page of the SQL Server Installation
Center, click the link for New Installation or Add Features To An
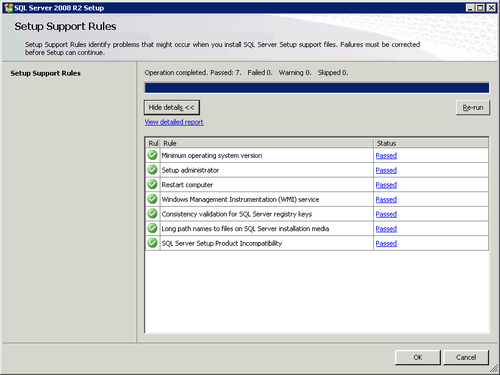
Existing Installation. SQL Server 2008 Setup launches. The Setup Support Rules are run. Click See Details to see
the list of rules, as shown in Figure 6. Click OK if
all rules show as Passed. Review any warnings to determine their
relevance to your network. Correct the relevant warnings and all
Failed rules before proceeding.
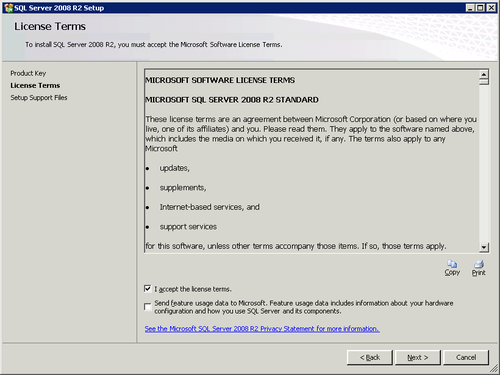
On the Product Key page, type the product key for SQL Server
2008 Standard Edition for Small Business. Click Next. Read the license terms (shown in Figure 7), select the box
to accept the license terms, and then click Next.
Click Install on the Setup Support Files, and the support
files are installed. Another set of Setup Support Rules run. Click See Details to
see the list of rules. Click OK if all rules show as Passed.
Review any warnings to determine their relevance to your network.
Correct the relevant warnings and all Failed rules before
proceeding. On the Setup Role page, there are two options: SQL Server Feature
Installation Choose this option and you can choose on
the next page the features you want installed. All Features With
Defaults This option will install all features of SQL
Server 2008 R2 with default settings.
On the Feature Selection page, select the features to
install. A description for each component group appears in the
Description pane when you select it. See Table 1 for additional
descriptions of the available features. Verify the location for
shared features. Click Next. Table 1. SQL Server available features| FEATURE | DESCRIPTION |
|---|
| Database Engine Services | The core service for storing and processing
data. | | SQL Server Replication | Replicates between and synchronizes two
databases. It’s unnecessary for a single
database. | | Full-Text Search | Allows full-text queries against plain,
character-based data in SQL Server tables. | | Analysis Services | Tools to create and administer online
analytical processing (OLAP) and data-mining
applications. | | Reporting Services | Server and client tools to produce and manage
reports. | | Business Intelligence Development
Studio | A development environment for Analysis
Services, Reporting Services, and Integration Services
solutions. | | Client Tools Connectivity | Tools for client/server
communication. | | Integration Services | Graphical tools and programmable objects for
moving, copying, and converting data. | | Client Tools Backwards
Compatibility | Tools for clients to access earlier versions
of SQL Server. | | Client Tools SDK | The software development tools for
programming clients. | | Management Tools – Basic | Includes SQL Server Management
Studio. | | Management Tools – Complete | Adds SQL Server Management Studio support for
Reporting Services, Analysis Services, and Integration
Services. | | SQL Client Connectivity SDK | Software development kit for client
connectivity. | | Microsoft Sync Framework | Platform to enable collaboration and offline
synchronization for applications, services, and
devices. |
Still another set of Installation Rules run. Select Show
Details to view the items that passed and failed. Click
Next. On the Instance Configuration page, specify whether to
create a default instance or a named instance. If you plan to
install a single instance of SQL Server on a database server, it
should be a default instance. Verify the root directory for the
instance, and click Next. On the Disk Space Requirements page, review the available
space and the amount of space required for the installation. Click
Next.
Note:
If the available space isn’t sufficient, you can change
the SQL Server features you want to install, change the
installation directory to a drive with more space, or create
more free space on the drive by moving other files.
On the Server Configuration page, assign login accounts to
the various SQL Services. Click Help for the recommended
procedures. Click Next. |
SQL Server 2008 R2 requires several service accounts to
run its various services. Choosing which account to use for a
service account is always a tradeoff between simplicity and
security. The simplest solution is to select the Local System
account. You never need to worry about the password changing,
and this account always has sufficient privileges.
Unfortunately, running your SQL Server services under that
account is not the best solution from a security standpoint. The
Local System account is a powerful account, especially when it’s
running on your SBS server: if your security in SQL Server is
breached, the entire network is compromised.
Using a regular user domain account is a possibility for
the SQL Server service—it does not require any administrative
privileges. But the SQL Server Agent process does require
administrative privileges if your SQL Server environment uses
CmdExec or ActiveScript jobs, or if you use the AutoRestart
feature. If this is the case in your SQL Server environment, you
should use separate service accounts for the SQL Server service and
the SQL Server Agent.
Whatever domain accounts you use for SQL Server, you should use strong (long and
complex) passwords. Also, when entering the domain name for a
domain user account, you must use the NetBIOS name, not the DNS
name. (In our environment, this means that the domain must be
entered as “EXAMPLE” or “example”, but not
“example.local”.)
|
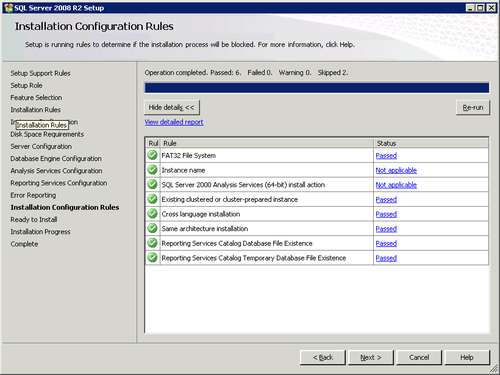
The rest of the installation will configure the features
selected in step 8. After you configure all these features and the
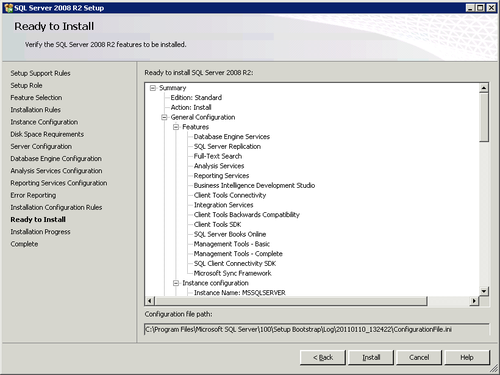
Installation Configuration Rules are run (as seen in Figure 8), the Ready To
Install page (shown in Figure 9) displays.
Confirm that the installation tree is correct, and click
Install.
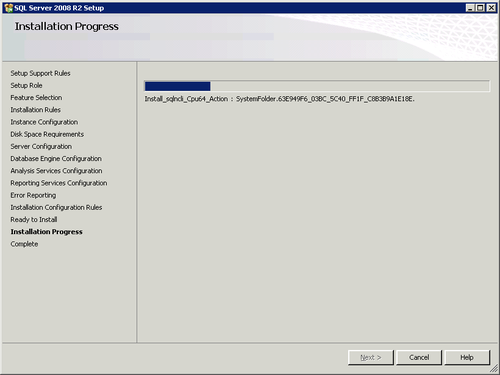
The Installation Progress page follows the installation
performance. (See Figure 10.)
At the completion of installation, the Installation Progress
page displays the features and their status (Success or Failure).
Click Next. On the Complete page (shown in Figure 11), review the
information about your setup and notes that apply to your
installation.
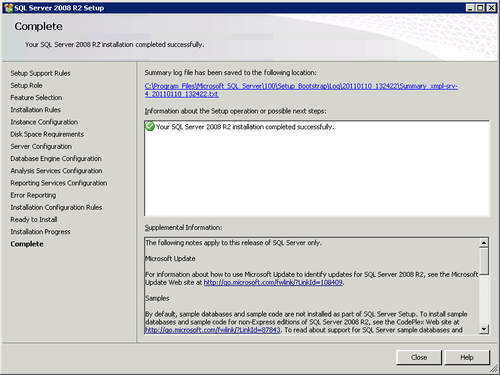
Click the link at the top of the page to review an
exceedingly detailed log file for the installation. This
information can be very useful for any feature that failed
installation. Click Close to finish.
When the installation is complete, select All Programs on the
Start menu and then expand the Microsoft SQL Server entry. You can
import an existing database and access the configuration tools you’ve
installed.
|