Scenario/Problem: When editing a page, you want to change the settings for existing web parts on that page.
Solution:
The following sections explain how to get a web part into editing mode.
These sections discuss some of the common settings you can modify for a
web part in each mode, such as modifying the web part’s title, its
display settings, and the web part’s position on the page.
To modify a web part of any kind, switch the page to editing mode . Then select the web part whose properties you
want to edit by hovering your mouse over the web part and selecting the
check box that appears at the top-right corner of the web part (on the
title row). Doing so should reveal the Web Part ribbon, as shown in Figure 1.
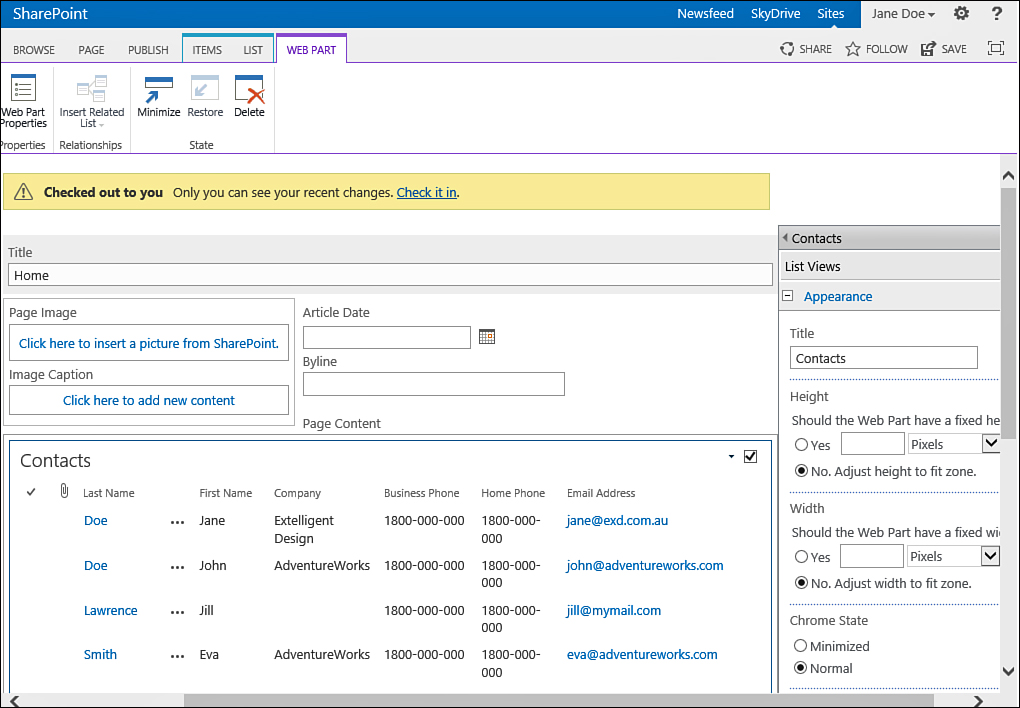
FIGURE 1 The Web Part ribbon and a web part’s properties pane with the Appearance section expanded.
This tab has the Web Part Properties button
at the top left. Clicking this button opens the tool pane for the web
part. Different web parts have different tool panes with different
settings, but all of them have some basic settings that you can modify.
Modify a Web Part’s Title
To modify a web part’s title, expand the Appearance section in the web part’s tool pane (refer to Figure 1).
The first option in the Appearance section is the title of the web
part. Simply type in the title you want and click OK to save it.
Modify a Web Part’s Title Bar and Border Settings
To modify whether a web part displays the
title bar and whether it displays a border line around its contents,
expand the Appearance section in the web part’s tool pane and scroll
down to the Chrome Type selection (refer to Figure 1).
Chrome Type can be set to one of these options:
- None—The
web part does not display a title bar or border. This is typical for
Image Viewer web parts, where you want the picture to appear without a
title bar above it and without a border around it, as if it is part of
the page and not in a web part (see Figure 2).

FIGURE 2. The Image web part with the None chrome type.
- Title and Border—The web part displays the title bar and a border around the content (see Figure 3).
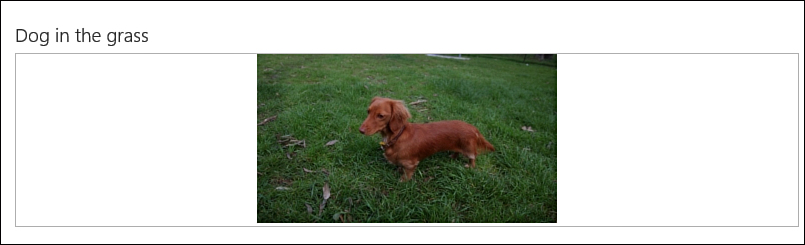
FIGURE 3 The Image web part with the Title and Border chrome type.
- Title Only—The web part displays the title bar without a border around the content (see Figure 4).
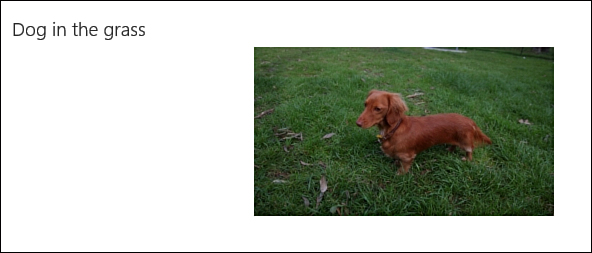
FIGURE 4. The Image web part with the Title Only chrome type.
- Border Only—The web part does not display the title bar but does display a border around the content (see Figure 5).

FIGURE 5 The Image web part with the Border Only chrome type.
Modify or Remove the Link for the Web Part’s Title
In some web parts, you want the title to be a
link that the users can click. To set that link or remove it (some web
parts have a link by default), expand the Advanced section in the web
part’s tool pane and scroll down to the Title URL box. In this box,
type the link that you want for the web part’s title or clear the box
to remove the link.
Move a Web Part in a Page
To move an existing web part in a page, switch the page to editing mode , and then just drag and drop the title of the
web part to the location where you want it to appear. To do so, just
hover the mouse cursor over the web part’s title; then hold down the
left mouse button and, without releasing it, move the mouse cursor to
the place where you want the title—either in the same web part zone or
in another, or to a different location in the text (if you are editing
the contents of a publishing page or a wiki page).
The location of your mouse cursor is
displayed by the title of the web part you are moving. When you are
hovering the mouse cursor over a web part zone, the place in that zone
where the web part will be added is signified by a bold line above,
below, or between the existing web parts already in that zone (see Figure 6). When you have the mouse cursor where you want the web part to be, you release the mouse button.
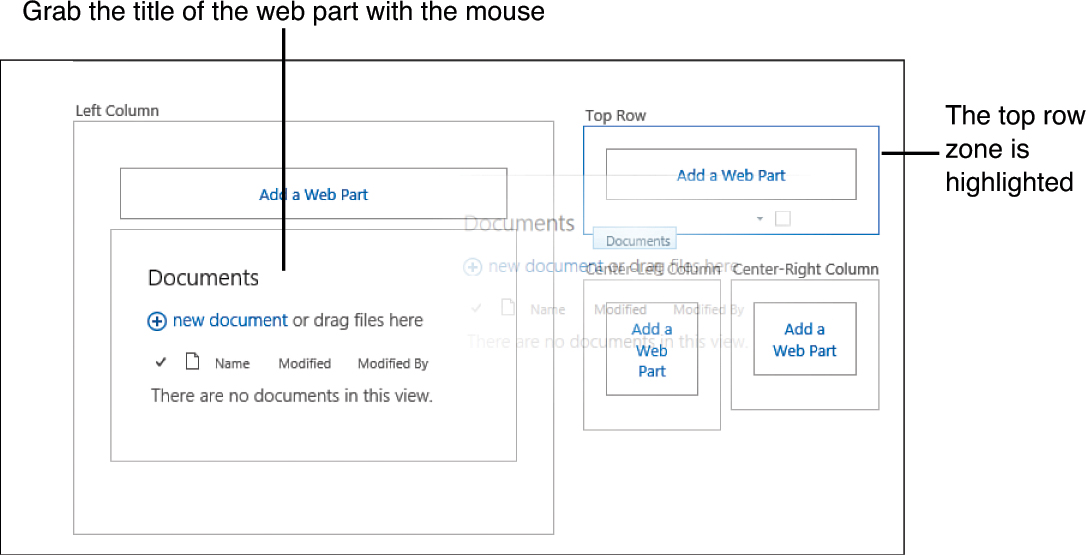
FIGURE 6 Dragging and dropping the Documents web part to the Top Row zone.
Tip
You cannot drag and drop a web part in a text
area in a wiki page except to another location within the text in that
area. To move a web part to another text area in the same page, you
will need to export and import the web part.