1. Installing WSUS
To download WSUS, first head for technet.microsoft.com/en-us/wsus/default.aspx.
Click the Download link, click the Download button
for the 64-bit version of WSUS 3.0 SP2, click Run to download the setup
file, and then click Run again to launch the WSUS Setup Wizard.
Note
If you want to download WSUS directly using your
Windows Home Server machine, you’ll need to turn off Internet Explorer
Enhanced Security Configuration (ESC) for your Administrator account.
Click the Server Manager icon in the taskbar and then click Configure
IE ESC in the Security Information section. In the dialog box that
appears, select Off in the Administrators section, and then click OK.
Next, follow these steps:
1. | In the wizard’s initial dialog box, click Next. The wizard asks what type of installation you want.
| 2. | Select the Full Server Installation option, and then click Next. The wizard displays the license agreement.
| 3. | Select the I Accept the Terms of the License Agreement option, and then click Next.
| 4. | If
the wizard tells you that you don’t have required components installed
(such as Microsoft Report Viewer 2008 Redistributable), make a note of
what you’ll need to install later, and then click Next. The wizard asks
if you want to store the updates locally.
| 5. | If
you don’t have much free space left on drive C:, deactivate the Store
Updates Locally check box, which tells WSUS to store updates on the
Microsoft Update website; otherwise, leave the Store Updates Locally
check box activated, and change the path to C:\WSUS. Click Next. The
wizard prompts you to choose a database option.
| 6. | Leave
the Install Windows Internal Database on this Computer option selected,
and then click Next. The wizard prompts you to choose a website for
WSUS.
| 7. | Select the Create a Windows Server Update Services 3.0 SP2 Web Site option, which creates a new IIS website at http://SERVER:8530 (where SERVER is the name of your Windows Home Server machine). Click Next. The wizard tells you that it’s ready to install WSUS.
| 8. | Click Next to start the installation.
| 9. | When
the installation is complete, click Finish. The Windows Server Update
Services Configuration Wizard appears. See the next section for the
details on this wizard.
| 10. | If the wizard warned you about required software that you need to install, go to Microsoft.com to locate and install the necessary programs.
|
2. Configuring WSUS
After
WSUS is installed, the Windows Server Update Services Configuration
Wizard appears. (If you don’t have this wizard onscreen, select Start,
Administrative Tools, Windows Server Update Services, open the Update
Services, SERVER branch [where SERVER
is the name of your Windows Home Server computer], click Options, and
then click WSUS Server Configuration Wizard.) Follow these steps to use
this wizard to configure WSUS for your Windows Home Server network:
1. | In the wizard’s initial dialog box, click Next. The wizard asks if you want to join the Microsoft Update Improvement Program.
| 2. | Activate
or deactivate the Yes, I Would Like to Join the Microsoft Update
Improvement Program, as desired, and then click Next. The wizard
prompts you to choose the server from which your WSUS server will
synchronize the updates.
| 3. | Select
the Synchronize from Microsoft Update option, and then click Next. The
wizard asks if your WSUS server requires a proxy server.
| 4. | Your home network doesn’t use a proxy server, so click Next to move on. The wizard prompts you to connect to the update server.
| 5. | Click
Start Connecting. The wizard connects to Windows Update and then
downloads information about the available updates, which might take a
few minutes.
| 6. | Click Next. The wizard prompts you to select the languages you want to download.
| 7. | Activate
the check box beside each language you need, and then click Next. The
wizard asks you to select the products for which you want updates
downloaded.
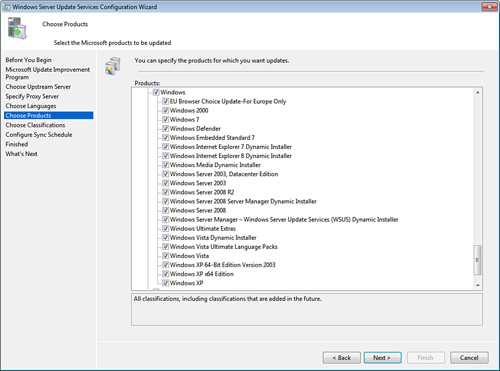
| 8. | Activate the check box beside each product you want updated (see Figure 1), and then click Next. The wizard prompts you to select the update classifications you want to include in the synchronization.
| 9. | Activate the check box beside each type of classification you want to sync:
- Critical Updates— These are fixes that address critical, nonsecurity-related problems.
- Definition Updates—
These are updates to the definition databases of software programs,
particularly security-related software. Definition databases include
virus lists for antivirus software; spyware and other malicious code
for antispyware programs; and junk email filters for email programs.
- Drivers— These are updated device drivers for existing hardware, and new device drivers for recently released hardware.
- Feature Packs—
These are updates that include new product features, particularly
features that are intended to be included in the product’s next release.
- Security Updates— These are fixes that address product-specific security issues.
- Service Packs—
These are broad updates that include a cumulative set of all hotfixes,
security updates, critical updates, new features, and other updates
that have been created since the product was released.
- Tools— These are utilities designed to accomplish some task.
- Update Rollups—
These are broad, product-specific updates that include a cumulative set
of hotfixes, security updates, critical updates, and other updates that
have been created since the product was released.
- Updates— These are fixes that address noncritical, nonsecurity-related problems.
Note
If you elected to store updates locally and disk
space is tight, you don’t need to sync every update type. At a minimum,
however, you should sync Critical Updates, Definition Updates, and
Security Updates.
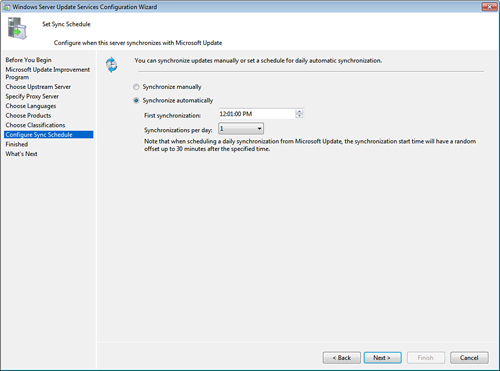
| 10. | Click Next. The wizard asks whether you want to synchronize manually or on a schedule.
| 11. | If
you prefer to run the sync yourself, leave the Synchronize Manually
option selected; otherwise, select Synchronize Automatically, and then
use the First Synchronization spin boxes to set the sync time you want
to use, as shown in Figure 2.
Note, too, that you can leave the Synchronizations Per Day value set to
1, which is often enough. When you’re ready to move on, click Next.
| 12. | In
the Finished dialog box, leave the Launch the Windows Server Update
Services Administration Console and the Begin Initial Synchronization
check boxes activated, and then click Finish.
|
Note
The initial synchronization may take quite
some time, depending on your connection speed and the number of
products and update types you included in the sync.
|