While most things that you’ll need to do for email configuration
are easily handled from the Windows SBS Console, there are a few
things that require running the Exchange Management Console, shown in
Figure 1, or using Windows
PowerShell scripts. Anything that can be done in the Exchange
Management Console can also be done using Windows PowerShell in the
Exchange Management Shell.
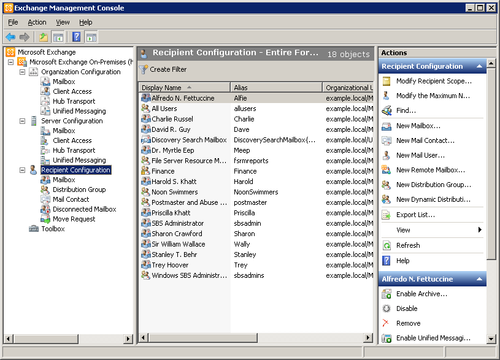
1. Using Contacts
In Microsoft Exchange terms, a contact is
someone who doesn’t need an Active Directory user account and
doesn’t have mail stored in Exchange. But a contact does need to be
both a contact in Active Directory and mail-enabled in Microsoft
Exchange. If you’ve created someone as a contact in Active
Directory, he or she still needs to be mail-enabled in Exchange. If
you’re creating the contact directly in Exchange, you will also be
adding him or her to Active Directory at the same time, so it’s
usually more efficient to add contacts directly from within the
Exchange Management Console, or using the New-MailContact PowerShell cmdlet.
1.1. Mail-Enabling Existing Contacts
You can mail-enable existing Active Directory contacts. To mail-enable an
existing contact, follow these steps:
Open the Exchange Management Console if it isn’t
open.
Navigate to Recipient Configuration and then click Mail
Contact in the left pane of the console.
Click New Mail Contact in the Actions pane to open the
New Mail Contact Wizard shown in Figure 1.
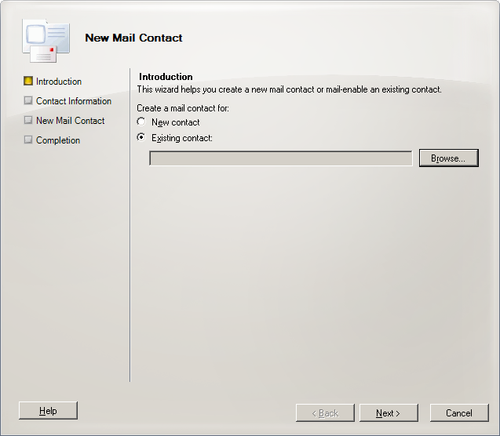
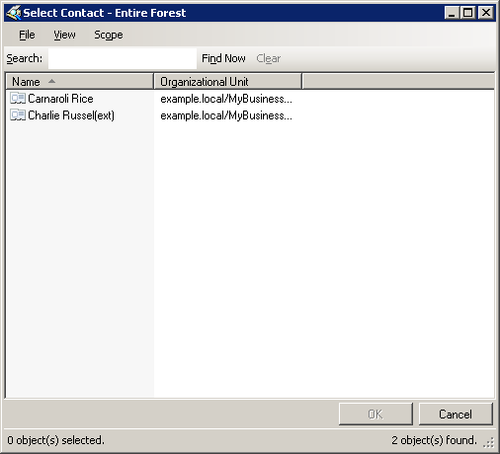
Select Existing Contact and click Browse to open the
Select Contact dialog box shown in Figure 3. You’ll
see a list of all Active Directory contacts that are not
currently mail-enabled.
Select the contact you want to mail-enable and click OK
to return to the Introduction page of the New Mail Contact
Wizard.
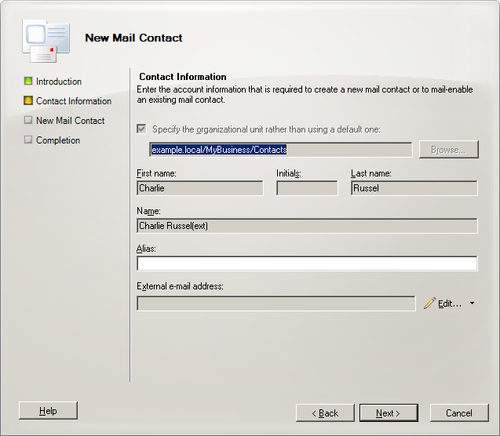
Click Next to open the Contact Information page of the
New Mail Contact Wizard, as shown in Figure 4. Most of
the fields will already be filled in because this is an
existing contact.
Click Edit to open the SMTP Address dialog box shown in
Figure 5.
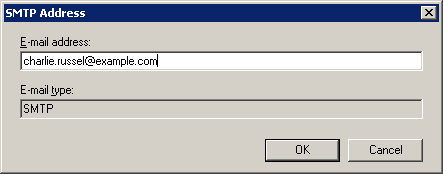
Type in the email address for the contact and click OK
to return to the Contact Information page of the New Mail
Contact Wizard.
Enter an alias for the contact, as shown in Figure 6.
Note:
It’s a good idea to use a standard way to identify
contacts so that they don’t get confused with internal
users.
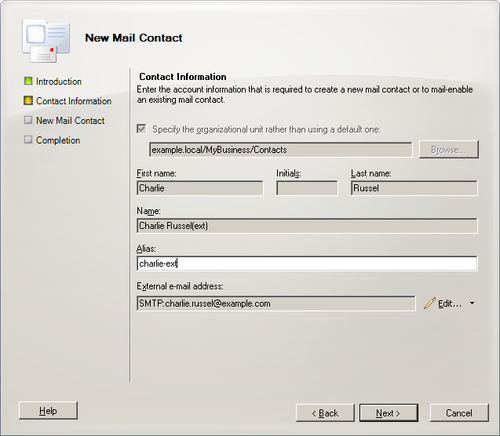
Click Next to open the New Mail Contact page shown in
Figure 7.
This summarizes the actions that are about to be taken and is
your last chance to cancel or to correct the
information.
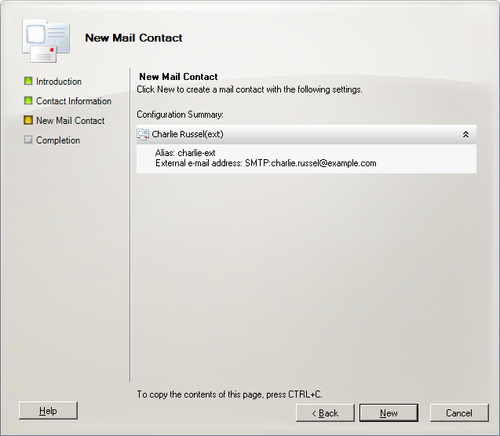
Click New to create the contact and open the Completion
page shown in Figure 8.
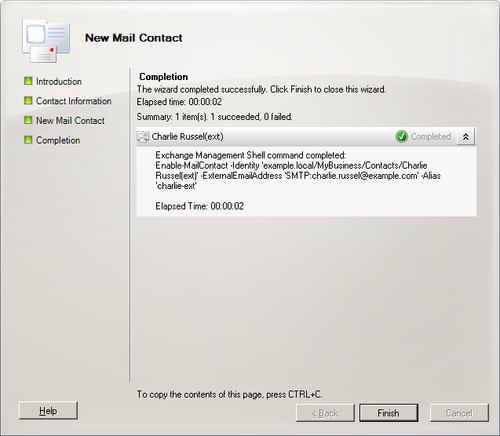
Click Finish to close the New Mail Contact Wizard and
return to the Exchange Management Console.
Note:
Press Ctrl+C on the Completion page of the New Mail
Contact Wizard (or any other wizard in Microsoft Exchange 2010)
to copy the contents of the page to the clipboard. This will
include the Windows PowerShell script that was executed to
complete the task.