1. Letting Windows Troubleshoot the Network
Whenever you have a problem
with a network, whether wired or wireless, you should always check your
network hardware first. Even experts have been known to spend much time
trying to troubleshoot a network problem from mouse and keyboard, when
the problem turned out to be a loose cable.
If on a wired network, make
sure the computer is firmly connected to the hub using an appropriate
cable. For example, if you're using gigabit Ethernet, use Cat 6 straight
through cables (not crossover cables) to connect all computers to the
hub. Make sure each cable is firmly plugged in. If the hub and cards
have indicator lights, they should be green when the computer is
properly connected. The amber light only flashes when there's data
crossing the cable.
|
How can you tell a straight
cable from a crossover cable? Hold the two ends of the cable
side-by-side, with the retaining clip facing away from you. The colors
will be in the same order left-to-right on both connectors on a straight
cable.
|
|
For a wireless network, make
sure the wireless access point is turned on and its connection to the
wired segment (such as the switch, or DSL or cable modem) is connected.
Always
refer to the installation and troubleshooting documentation that came
with your networking hardware. Remember, not all products are exactly
alike. You have to understand and properly install whatever network
hardware you've purchased. Windows 7 can only use that hardware for
networking if that hardware is properly installed and working correctly.
If you're confident that
the hardware is working properly, then you can use several techniques to
help with troubleshooting. For example, Windows can perform some
automated troubleshooting. Here's how to start the process:
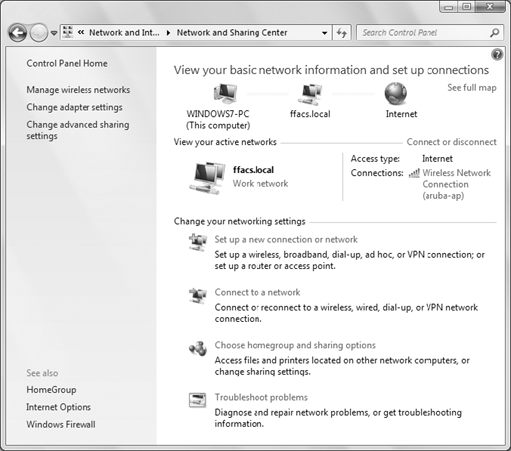
Click Start =>
Control Panel. If the Control Panel is in Category view, select View
Network Status and Tasks under Network and Internet. If the Control
Panel is in Classic view, click Network and Sharing Center.
Click Troubleshoot Problems at the bottom of the window (Figure 1).
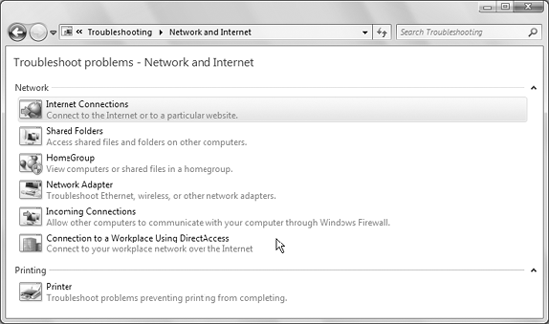
After
selecting Troubleshoot Problems, Windows searches for troubleshooting
packs, which enable it to troubleshoot specific types of problems. Figure 2 shows the list of troubleshooters.
Locate
and click the troubleshooter that you believe is related to the problem
your computer is experiencing. Windows 7 opens a troubleshooting
wizard. Click Next to allow the wizard to attempt to resolve the
problem.
Hopefully, the diagnostics
will solve the problem for you. If not, you can take some general steps
to troubleshoot the problem yourself.
3. Troubleshooting Network Printer Connections
If you're unable to locate a
printer on your network, you should first make sure that the printer is
shared correctly off of the remote system. First verify that you can
print when you are sitting at the computer connected directly to the
printer. When you're able to print from the computer connected to the
printer, you need to verify that print sharing is enabled. To do this,
follow these steps:
Click Start =>
Control Panel. If the Control Panel is in Category view, click View
Network Status and Tasks under Network and Internet. If the Control
Panel is in Classic view, choose Network and Sharing Center.
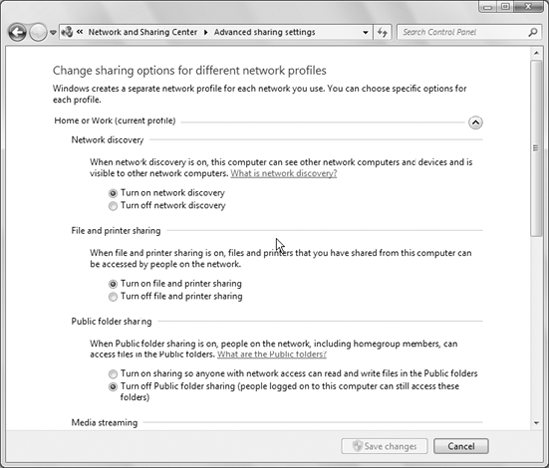
When
the Network and Sharing Center window opens, click Change Advanced
Sharing Settings in the left pane to show Advanced Sharing Settings, as
shown in Figure 3.
Choose the option Turn on File and Printer Sharing, and click Save Changes.
Open Devices and Printers from the Start menu and double-click the printer you want to share.
In the printer's dialog box that opens, double-click Customize Your Printer to open the properties for the printer.
Click the Sharing tab and verify that the Share This Printer check box is checked, and click OK.
After you have verified
that the printer has been shared correctly, move to the computer from
which you are trying to connect. Open Network and Internet from the
Control Panel, and click View Network Computers and Devices.
Double-click the remote computer and then the printer to which you are
trying to connect. You can double-click the printer to install it on
your system.