8. Installing and configuring Remote Desktop Virtualization Host, Connection Broker, and Session Host for VDI
In this exercise, we will go through the process of
deploying a simple VDI, using Windows Server 2008 R2. We will be
supporting dedicated virtual machines for our end users. Microsoft
refers dedicated VMs as personal virtual desktops. Before you begin
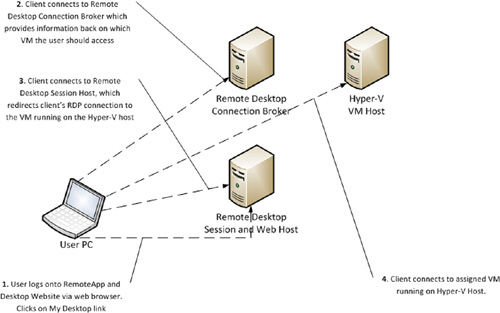
setting up VDI services, review Figure 29, which explains servers required as part of the deployment and how users connect to virtual desktops using the solution.

In this exercise, we will be performing the following:
Set up Remote Desktop Virtualization Host Services
Install Remote Desktop Connection Broker
Install Remote Desktop Session Host and Web Access
Configure the Remote Desktop Connection Broker, Desktop Session Host, and Web Access
Test Connectivity to A Dedicated Windows 7 Virtual Machine
8.1 Set up Remote Desktop Virtualization Host Services
The first step we need to perform is to set up the
proper role services on the server that will host the VMs. We will be
adding the Remote Desktop Virtualization Host role service. By
installing this role service, Hyper-V will be installed as a required
component. Prior to installing Remote Desktop Virtualization Host, you
will need to ensure that your server hardware supports Hyper-V.
1. | Open Server Manager and select the Roles node. Then click the Add Roles link. This will launch the Add Roles wizard. Click Next to continue.
|
2. | Select the Remote Desktop Services role. Then click Next.
|
3. | On the Remote Desktop Services Introduction page, click Next to continue.
|
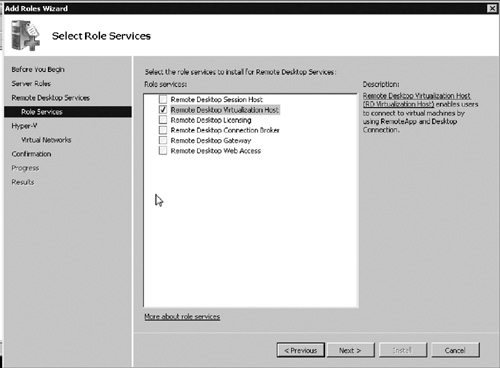
4. | Select the Remote Desktop Virtualization Host option as seen in Figure 30. You will be prompted to add the Hyper-V role services. Click Add Required Role Services. Then click Next.

|
5. | Click Next at the Hyper-V introduction page.
|
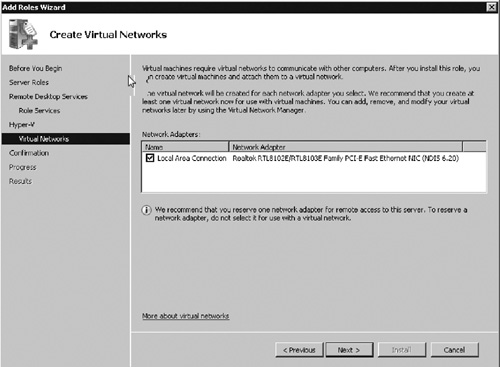
6. | Select the network adapter to use for the virtual network (see Figure 31). Then click Next.

|
7. | On the verify settings page, click Install. Then click Close.
|
8. | At the restart prompt, click Yes to restart the computer.
|
9. | After
the computer restarts, the Resume Configuration Wizard will complete
the installation of Desktop Virtualization Host with Hyper-V. After the
wizard completes the installation, click Close.
|
10. | Next
you will need to create a new virtual machine for each desktop you want
to provide to users. If using dedicated desktops, each user will need
his or her own VM. If using pools, you will need enough VMs to support the maximum number of concurrent usersFor
Virtualization Host Services to work properly, the VM needs to be
labeled in the Hyper-V interface using a fully qualified domain name,
for example, win7vm.syngress.com.
|