Tables, queries, forms,
reports, macros, and modules combine to comprise an Access database.
Each of these objects has a special function. The following sections
take you on a tour of the objects that make up an Access database.
Tables: A Repository for Data
Tables are the starting
point for an application. Whether data is stored in an Access database
or you are referencing external data by using linked tables, all the
other objects in a database either directly or indirectly reference
tables.
To
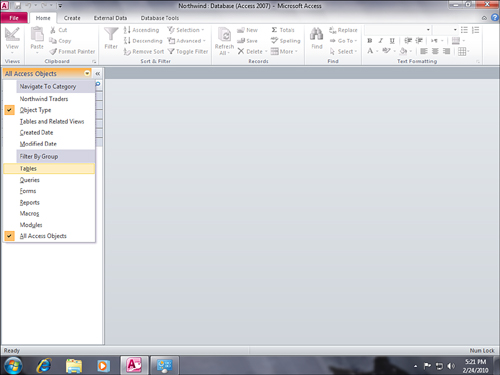
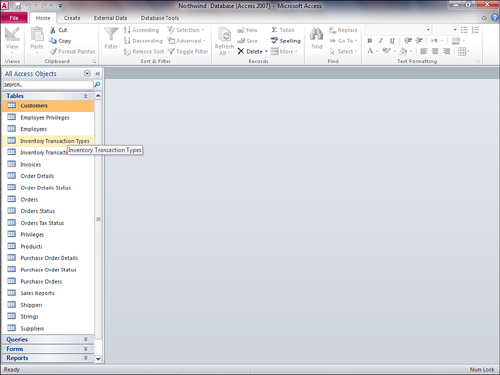
view all the tables that are contained in an open database, you select
Tables from the list of objects available in the database (see Figure 1). A list of available tables appears (see Figure 2).
To view the data in a table,
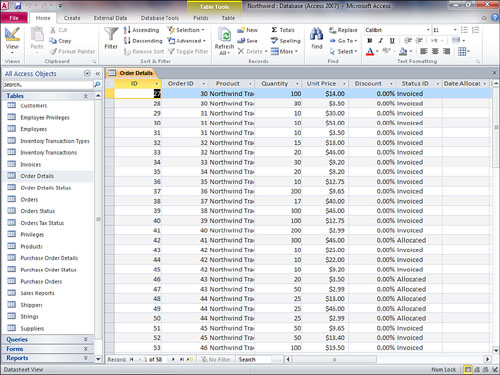
double-click the name of the table you want to view. (You can also
right-click the table and then select Open.) Access displays the table’s
data in a datasheet that includes all the table’s fields and records
(see Figure 3).
You can modify many of the datasheet’s attributes and even search for
and filter data from within the datasheet.
If the table is related to
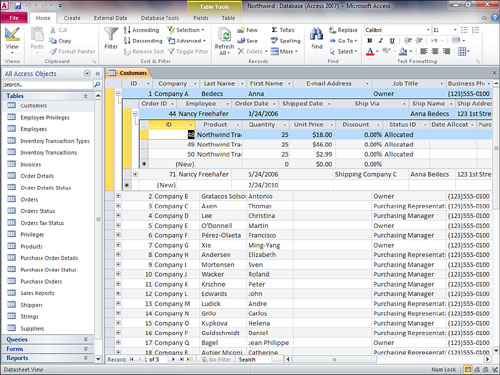
another table (such as the Northwind database’s Customers and Orders
tables), you can also expand and collapse the sub-datasheet to view data
stored in child tables (see Figure 4).
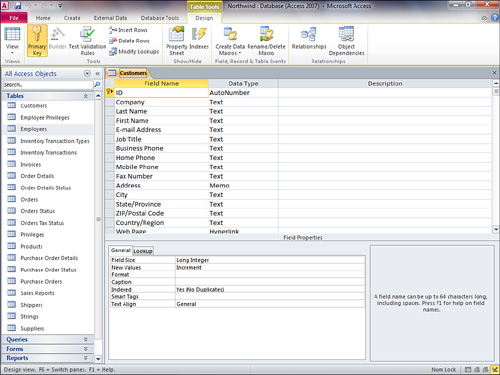
As an Access user, you will
often want to view the table’s design, which is the blueprint or
template for the table. To view a table’s design (see Figure 5),
right-click the table name in the Navigation Pane, and then select
Design View. In Design view, you can view or modify all the field names,
data types, and field and table properties. Access gives you the power
and flexibility you need to customize the design of tables.
Relationships: Tying the Tables Together
To
properly maintain data’s integrity and ease the process of working with
other objects in a database, you must define relationships among the
tables in a database. You accomplish this by using the Relationships
window. To view the Relationships window, select Relationships from the
Database Tools tab of the Ribbon. The Relationships window appears. In
this window, you can view and maintain the relationships in the database
(see Figure 6).
If you or a fellow user or developer have set up some relationships,
but you don’t see any in the Relationships window, you can select All
Relationships in the Relationships group on the Design tab of the Ribbon
to unhide any hidden tables and relationships.
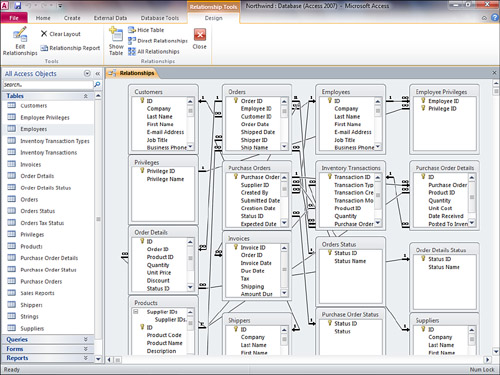
Notice that many of the relationships in Figure 1.6
have join lines between tables and show a number 1 on one side of the
join and an infinity symbol on the other. This indicates a one-to-many
relationship between the tables. If you double-click a join line, the
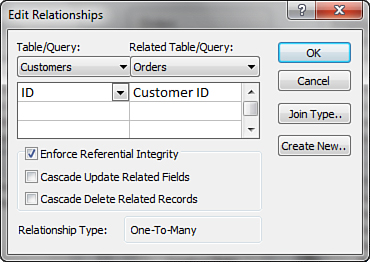
Edit Relationships dialog box opens (see Figure 1.7).
In this dialog box, you can specify the exact nature of the
relationship between tables. The relationship between the Customers and
Orders tables in Figure 1.7,
for example, is a one-to-many relationship with referential integrity
enforced. This means that the user cannot add orders for customers who
don’t exist. Notice in Figure 1.7 that the Cascade
Update Related Fields check box is selected. This means that if the
user updates a CustomerID field, Access updates all records containing
that CustomerID value in the Orders table. Because Cascade Delete
Related Records is not checked in Figure 7, the user cannot delete from the Customers table customers who have corresponding orders in the Orders table.
You should
remember that you should establish relationships both conceptually and
literally as early in the design process as possible. Relationships are
integral to successfully designing and implementing your application.