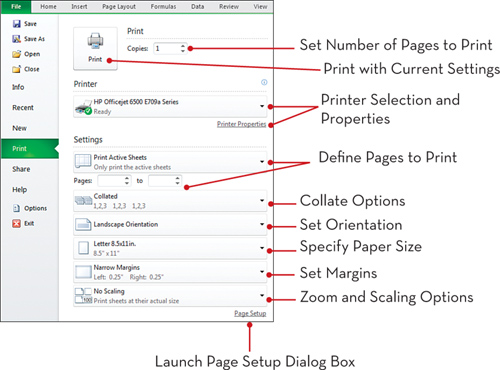
Print Options Via the Backstage View

Using Print Preview
Worksheets
with lots of data can generate large print jobs, possibly containing
hundreds of pages. Waiting until all these pages are printed to verify
that the information is printed correctly can cost a lot in both time
and printing supplies. To help prevent printing mistakes, use Print
Preview to ensure that all the necessary elements appear on the pages
before printing.

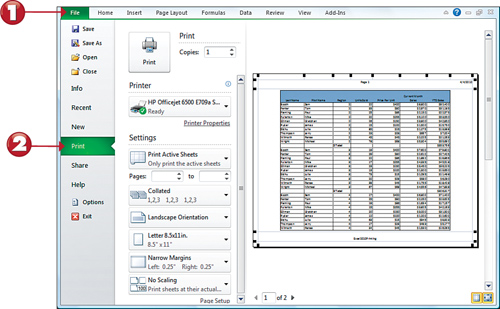
 With the worksheet you want to print open, click the File tab on the ribbon.
 Click Print to display the worksheet’s Print Preview.
Note: Paging Through the Print Preview
Note the
navigation spinner in the lower left-hand corner of the Print Preview.
In this case, the navigation spinner reads 1 of 2. You not only can use
this to determine how many pages will be printed, but you can cycle
through the pages by clicking the left and right arrows. |
Tip: Page Break Preview Button
Click Page
Break Preview on the View Tab to see and modify exactly what is
selected to print (in the print area).
|

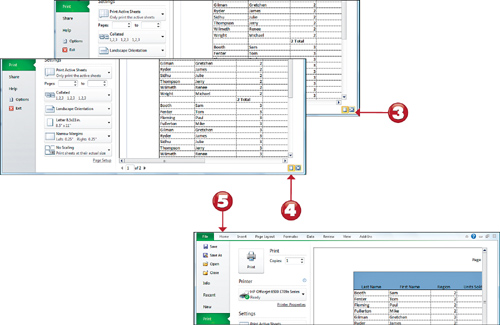
 Click the Zoom
button to increase the viewable size of the worksheet in Print Preview
mode. (Click Zoom again to return to the original page size.)
 Click Margins to toggle between displaying the margin indicators, which you can drag to set more or less of your worksheet to print.
 Click the Home tab to return to the worksheet’s Normal view.
Tip: Zoom with your Mouse Wheel
You
can also use your mouse wheel to zoom in and out of a print preview.
Hold down the Ctrl key on your keyboard while you spin your mouse wheel.
This increases or reduces magnification of your Print Preview depending
on the direction you spin (up or down).
|