In PowerPoint 2010, creating presentation videos couldn’t be easier.
However, video files can be quite large, so before you create your video, you
might want to ensure that your presentation is as compact as possible by
compressing pictures and media to the smallest size that is suitable for the
intended use.
When you are ready to turn the presentation into a video, you simply click
Create A Video on the Save & Send page of the Backstage view, and
specify the following:
The size that is most suitable for your intended output. You can
choose Large or Small depending on the size of the device on which the
presentation will be viewed, or Medium for presentations that will be
viewed from the Internet or DVD.
Whether to use recorded timings and narrations. If the presentation
has no slide timings or narration, you are given the opportunity to
create them before saving the video.
After specifying these options, you click Create Video. The Save As dialog box
opens with the Save As Type option already set to Windows Media Video. Then all
you have to do is name the file and specify a location. Depending on the size of
the presentation and the amount of media and linked files it contains, the
creation process can take quite a while, so be patient!
In this exercise, you’ll save a presentation with slide
timings as a video optimized for distribution via the Internet.
On slide 1, click the photo. Then
on the Format contextual tab, in the
Adjust group, click the Compress Pictures button.

The Compress Pictures dialog box opens.
The descriptions after each output type help you
select the appropriate setting.
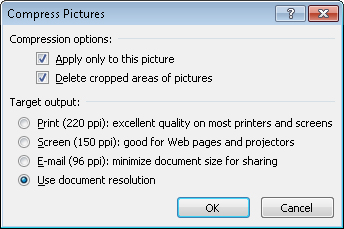
Clear the Apply only to this
picture check box to compress all the pictures in the
presentation. Then with Use document
resolution selected, click OK.
Tip:
Tip
For any presentation, you can compact the size of its media files
by clicking Compress Media on the Info page of the Backstage view,
and then choosing the intended output category.
Display the Backstage view, click Save
& Send, and then in the center pane, click
Create a Video.
The right pane changes to display the options related to
videos.
If a presentation does not have slide timings, by
default each slide in the video will display for 5
seconds.
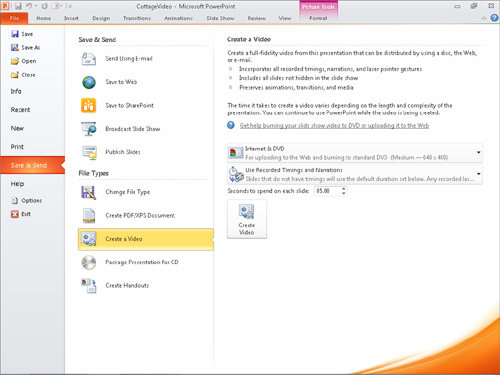
In the Create a Video pane, click
Computer & HD Displays,
and then in the list of size options, click Internet & DVD.
Click Use Recorded Timings and
Narrations, and then click Preview Timings and Narrations.
PowerPoint switches to Slide Show view and advances the slides
according to their slide timings.
Press Esc to return to the Backstage view after you have previewed a
few slides.
The slide timings are satisfactory, so at the bottom of the right
pane, click Create Video.
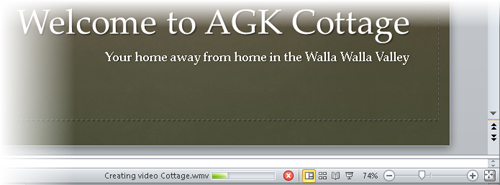
In the Save As dialog box, name the
file Cottage, and click Save.
A progress bar on the status bar indicates that the video is being
created in the background.
You cannot close the presentation during this
process.
When the Creating progress bar
disappears, open Windows Explorer, navigate to your practice file folder, and
double-click Cottage.
The video begins.
Click the Close button to end the
video.
Note:
Close Windows Explorer, and then save and close the CottageVideo
presentation.