| Scenario/Problem: | You have a read-only value to display on your form. |
| Solution: | Display the value in a text box that is set to read-only and does not contain any borders or shading. |
When a read-only field is displayed in a text box,
you obviously do not want the user to edit that field. You also do not
want the user to think that they can edit that field. Therefore, it’s
best to modify the text box properties accordingly.
To display a read-only value, follow these steps:
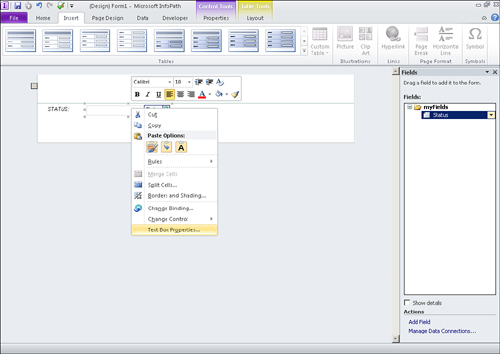
1. | Right-click the text box that contains the read-only field on your form and select Text Box Properties, as shown in Figure 1, to display the properties dialog.

|
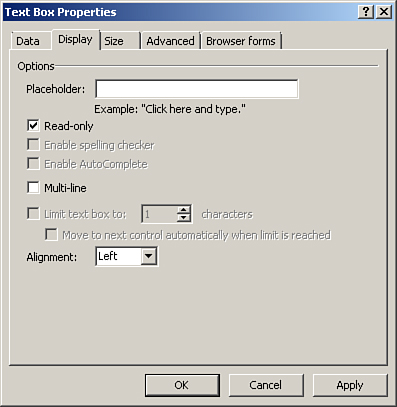
2. | Click the Display tab and check the Read-Only box, as shown in Figure 2, to make the text box read-only. Click OK.

|
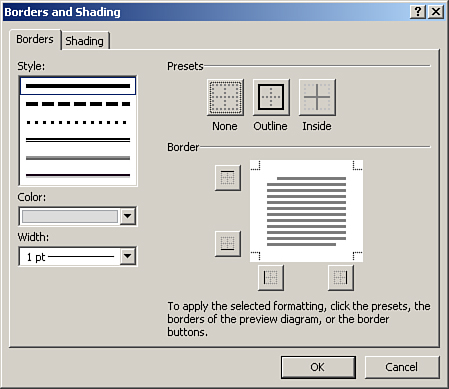
3. | Right-click the text box again and select Borders and Shading, as shown in Figure 3, to modify the borders and shading properties.

|
4. | On the Borders tab, click the None button to remove the borders from the text box, as shown in Figure 4.

|
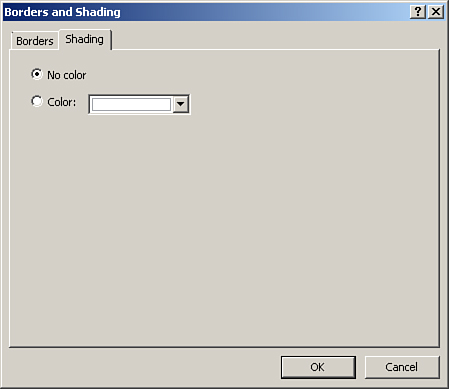
5. | Click the Shading tab and select No Color to remove any shading from the text box, as shown in Figure 5. Click OK.

|
Previewing or rendering your form displays the field as read-only, as shown in Figure 6.
