Installing an operating
system is not among the 10 "must have" experiences in your life. Rather,
it can be a slow, agonizing process, and can be unceremoniously aborted
for a variety of reasons.Depending
on your hardware, just booting up the setup disc can be a headache. You
then must sit and wait... and wait... for Windows to copy some 2,000
files to your hard disk and then go through the excruciating process of
"configuring" your computer. When it finally boots—assuming it even
makes it this far—you then have the unenviable task of having to
download and install more than a hundred megabytes' worth of updates and
fixes. And when all is said and done, you still will need to go through
and turn off all of the annoying "features" littered throughout the
interface and then fix the myriad of problems that are sure to pop up.
But
the worst part is the feeling you can't shake: that you chose to
install Windows Vista on your machine, and now you've got to live with
it. (Of course, this may not apply to you if you got Vista preinstalled
on a new PC, at least not yet....)
Both
the steps to begin the installation procedure and the procedure itself
can vary, depending on what's already installed on your system (if
anything) and how you choose to approach the task. If you're installing
over an older version of Windows, use Table 1
to cross-reference the old version with the edition of Vista you're
installing and determine whether or not upgrading is an option.
Table
1. Vista upgrade compatibility chart; a checkmark (✓) means you can
upgrade from within the older version, no checkmark means you need to
perform a clean install
| |
Vista Home Basic
|
Vista Home Premium
|
Vista Business
|
Vista Ultimate
|
|---|
|
Windows XP Professional
| | |
✓
|
✓
|
|
Windows XP Home
|
✓
|
✓
|
✓
|
✓
|
|
Windows XP Media Center
| |
✓
| |
✓
|
|
Windows XP Tablet PC
| | |
✓
|
✓
|
|
Windows XP 64-bit
| | | | |
|
Windows 2000
| | | | |
1. Install Vista on a New (Clean) System
Use
this method to set up Vista on a brand-new, empty hard disk, or if you
don't want to upgrade an earlier version of Windows (discussed in the
next section). See the upcoming sidebar, "Reduce Vista's Footprint," before you proceed if you want to customize the installation.
The
Windows Vista installation disc is bootable, which means that you can
pop it in your drive, turn on the computer, and the installation process
will start automatically.
If your PC doesn't boot off your Vista disc, you'll need to do one of the following:
BIOS setup
Enter your BIOS setup utility , navigate to the Boot section, and change the boot device priority or boot sequence so that your DVD drive appears before your hard disk. Save your changes and exit BIOS setup when you're finished.
Boot menu
Alternatively,
some PCs provide a "boot menu" that lets you choose the boot drive on
the fly. Look for a message above or below the boot screen right after
you power on your PC; usually, all you do is press the F12 key (before the beep; don't dawdle), select your CD/DVD drive from a list, and hit Enter.
When your PC detects a bootable disc, you'll usually see this message for three to four seconds:
Press any key to boot from CD or DVD . . .
When
you install Vista, the setup program basically unpacks a standard
installation from a disc image on the DVD. This is why there are so few
questions asked during setup, no optional components to include, and no
way to exclude the tons of sample media files Vista includes. Sure, once
Vista is installed, you can subsequently go through it and thin out
this bloated behemoth, but wouldn't it be easier to lighten the load
before you install? Fortunately, there's vLite, a free utility available at http://www.vlite.net/,
which lets you customize your Vista installation before you install a
single file to your PC. It requires a functional PC (and a DVD burner)
to run, but, of course, you can always install Vista as-is first, and
then wipe your hard disk clean before you install the vLite version. Using your original setup disc as a template, vLite walks you through the process creating a new, custom disc, allowing you to: Integrate
available Windows updates, language packs, and hardware drivers, so you
don't have to install them later (a great time-saver if you're setting
up more than one PC). Remove unwanted components. Tweak default settings, like disabling UAC, enabling Hibernation, and unhiding filename extensions in Windows Explorer. Split
a DVD disc into CDs so you can install Vista on a PC without a DVD
reader, or consolidate a set of CDs into a DVD-based install to save
time. Embed your
product key on the disc so you don't have to type it each time, or add
other features to create an "unattended" installation.
When you're done, vLite burns your custom installer to a DVD you can use just like an ordinary Vista disc. |
Press
a key on the keyboard, and in a few moments, setup should load normally
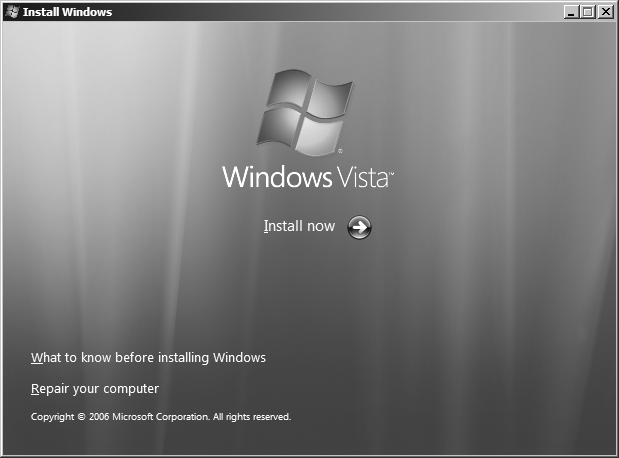
and display its Welcome screen. On the first screen, click Next to display the Install Windows screen shown Figure 1. From here, click Install now to proceed.

On
the next page, setup asks for your product key, which you can read off
the DVD sleeve or the sticker on your PC case. Mercifully, Microsoft now
allows you to skip this step—leave the field blank, click Next, and then answer No—so
you don't have to waste time fishing around for the sticker and typing
the excruciating 25-digit key. This is a particularly nice time-saver in
the event that setup fails and you have to start over, or if you're
only setting up a temporary Vista installation for software testing or
data recovery.
If
you complete setup without typing your key, make sure you choose the
edition of Vista you actually own. If you choose the wrong edition, you
won't be able to change it later without reinstalling from scratch. When
Vista boots, it'll operate in a fully functional "evaluation mode" you
can use normally for 30 days. If you don't enter a valid product key for
the edition you chose during setup in time—through the System page in
Control Panel—Vista goes into a lockdown mode. So, if this installation
ends up being a keeper, don't put this step off, lest you risk making
the data on your hard disk more-or-less inaccessible. |
|
A few pages later, you'll be asked "Which type of installation do you want?," at which point you can select Upgrade or Custom (advanced).
The Upgrade option is only available if you install Vista from within a
previous version of Windows. So,
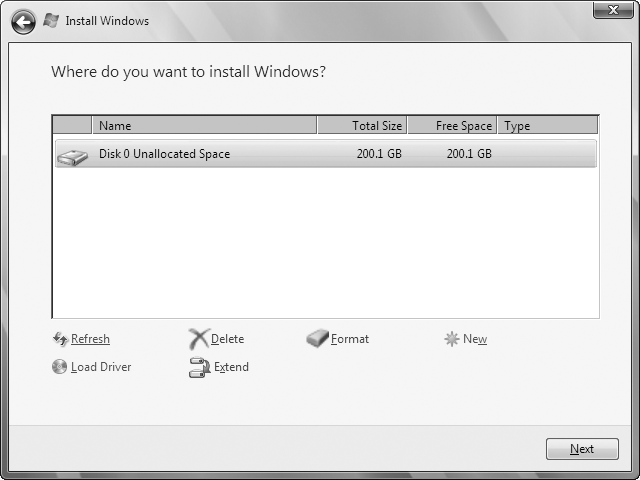
click Custom (advanced) to advance to the "Where do you want to install Windows?" page, and then click the Drive options link to reveal the partition editor shown in Figure 2.

If the hard disk is clean, and you want to use the entire hard disk for your Vista installation, just click Next to proceed. Otherwise, use Delete to wipe out any existing partitions—as well as the data on them (warning: there's no undo here)—and New to create new partitions on the drive.
1.1. Install clean with only an upgrade disc
So
you thought you'd save a little money by purchasing the "upgrade"
version of Vista, but now you find yourself in a bit of a jam. Your hard
disk crashed, and without a full backup ,
you need to rebuild your system. Or perhaps you've decided against
upgrading XP directly to avoid passing on six years of accumulated junk
to your new operating system. Either way, you've undoubtedly discovered
that your upgrade disc won't install if it can't find an eligible
Windows installation to upgrade.
In this scenario, Microsoft suggests that you install XP and then install Vista over it. Not bloody likely.
Instead, just follow these steps to get a fresh Vista installation from an upgrade disc:
Use your Vista disc to boot your PC.
When setup loads, click Install now and proceed normally.
When prompted for the product key, leave the field blank, and just click Next.
Without
the key, setup will ask you which edition of Vista you'd like to
install; make sure you choose the edition you've actually purchased.
When
setup is complete, you'll be operating in the 30-day evaluation period,
but you won't be able to activate Vista until you enter your product
key.
To enter the product key, open a Command Prompt window in administrator mode, and then type this at the prompt:
cscript \windows\system32\slmgr.vbs -ipkxxxxx-xxxxx-xxxxx-xxxxx-xxxxx
where xxxxx-xxxxx-xxxxx-xxxxx-xxxxx is your Vista product key, taken from the DVD sleeve or the sticker on your PC case. Press Enter to proceed.
Next, activate Vista with this command:
cscript \windows\system32\slmgr.vbs -ato
and press Enter. To verify that activation was successful, type this:
cscript \windows\system32\slmgr.vbs -dlv
Type exit or close the Command Prompt window when you're done.
Using a process known as rearming, you can extend Vista's evaluation period up to two or three times, for a total of 120 days. Just execute the slmgr.vbs script with the -rearm parameter. It will take 15–30 seconds to make the change, at which point you'll need to restart Windows. |