It’s no surprise that products within Adobe Creative Suite are meant to play well together—they are a suite,
after all. In this section, you’ll learn some techniques for making the
most of the integration between Fireworks and Dreamweaver.
Note
This exercise requires Dreamweaver CS5. If you do not
own Dreamweaver, you may skip this section, or download the 30-day,
fully functional trial version of Dreamweaver from Adobe at www.adobe.com/downloads.
Copying and pasting to Dreamweaver
You can quickly add objects from a Fireworks design directly into a website layout in Dreamweaver.
1. | Start Dreamweaver.
|
2. | Open
the check_mag_home.html file from the webpage folder of the Lesson13
folder. This is an HTML prototype page that has been reviewed by the
client. It has also undergone a lot of layer restructuring for better
organization.

Another watch image has been sent as a replacement for the existing
watch promo image. The client has requested the blue background be
removed and replaced with a gradient background.
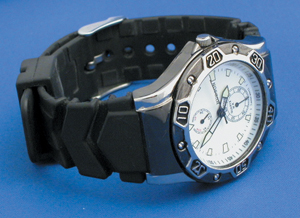
This work has already been done in the file called watch.fw.png, using a bitmap mask and a gradient-filled rectangle.
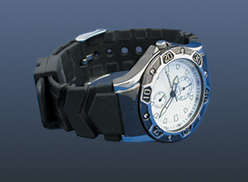
The image is currently not the right dimensions for the watch promo
section of the banner. You will create the correct image size without
affecting the original file in any way.
|
3. | In Fireworks, open the watch.fw.png file in the Lesson13 folder.
|
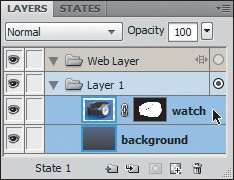
4. | In the Layers panel, hold down the Shift key and select both the watch and the background.
|
5. | |
6. | Switch to Dreamweaver.
|
7. | Select the original watch image, and delete it.
|
8. | Choose Edit > Paste.
The Image Preview window opens. This is the same Image Preview window
you can access from Fireworks, but in this case, it’s initiated by
Dreamweaver.
|
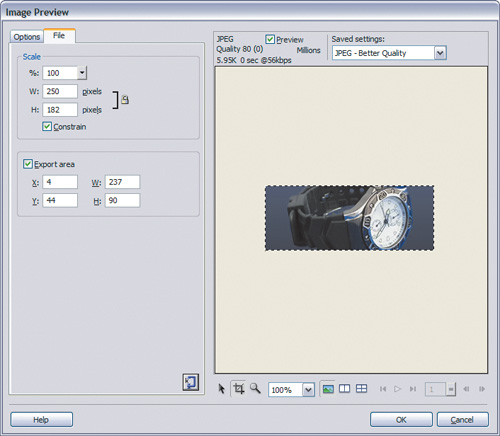
9. | In the Options pane, set the file format to JPEG – Better Quality.
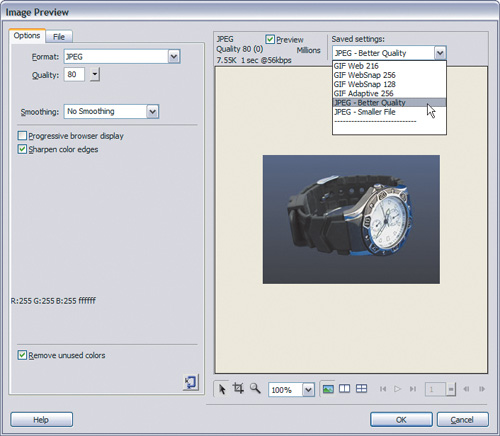 |
10. | Switch to the File tab, and then set the scaling to 95%.
|
11. | In the Export Area option, type 237 in the width field and 90 in the height field.
These are the dimensions of the original watch image.
|
12. | Type 0 in the x field and 35 in the y field, and click OK.
The Save Web Image dialog box appears.
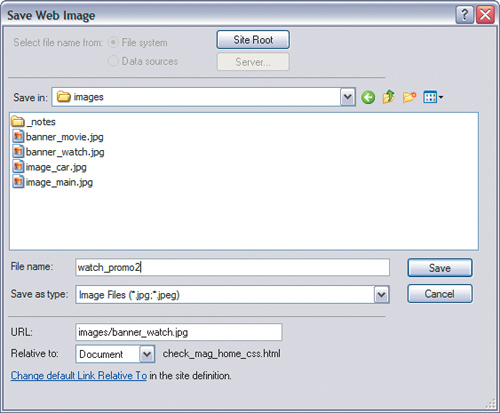 |
13. | Browse to the images folder within the webpage folder of the Lesson13 folder.
|
14. | Rename the file to watch_promo2.jpg, and click Save.
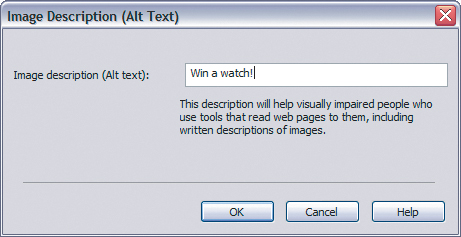
The Image Description (Alt Text) dialog box appears.
|
15. | Type Win a watch! in the Alt Text field, and click OK.
The new, cropped image appears on the page, where the old image used to be.

|
16. | Return to Fireworks; the original PNG file remains unchanged.
|
17. | Close the watch.fw.png file without saving. |