Round-trip editing
Another request has come in—this one for a change to
the navigation bar. The client would prefer the navigation text to be
closer to the right and with more spacing between each link. You will
make this change using round-trip editing.
1. | Select the navigation bar image within Dreamweaver.
 |
2. | In the Properties panel, click the Edit icon.

Note
Editing the PNG file works properly only if the page
was originally exported as HTML And Images. If the file was exported as
CSS And Images, round-trip editing will have a negative effect on the
HTML page.

|
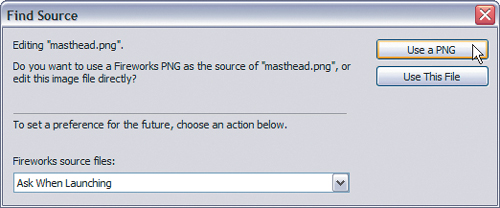
The Find Source dialog box may appear, asking whether
you want to edit this individual image or locate the Fireworks PNG
file. If it does, follow these steps:

1. | Click the Use A PNG button.
The Open dialog box appears.
| 2. | Locate and open the check_mag_home.fw.png file in the Lesson13 folder.
|
|
A Done button and the status message, Editing From Dreamweaver, appear near the top of the document window.

|
3. | Click Hide Slices And Hotspots in the Tools panel.
|
4. | Select the five text links using the Pointer tool.

|
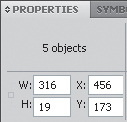
5. | In the Properties panel, change the X value to 456.

|
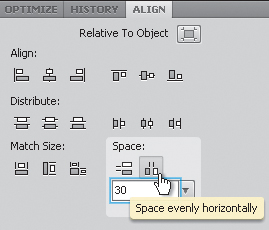
6. | Open the Align panel, and change the Spacing value to 30.
|
7. | Click the Space Evenly Horizontally icon to spread the text links apart.


|
8. | |
You are returned to Dreamweaver, and the navigation
bar has been updated to reflect the changes in the PNG. The PNG file is
saved automatically.
