Many designers love Fireworks because it lets them get in and get out quickly. Expediting your workflow is indeed a key goal of Fireworks.
One feature that may help you
in concept and prototyping stages is document templates. Fireworks comes
with a number of prebuilt templates you can use to jump-start a
brand-new project. The template options range from common document sizes
for web and mobile projects, to grid layouts for creating original
web-page layouts and wireframes, to mobile application and website
prototype samples. You will use one of these templates to quickly
generate a series of web banners to promote a website.
Opening a document template
You’ve been asked to create a
series of web banners from some supplied artwork. This is a great chance
to see how document templates can save you time.
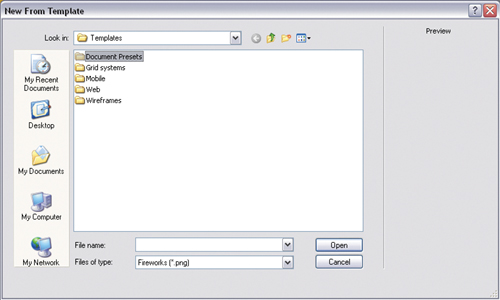
1. | Choose
File > New From Template or select the From Template option on the
Welcome screen. The New From Template dialog box opens directly to the
main Templates folder.

You can choose from one of five default categories.
|
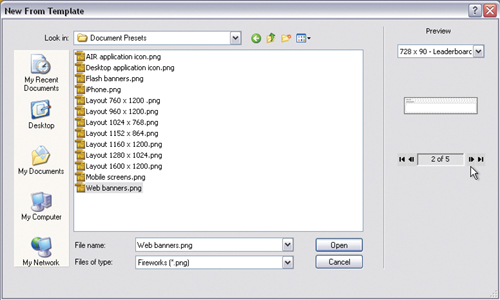
2. | Open
the Document Presets folder and select the Web banners template. In
Windows, a preview window appears automatically. On the Mac, click the
Preview button to open the preview window.
|
3. | Use the playback controls below the preview image to browse through the various design options.
|
4. | Choose the 728 × 90 – Leaderboard page and click Open.
 |
The entire document opens,
with the 728 × 90 Leaderboard template as the active page. Note that all
the other banner sizes are still part of the document, including a
summary page that has all the banners on a single page. This is already
saving you time because you don’t need to research banner sizes or
create the banner files.

Assembling the banners
The main graphics are already
created for you as separate files. It’s up to you to use them in a
variety of ways to create unique banners. We’ll walk you through the
process for the Leaderboard and skyscraper ads.
Building the leaderboard banner
Once again, you will be using the Import command to speed up your workflow.
1. | Choose
File > Import (Ctrl+R on Windows or Command+R on Mac) and browse to
the meridian_header.png file. This is a flattened PNG, with no special
layers or effects.
|
2. | Click Import, then Open (Windows) or Open, then Open (Mac) and place your import cursor at the top left of the banner rectangle.
 |
3. | Click
once to import the image at its original dimensions. On the Mac, you
may need to click once to set the focus to the Document window first.
|
| | |
4. | Hold down the Ctrl or Command key and press the down arrow key once. The image is moved behind the banner rectangle.
|
5. | Select the Pointer tool and click on the banner rectangle.
|
6. | Press Ctrl+X or Command+X to cut the rectangle.
|
7. | Select
the image and choose Edit > Paste As Mask. The banner rectangle now
masks the image at the correct dimensions for the banner.
|
8. | In the Layers panel, select the image rather than the mask.
|
9. | On
the canvas, locate the blue control handle and reposition the image
within the mask. Your final X and Y coordinates for the image (not the
mask) should be X: –206 and Y: 32. Don’t use the Properties panel to do
this; use the image control handle within the image.

Tip
If you want to
numerically control the position of the masked object, rather than drag
it with the mouse, first break the link between mask and masked object
by clicking on the chainlink icon found between the two objects in the
layers panel. Then select the image itself and use the Properties panel
to alter its location.
|
10. | In the Properties panel, reduce the opacity of the image to 50%.
|
11. | Save your file as meridian_banners_working.fw.png.
|