One of the biggest advantages of using
Camera Raw is that it enables you to apply changes to one photo, and
then easily apply those exact same changes to a bunch of other similar
photos taken in the same approximate setting. It’s a form of built-in
automation, and it can save you an incredible amount of time when
editing your shoots.
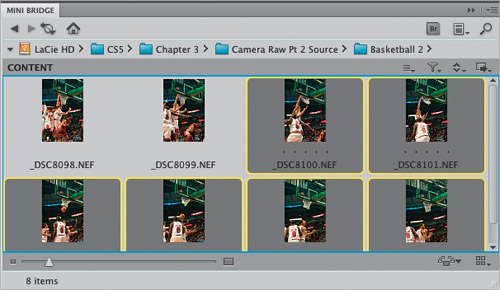
Step One. | The
key to making this work is that the photos you edit all are shot in
similar lighting conditions, or all have some similar problem. In this
case, our photos are from an indoor basketball game, and there’s a green
color cast to them from the lighting on the court. In Mini Bridge,
start by selecting the images you want to edit (click on one,
press-and-hold the Command [PC: Ctrl] key, then click on all the
others). If they’re RAW images, just double-click on any one of them and
they open in Camera Raw, but if they’re JPEG or TIFF images, you’ll
need to select them, then switch to Review mode, and then press Option-R (PC: Alt-R).
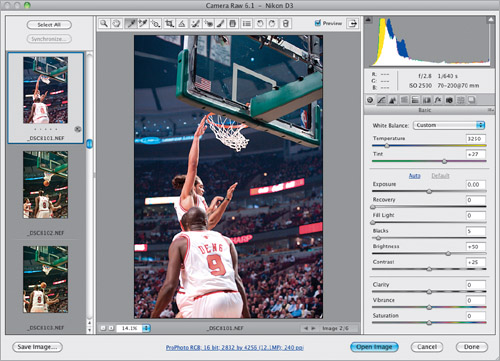
 | Step Two. | When
the images open in Camera Raw, you’ll see a filmstrip along the left
side of the window with all the images you selected. Now, there are two
ways to do this and, while neither one is wrong, I think the second
method is faster (which you’ll see in a moment). We’ll start with the
first: Click on an image in the filmstrip, then make any adjustments you
want to make this one image look good (I tweaked the white balance so
it wasn’t so green).
 | Step Three. | Once
you’ve got one of the photos looking good, click the Select All button
up at the top of the filmstrip to select all the photos (even though it
selects the rest of the photos, you’ll notice that the image you edited
is actually the “most selected” image, with a highlight border around
it). Now click the Synchronize button (it’s right below the Select All
button) to bring up the Synchronize dialog (seen here). It shows you a
list of all the things you could copy from this “most selected” photo
and apply to the rest of the selected photos. Choose White Balance from
the pop-up menu at the top, and it unchecks all the other stuff, and
leaves just the White Balance checkbox turned on.
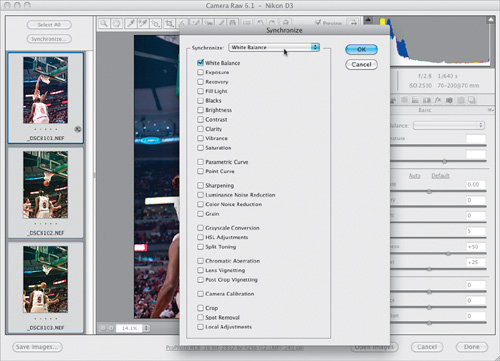 | Step Four. | When
you click the OK button, it applies the White Balance settings from the
“most selected” photo to all the rest of the selected photos (if you
look in the filmstrip, you’ll see that all the photos have had their
white balance adjusted). Okay, so why don’t I like this method? Although
it does work, it takes too many clicks, and decisions, and checkboxes,
which is why I prefer the second method.
Tip: Editing Only Select Photos
If you only want certain photos to be affected, and
not all the ones open in Camera Raw, then in the filmstrip,
Command-click (PC: Ctrl-click) on only the photos you want affected and
click the Synchronize button.
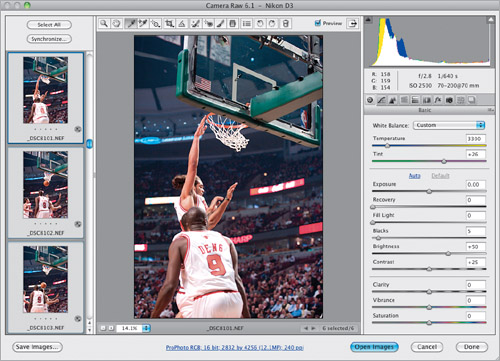
| Step Five. | In
the second method, as soon as Camera Raw opens, click the Select All
button to select all your images, then go ahead and make your changes.
As you make the changes to your “most selected” photo, all the others
are updated with your new settings almost instantly, so you don’t have
to remember which settings you applied—when you move one slider, all the
images get the same treatment, so you don’t need the Synchronize dialog
at all. Try out both methods and see which one you like, but if you
feel the need for speed, you’ll probably like the second one much
better.
 |
|