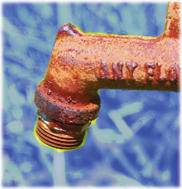
1. | Open the file Ch05_Pump.tif . You’ll create an accurate selection around the water pump.
|
2. | Select the Polygonal Lasso tool from the Tools panel.
|
3. | Make
an accurate selection around the pump, but don’t worry about
perfection. Treat it as if you were cutting out the image with a pair of
scissors. Remember, you must return to the starting point with the Lasso tool and click to close the loop.
Tip: Abort a Selection
If you need to exit a Lasso tool without making a selection, you can press the Esc key.
|
4. | Click
the Quick Mask icon (near the bottom of the Tools panel) or press Q.
The shielded (tinted) areas will become the area outside the active
selection when you exit Quick Mask mode.
|
5. | The
default Quick Mask color is red, set to 50%. In this case, another
color may be more helpful. Double-click the Quick Mask icon to call up
the Quick Mask Options window. Change the color to blue and set the
opacity to 75%. You may want to revisit this window when masking to adjust your settings to improve visibility.
|
6. | Select
the Brush tool from the Tools panel or press B. You’ll paint in the
mask using brushes. However, you must first “adjust” the Brush tool, so
it’s more accurate.
|
7. | Press
Command+K (Ctrl+K) to call up the Preferences dialog box. Choose the
Cursors category from the column to the left edge of the window. In the
Painting Cursors area, click Normal Brush Tip (this will show you the
size of your brush before clicking) and select Show Crosshair in Brush
Tip. While in the Preferences dialog box, change the Other Cursors to
Precise.

|
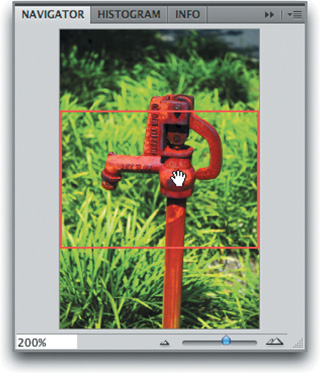
8. | Call
up the Navigator panel. This useful panel makes it easy to zoom in and
pan around your image. The slider changes your magnification level; the
red box indicates your work area.
|
9. | Zoom in to a high magnification level (between 200–300%) to make it easier to paint in the rest of your selection.
|
10. | Examine your Brush options in the Options bar and Tools panel. Black adds to your mask; white subtracts from it.
- Pressing the D key loads the default black and white values.
- You
can quickly adjust the size of your brush from the keyboard. Press the
right bracket ] to enlarge the brush or the left bracket [ to reduce the
size of the brush.
- You can soften your brush if you
want a feathered edge. Shift+] makes the brush harder; Shift +[ makes
the brush softer. A soft brush usually makes a more photorealistic edge.
|
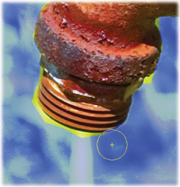
11. | Click and paint in the remaining areas of the mask.
Use smaller brushes to paint in tiny areas. Use larger brushes to paint in big areas.
Use the keyboard shortcuts to quickly change the size of your brush as needed. If
you have a long, straight run (like an edge), you can click once with a
brush. Hold down the Shift key and click again farther away. Photoshop
will “connect the dots.” This is the fastest way to fill in the mask. If
you paint too close to the image, you can fix it. Press X to toggle
from black to white. Painting with white subtracts from the mask (the
color overlay is removed from areas painted with white). Painting with
gray creates a semitransparent area, which is useful for feathering
edges. (Semitransparent areas may not appear to be selected when you
exit Quick Mask mode, but they are.)
|
12. | To
pan around your image, you can move the red box in the Navigator panel.
Alternately, hold down the spacebar and drag around in the document
window.
|
13. | If
you want to soften the edge of the quick mask, use the Smudge or Blur
tool. The Smudge tool set to Darken mode works well. You can change the
tool’s mode in the Options bar.
|
14. | Continue to paint in the mask. For an image of this complexity, it may take 5–20 minutes, but professional work takes time.
|
15. | When finished, press Q to exit Quick Mask mode. You should now have an active selection.
|
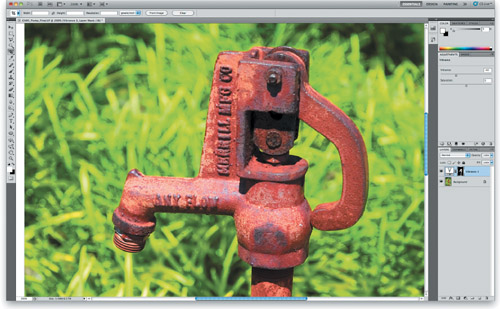
16. | Let’s
test the selection by making an image adjustment. Choose Layer > New
Adjustment Layer > Vibrance. Move the Vibrance slider left or right
to see the intensity of the color of the pump change. Move the
Saturation slider left to reduce the intensity of the color change.
Click OK when you are done with the adjustment to apply it. Because you
had an active selection, the adjustment is constrained to only the
selected areas.
|
17. | Let’s
make one more adjustment. Reload the selection by choosing Select >
Reselect. Then reverse it by choosing Select > Inverse.
 |
18. | You’ll
now reduce the balance of the grass using the Levels command. Choose
Layer > New Adjustment Layer > Levels. Move the middle (gray)
input slider. Notice how the image gets darker? You adjusted the gamma
or midtones of the image and changed its exposure. Click OK to apply the
Levels change.
 |
19. | You
may now notice a slight red fringe around the pump. This is easy to
fix. In the Layers panel, click the black and white mask icon (which
looks like a silhouette of the pump) for the Vibrance adjustment layer.
|
20. | Click the Masks panel to select it.
|
21. | Adjust the Feather slider to blend the edges of the mask.
|