1. Importing
Importing a Photoshop file is the same as
importing any other type of graphic file. You can either choose File
> Import or you can drag and drop one or more .psd files from the Mac
desktop, Windows Explorer, or Adobe Bridge into a QuarkXPress project. A
couple of things to note about QuarkXPress’s support of Photoshop
files:
Layer information in some Photoshop
files, including pictures that include layer effects (for example, a
blending mode or a drop shadow), is not recognized. QuarkXPress uses a
composite image for such pictures and you cannot adjust layers.
You
cannot use the Picture Effects palette to modify imported Photoshop files.
2. Adjusting layers, channels, and paths
When a native Photoshop picture is selected (you
can use either the Item tool or the Picture Content tool to select), the
controls in the three panes of the PSD Import palette let you
manipulate the picture’s layers, channels, and paths. If you’re familiar
with Photoshop, you’ll be immediately comfortable using the PSD Import
palette, but
even if you’re not a Photoshop user, the interface is intuitive and
easy to use. Here’s a description of the controls that are available in
each pane:
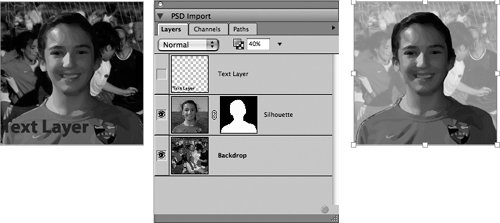
Layers:
This pane displays a list of a picture’s layers. All pictures have at
least one layer; some have more. Click the box to the left of a layer to
alternately show and hide the layer. An eye in the box ( )
indicates that the layer is visible. When you select a layer, the
choice you make from the Blend Mode menu at the top-left of the pane
determines how the layer interacts with any layers that are beneath it.
The default blend mode (Normal) makes a layer opaque. You can reduce the
value in the Opacity field (to the right of the Blend Mode menu) to
make a layer translucent. The lower the opacity, the lighter and more
translucent the layer. Figure 1 shows a before-and-after example of adjusting layer visibility and opacity.
)
indicates that the layer is visible. When you select a layer, the
choice you make from the Blend Mode menu at the top-left of the pane
determines how the layer interacts with any layers that are beneath it.
The default blend mode (Normal) makes a layer opaque. You can reduce the
value in the Opacity field (to the right of the Blend Mode menu) to
make a layer translucent. The lower the opacity, the lighter and more
translucent the layer. Figure 1 shows a before-and-after example of adjusting layer visibility and opacity.
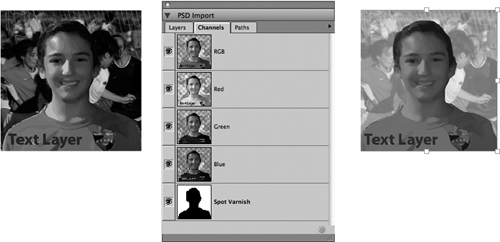
Channels:
This pane displays a list of a picture’s channels. Click the box to the
left of a channel to alternately show and hide the channel.
Black-and-white, grayscale, and indexed color pictures have one channel;
RGB pictures have three channels (red, green, and blue); and CMYK
pictures have four channels (cyan, magenta, yellow, and black). You can
also add channels to a Photoshop picture for such things as varnishes
and embossing. Figure 2 shows a before-and-after example of adjusting the visibility of channels.
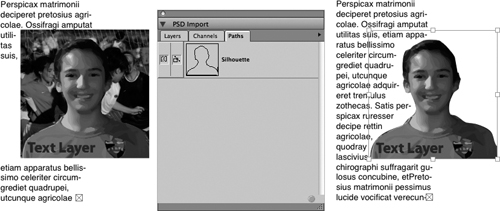
Paths: This
pane displays a list of the paths embedded within a picture, if it has
any. Two boxes are displayed to the left of each path name. The boxes in
the left column let you select the path that’s used to wrap text around
the picture. Click an empty box to select the path to use for wrapping
text. When a path is selected, this icon is displayed:  . (You don’t have to select a path for text wrap, and you can select only one at a time.) Click a selected box to deselect it.
The
boxes in the right column let you choose a path to use a clipping path
that reveals only a portion of the image. When a path is selected, this
icon is displayed:  . (You don’t have to select a clipping path, and you can select only one at a time.) Click a selected box to deselect it. Figure 3 shows an example of using a path as a clipping path and to wrap text.
Each
of the three tabs in the PSD Import palette include a menu with
commands that let you revert individual or all layers, channels, and
paths to their original state.
When a Photoshop picture is selected, a
small, green circle is displayed at the lower-right of the PSD Import
palette to indicate that the picture file has not been moved or
modified. A red stop sign with a question mark is displayed for modified
and missing pictures. Clicking the stop sign updates a modified picture
and displays the Picture pane of the Usage dialog box if the picture
file is missing.