Artists have drawn and painted themselves
since the invention of the mirror. You’ve probably seen numerous
self-portraits by Van Gogh. Even when he couldn’t afford to hire a
model, his own face was always handy. Portraits don’t necessarily have
to be restricted to the head and shoulders. Torsos and even the entire
body can be included, but the head will usually be the most important
element.
You’re invited to set up a mirror next to your
workstation, or if it’s more comfortable, work from a recent photo of
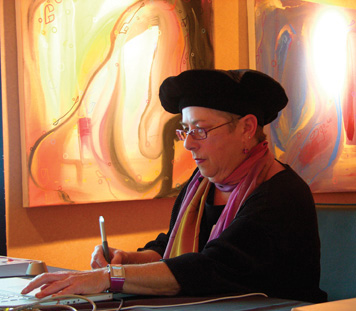
yourself. I’ll be working with the image in Figure 1,
part of a series of photos taken by Joseph Schaller while I was
creating live digital caricatures at a wine gallery in San Francisco.
Several photos from this series are included in the People folder, and
you have my permission (and Joseph’s) to work with them.

1. Be Yourself
Feel
free to work with more than one reference photo, combining the best
aspects of them in your digital portrait. Plan to use a painting style
compatible with your personality and artistic instincts. If you tend to
prefer a loose, casual style (as I do), don’t hold back. If your work is
generally tight and controlled, stick with that approach—but you might
also want to consider that life is short.
You have at least a nodding acquaintance with
several techniques by now. I invite you to use any combination that
appeals to you and to experiment freely. That’s what I intend to do.
Before you begin, try some new color schemes or enhancements for your
photos in the Underpainting Palette. When you begin painting, use the
RIFF format so you can make iterative saves easily. Start with File >
Clone (not Quick Clone) so you’ll have a safety net.
Work in layers for maximum flexibility. I want
to have the clone copy of the photo on its own layer. To do that, choose
Select > All, followed by Edit > Cut, then Edit > Paste In
Place. This will automatically create a new layer with the photo in the
same position. Now I can turn the opacity of the photo down while I work
on other layers.
On a new layer, I’ll make a line drawing with
Dry Ink. If you’ve been practicing the pressure control exercises I
recommended in Lesson 1, you know where to find this variant. If not, I
won’t punish you by making you look all over for it—it’s in the
Calligraphy category.
Dry Ink creates a luscious, bristly line whose
width is very responsive to pressure. If I were stranded on a desert
island and could only have one Painter brush variant, it would be Dry
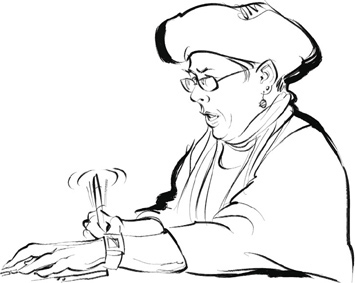
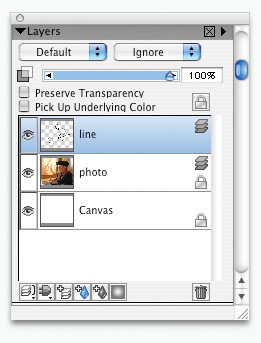
Ink. My line drawing layer is shown in Figure 2, and the Layers Palette at this stage can be seen in Figure 5.12.
Notice that I have locked the photo layer to prevent drawing on it
accidentally. To lock or unlock the current layer, click on the padlock
icon on the Layers Palette.


|
Why not just use Tracing Paper to see the
original photo at reduced opacity? Because when Tracing Paper is, say,
50 percent visible, your painting is 50 percent visible. The only way to
see your working image accurately is to turn Tracing Paper off
completely. Not a problem when the photo is on its own layer.
|
|
When
you want to save your image in a variety of file formats that don’t
support layers, you’ll have to use the Drop All command to flatten the
image. This won’t work if any of the layers are locked.
|
Color
is next, and that requires another layer, using Gel or Multiply mode so
the black lines will show through. The line drawing has a cartoon or
comic book style (check out the “speed whiskers” around the Wacom pen),
which suggests adding flat color to the skin area. I’ll do that with Dry
Ink. Other areas on the color layer will be left blank for now. The
photo layer is no longer needed, and I’ll delete it to reduce file size.