IT tutorials
 
Office
 

Microsoft OneNote 2010 : Inserting Documents and Files (part 2) - Inserting a File Printout on a Page

- Free product key for windows 10
- Free Product Key for Microsoft office 365
- Product Key Free : Microsoft Office 2019 – Serial Number
4/22/2014 2:42:50 AM

Inserting a File Printout on a Page

An alternate way to import content from a file on your computer into OneNote is to make it appear on your notes page like a printout on paper. This ensures that there’s no confusion between an imported copy of a file and its original version on your hard drive, because the imported copy appears as a static image that cannot be edited.

Although this might seem limiting compared with importing an actual copy of a file, this option has two benefits. First, the layout and appearance of the original file is preserved perfectly, much like a PDF document would appear on your screen. Second, the images of the printout can be annotated with typed or handwritten text or with drawings, offering a much more flexible way to review and annotate content, especially when reviewing it together with other people.

To insert a file as a printout, follow these steps:

1.
On your notes page, click to activate the cursor where you want the file printout to begin.

2.
On the ribbon, click the Insert tab.

3.
In the Files group, click File Printout.

4.
In the Choose Document to Insert dialog box that opens, navigate to the folder containing the file you want to print to OneNote.
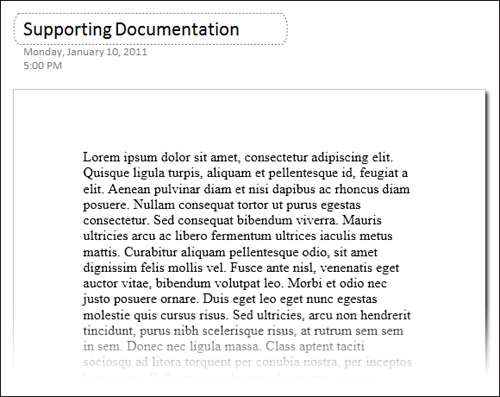
5.
Click to select the file and then click OK. Depending on the size of the file and the processing speed of your computer, a progress indicator might briefly appear. When it reaches 100%, one or more static images resembling the page (or pages) of your “printed” file appears on your notes page (see Figure 2).

Figure 2. Using the File Printout command, you can send the contents of a selected file or document to OneNote as one or a series of images. This makes it easy to read, review, and annotate its information in context with your other notes.

If the terminology here is confusing you, let me be absolutely clear: A so-called “printout” of a file that you’ve inserted into your notes in OneNote never actually uses your printer in any way. It’s just a figure of speech to explain how a computer file is sent to OneNote, where it appears as an inserted image, looking much the same way as the file would look had you actually printed it out on paper.


File printouts can be easily annotated by setting their images as the page background and then clicking over the image to create a notes container that holds your text annotations and other notes about the file’s content. This is especially useful when reviewing visual content, such as the slides in a PowerPoint presentation deck.

Another convenient imaging feature to remember for file printouts is the Copy Text from Picture command that’s available whenever you right-click an inserted picture. In the case of file printouts, the images offer two slightly different commands on the right-click menu—one for copying text from just the selected image (or page) of the printout, and another for copying all text from all of the images (pages) in a file printout. Just like with regular images, this lets you copy the file’s text and paste it into an editable annotation where you can then revise it with your proposed changes

 
Others
 
- Microsoft OneNote 2010 : Inserting Documents and Files (part 1) - Inserting a Copy of a File on a Page
- Microsoft OneNote 2010 : Working with Links (part 2) - Creating a Link from a Picture,Modifying a Link in Your Notes, Removing a Link from Your Notes
- Microsoft OneNote 2010 : Working with Links (part 1) - Creating a Link from Typed Text,Creating a Link from Selected Text
- Microsoft Access 2010 : Relating the Information in Your Database - Establishing Relationships in Access
- Microsoft Access 2010 : Relating the Information in Your Database - The Types of Relationships
- Microsoft Visio 2010 : Distributing Templates and Stencils (part 2) - Creating a Separate Stencil for Shape and Code Delivery
- Microsoft Visio 2010 : Distributing Templates and Stencils (part 1) - Creating a Template with a Document Stencil
- Microsoft Visio 2010 : Introducing Automation and VBA Code (part 3) - Calling VBA Code from a SmartShape
- Microsoft Visio 2010 : Introducing Automation and VBA Code (part 2) - Using the Macro Recorder to Generate Code
- Microsoft Visio 2010 : Introducing Automation and VBA Code (part 1) - Exploring the VBA Development
 
 
Top 10
 
- Microsoft Visio 2013 : Adding Structure to Your Diagrams - Finding containers and lists in Visio (part 2) - Wireframes,Legends
- Microsoft Visio 2013 : Adding Structure to Your Diagrams - Finding containers and lists in Visio (part 1) - Swimlanes
- Microsoft Visio 2013 : Adding Structure to Your Diagrams - Formatting and sizing lists
- Microsoft Visio 2013 : Adding Structure to Your Diagrams - Adding shapes to lists
- Microsoft Visio 2013 : Adding Structure to Your Diagrams - Sizing containers
- Microsoft Access 2010 : Control Properties and Why to Use Them (part 3) - The Other Properties of a Control
- Microsoft Access 2010 : Control Properties and Why to Use Them (part 2) - The Data Properties of a Control
- Microsoft Access 2010 : Control Properties and Why to Use Them (part 1) - The Format Properties of a Control
- Microsoft Access 2010 : Form Properties and Why Should You Use Them - Working with the Properties Window
- Microsoft Visio 2013 : Using the Organization Chart Wizard with new data
Technology FAQ
- Is possible to just to use a wireless router to extend wireless access to wireless access points?
- Ruby - Insert Struct to MySql
- how to find my Symantec pcAnywhere serial number
- About direct X / Open GL issue
- How to determine eclipse version?
- What SAN cert Exchange 2010 for UM, OA?
- How do I populate a SQL Express table from Excel file?
- code for express check out with Paypal.
- Problem with Templated User Control
- ShellExecute SW_HIDE
programming4us programming4us