Adding a logo and a call to action
You’ve got your background image. Now it’s time to add the logo and call to action.
1. | Select File > Import and bring in the local_logo.fw.png file.
|
2. | Click once on the canvas to import the file at its original size.
This file is made up of several grouped elements: a logo and three text objects.
|
3. | Position the group at X: 30 and Y: 75.

|
4. | Import the join_local.fw.png file at its original size and place it at X: 490 and Y: 62.

|
5. | Save your work.
 |
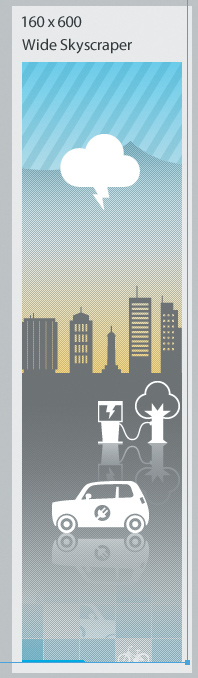
Creating the skyscraper banner
You will now add content to the skyscraper banner on the 160 × 600 Wide Skyscraper page.
1. | Select the 160 × 600 Wide Skyscraper page in the Pages panel.
|
2. | Import the file called meridian_skyline.png at the upper-left corner of the skyscraper rectangle.
|
3. | Hold down the Ctrl or Command key and press the down arrow key once.
|
4. | Select and cut the banner rectangle.
|
5. | Select the image and choose Edit > Paste As Mask.
|
6. | In the Layers panel, select the image rather than the mask.
|
7. | In
the Layers panel, break the link between the image and the mask by
clicking the chain-link icon between the two objects, and then select
the image.
|
8. | In the Properties panel, set the coordinates for the image to X: –1118 and Y: –79.
|
9. | Import the local_logo.fw.png file at its original size.
|
10. | Place it at X: 22 and Y: 70. The text will be located off the canvas.
You need to ungroup the logo so that you can place the text lower in the banner.
|
11. | Select
the logo with the Pointer tool and then press Ctrl+Shift+G or
Command+Shift+G. The objects are ungrouped but remain selected.
|
12. | Click off the canvas to deselect the objects, and then holding the Shift key, click on the three text blocks to select them.
|
13. | Use
the Pointer tool to drag the text below the logo. The final coordinates
should be about X: 22 and Y: 203. The text is in the right place, but
it’s too small. You will adjust this next.
|
14. | With
all three blocks still selected, change the text size from 18 pixels to
24 pixels in the Properties panel. This will force all three blocks to
overlap each other. Not to worry.
|
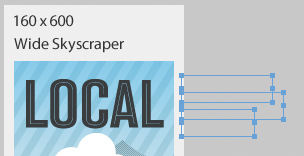
15. | Open the Align panel and in the Space field, set a value of 2 and then click on the Space Evenly Vertically icon.
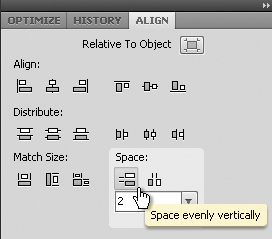
The text is now spaced evenly and no longer overlaps.
|
16. | Double-click inside the first text block and replace the comma with an ampersand.
|
17. | Save the file.

|
Editing individual objects within a group
You will work with the same
call-to-action file as before, but as with the logo, you will customize
it once it’s been imported. You will use the Subselection tool to edit
individual objects in the group, without ungrouping them.
1. | Scroll to the bottom of the banner.
|
2. | Import the join_local.fw.png file near the bottom of the banner.
|
3. | Select
the Subselection tool and click on the gray circle behind the words
JOIN LOCAL. This circle is a bitmap graphic rather than a vector. You
could replace it with a vector, but all that’s necessary is a simple
color change, so you will just edit the bitmap’s live properties.
|
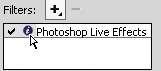
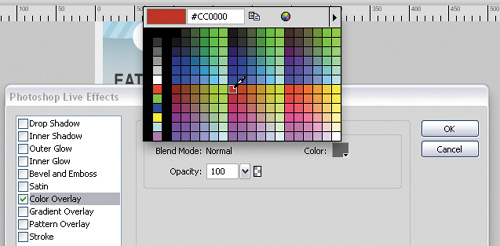
4. | In the Properties panel, you will see that a Photoshop Live Effect has been added to the circle.
|
5. | Click on the i icon beside the filter name. The Photoshop Live Effects dialog box appears.
|
6. | Select the Color Overlay option by clicking on the name.
|
7. | Click
the color box in the main window and choose a bright red instead of the
gray currently in use, and then click OK. The circle is now red.
 |
8. | Hold down the Shift key and click on the JOIN LOCAL text so both the text and the circle are selected on the canvas.
|
9. | In the Properties panel, change the position to X: 24 and Y: 538.
|
10. | With
the Subselection tool still selected, double-click on the text block
beside the circle, and then triple-click the top line of text to select
it.
|
11. | Press Delete.
|
12. | Click
away from the text; then, making sure the Subselection tool is
selected, click once on the text block again and reposition it beneath
the red line.
|
13. | Shift-click to select the two red lines along with the text and reposition the selection to X: 14 and Y: 597.

|
14. | Finally, select just the horizontal red line and change its width to 150 pixels in the Properties panel.
|
15. | Save the file.
|
For extra credit, study the meridian_banners_final.fw.png file and see if you can replicate those banners.
Removing unwanted templates
Chances are you won’t need the All Sizes page in your final file so now you will remove it from your new document.
1. | From the Pages panel select the 01 All Sizes page.
|
2. | Click the trashcan icon to delete the selected page. You are now left with just the four banner pages sample.
|
3. | Save your file and close it. |