Nothing ruins an outdoor shot like a dull gray sky , but luckily, in many cases, you can save the
shot by darkening the midtones a bit, and adding a blue tint or gradient
to the sky. Here’s how to do both:
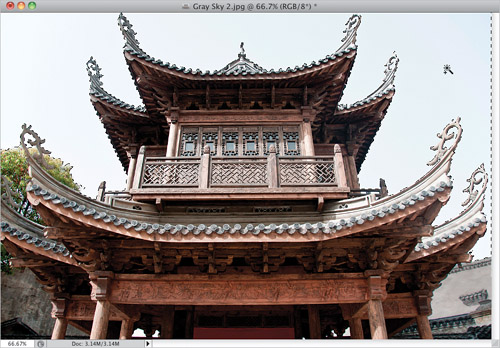
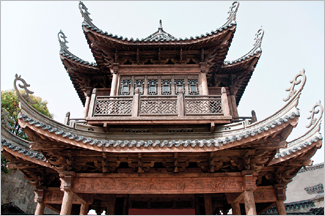
Step One. | Here’s
a shot taken in Beijing’s Tiananmen Square, and the sky is that flat
gray that we all hate for travel and outdoor shots. Before we go any
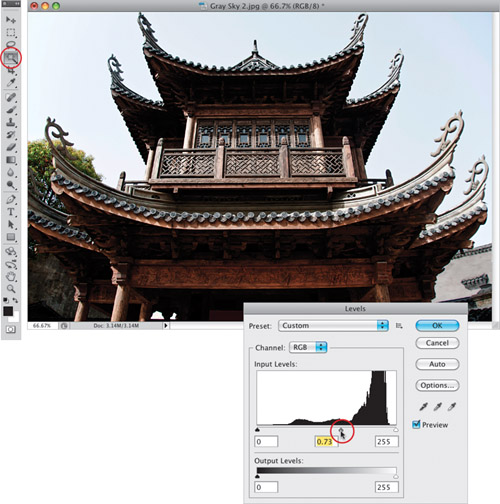
farther, the first thing I usually try is to press Command-L (PC: Ctrl-L)
to open the Levels dialog, and darken the midtones by dragging the
center Input Levels slider (circled here in red) to the right. If there
is any detail in the sky we can’t see, this will usually do the trick,
but unfortunately for this image, it just made the gray, grayer, so once
I tried it, I hit Cancel instead of OK. Of course, to adjust the sky,
you’ll have to select it first. You can use any selection tool you’re
comfortable with, but for something simple like this, I usually just use
the Magic Wand tool (press Shift-W until you have it; it’s nested with the Quick Selection tool).
 | Step Two. | Click
the Magic Wand tool on the gray sky to select it. I set my Tolerance
(up in the Options Bar) to 10, so it doesn’t accidentally select the
buildings at the bottom of the image, as well (when I tried my usual
Tolerance setting of 20, it selected too much). At 10, one click won’t
select the entire sky, so press-and-hold the Shift key and click in any
areas it didn’t select (it may take you a few Shift-clicks to get the
whole sky selected). Now, although this isn’t exactly what this project
is about, you could paste a totally different image of clouds into this
selected area. You’d do that by opening a photo of clouds, pressing Command-A (PC: Ctrl-A) to Select All, then pressing Command-C (PC: Ctrl-C)
to Copy that image into memory. Then, you’d switch back to the first
image, go under the Edit menu, under Paste Special, and choose Paste Into to paste the clouds into your selected area.
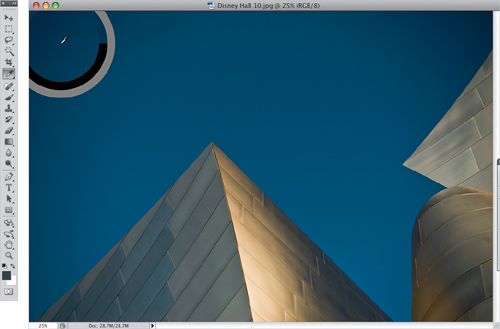
 | Step Three. | Instead,
we’re going to open a photo that has a sky color we like .
Once you open the image, switch to the Eyedropper tool (I),
and click once on the darkest blue area in the image (as shown here) to
make that your Foreground color. Now, press the letter X
to swap your Foreground and Background colors, then click the
Eyedropper on the brightest blue in the photo (lower in the sky), so
that now your Foreground is a lighter blue, and your Background is a
darker blue.
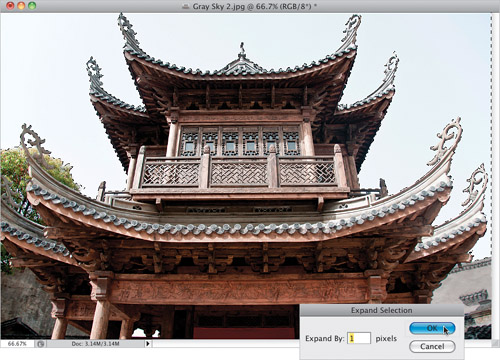
 | Step Four. | If
you’ve never used the Magic Wand tool before, you’ve already learned
that sometimes it leaves little white gaps where it didn’t quite select
every little pixel. That’s why, when I use the Magic Wand tool to select
something like a sky, I usually expand the selection outward by 1 pixel
to pick up that little edge pixel it sometimes misses. To do that, go
under the Select menu, under Modify, and choose Expand. When the Expand Selection dialog appears (shown here), enter 1, and click OK to grow your selection by 1 pixel.
Tip: The Color Selector Ring
That ring that appears
when you use the Eyedropper tool is new in CS5, and it’s there to help
you see which color you’re selecting. The outside ring is a neutral
gray, which just helps to make sure you’re seeing the right color
without being influenced by other colors around it. The bottom half of
the inside ring shows the old color, and the top half shows what your
Foreground color would change to if you clicked right now.
| Step Five. | Go
to the Layers panel and add a new, blank layer by clicking on the
Create a New Layer icon at the bottom of the panel, then switch to the
Gradient tool (G), and click-and-drag
your gradient from about the bottom 1/3 of the photo upward to about
the top 1/3 (the light blue color should be at the bottom of the
gradient). This fills the photo with a gradient made up of your
Foreground and Background colors (as seen here). For some images, you
can leave this gradient as is, but I think it usually looks a little too
fakey, which is why there’s a Step Six.
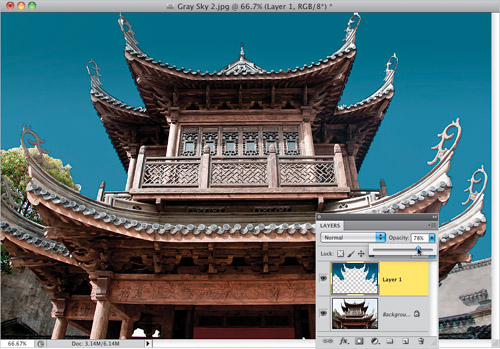
 | Step Six. | First, press Command-D (PC: Ctrl-D)
to Deselect, then go to the Layers panel and lower the Opacity for this
gradient layer until the sky looks more realistic and blends in better
with the rest of the image (in the image shown here, I thought that was
around 78%, but you’ll have to make the call on an image by image
basis).
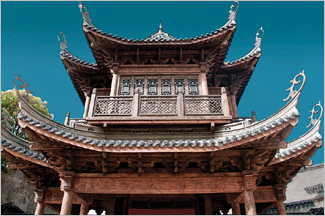
 |
Before
After
|