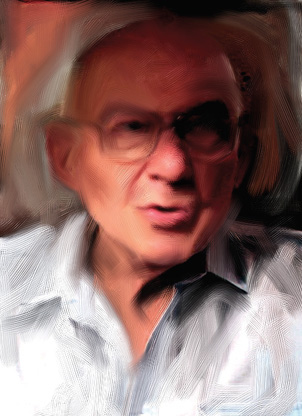
The Shadows Know!
The version of John with Modern Color Scheme and
Desaturation throws much of his face into deep shadow. To exploit that,
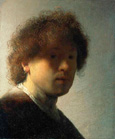
let’s use a painterly style reminiscent of Rembrandt, whose
self-portrait at age 22 is shown in Figure 5. Chiaroscuro refers to the way this old master brought forms out of the shadows. Or maybe it’s a fancy Italian dessert.
|
According to Wikipedia.org, chiaroscuro (Italian for clear-dark) is defined as “a bold contrast between light and dark.” Tiramisu (Italian for pick-me-up) is made from ladyfinger cookies, espresso coffee, mascarpone cheese, eggs, cream, sugar, marsala wine, cocoa, and rum.
|
This time we’ll use nothing
but Impasto all over the image. Find the Smeary Varnish variant in the
Impasto category. Or you can import the custom palette for this project,
called Impasto Smear. There are three items in this palette. Two are
Impasto brushes, and the third is a Cloner variant that has a pleasing
Impasto quality, the Oil Brush Cloner.
Use File > Clone to make a copy of the image.
Don’t use Quick Clone because you don’t want the copy deleted. You’ll
be working directly on the copy, blending edges and mixing adjacent
colors while applying thick juicy brush strokes.
|
Painter’s Impasto depth effect looks strange at
magnifications other than 100 percent, so plan either to work on this
image at actual size or to view it frequently at full size. Consider
changing size or resolution of the source image before you make the
clone copy.
|
Notice that the Resat (resaturation) value for
Smeary Varnish is zero, indicating that no new color will be applied.
Play a bit with this brush to get the feel of it and consider tweaking
its behavior. Figure 6
shows a practice area made using the Paint Bucket and a gradient fill.
The long squiggles show that this brush picks up color at the beginning
of a stroke and continues to smear that same color for the entire length
of the stroke. You can take advantage of that fact when you work.
Notice in the upper left how color strips are blended with short
overlapping strokes. The three straight horizontal strokes at the bottom
show different values for the Feature setting in the Property Bar. The
default value is 3.0, used in the center stroke. Higher amounts create
more space between bristles, and reduced amounts compress bristles. The
magenta swirl at the top of the image shows what happened when Resat was
turned up, allowing the current selection in the Colors Palette to be
applied.

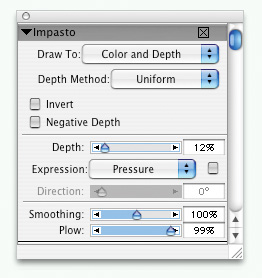
Another variable that influences the look of an
Impasto stroke is the amount of depth. This control is not available on
the Property Bar but is found in the Brush Controls Palette via the
Window menu. Figure 7
shows the Impasto Control Palette. Notice that the default depth for
Smeary Varnish is 12%. The vertical squiggles on the extreme right of
the practice area show the result of increased values for depth.
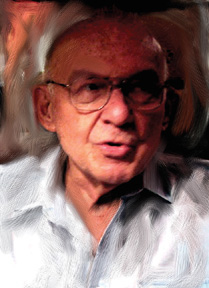
Begin working on the clone copy with Smeary
Varnish. I applied a variety of strokes to the background and John’s
shirt, shown in Figure 8.
|
Since you are not tracing or using Clone Color
when you smear, are you wondering why you needed to clone the image in
the first place? It’s so that you can bring back any lost details in a
painterly style. That’s what the Opaque Round Impasto brush in the
palette is for. It has 99% Resat. So just enable Clone Color, and you’re
good to go (back). Try the Oil Brush Cloner for a slightly different
kind of “back stroke.”
|
So with the Clone Color safety net in place, you
can feel free to smear to your heart’s content! In general, short
strokes will work better, especially on details in the face. A smaller
brush size will enable more control for those details. Use the bracket
keys for quick size changes. As with other techniques, it’s a good idea
to pay attention to the curves and shapes of your subject and use them
to guide your brushwork. Also, soften harsh edges. Figure 9 has my finished painting. Rembrandt’s reputation is safe.
