A woodcut or wood block
print is a labor-intensive technique that involves making several
“plates,” each carved into the surface of the wood to generate a portion
of the final image. Every plate must be inked by hand and carefully
lined up, or registered,
so that it is in the proper position for pressure to be applied
manually or with a special press. The procedure is time-consuming,
painstaking, and messy—did I mention you have to use sharp tools and
could easily hurt yourself?
What a Relief!
You’ll stay clean and
relatively safe using Painter’s Woodcut effect. Incidentally, woodcuts
are considered relief prints because ink is applied to the uncut
surface, while the incised lines and carved out areas of the block leave
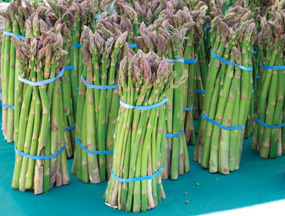
the paper unmarked. A good candidate for the woodcut look is an image
with strong line definition or bold textures. Let’s find a source image
in the Produce section of the Things > Food folder on the CD. I chose
Asparagus.jpg, shown in Figure 1. Another good choice is Pineapple_pile.jpg.
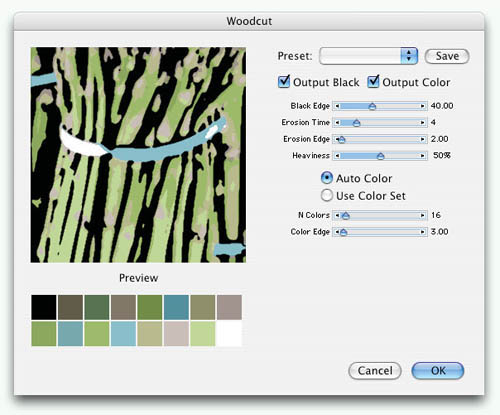
With your source image open, choose Effects > Surface Control > Woodcut and notice the array of settings available. Figure 2
shows the Woodcut dialog box. Notice that settings for Output Black and
Output Color are separate, and you can turn off either one. We’ll take
advantage of the independence of black from color in our preparation, so
cancel the effect for now. Make a copy of the image (Select > All,
then Edit > Copy) and use Edit > Paste in Place. Painter will
automatically make a new layer for the copy. Now you can apply color
effects to the canvas and black to the layer copy.
Turn off visibility of
the layer copy, and target (highlight) the canvas. Open the Woodcut
effect again. If it’s the last effect you invoked (even if you cancelled
it), it will be at the top of the Effects menu, so it’s easy to find
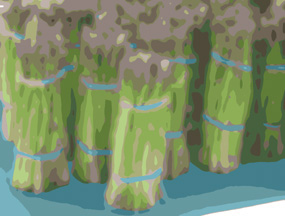
again. Disable Output Black and move the color sliders around until you
like what you see in the Preview window. Traditional woodcuts tend to
have a limited number of colors, so I reduced the N Colors to 16. I also
moved the Color Edge slider up to 25. This looked like the right amount
of simplification of color shapes. You can enable Output Black and
fiddle with those controls now to envision the final effects, but turn
it off again before you click OK. Only the Color Output layer is shown
in Figure 3. I accepted the default Auto Color, but imagine the fun you can have with an alternate color set.
Time to switch our
attention to the layer copy. Make it visible and highlight it. Call up
the Woodcut effect again. There’s a handy keyboard shortcut for the most
recent effect: Cmd/Ctrl+/ (forward slash). Use Output Black this time,
with Output Color disabled, and your best judgment about what settings
produce a pleasing amount of black detail. I used a high setting for
Black Edge and low values for the other variables. Click OK and you’ll
get a black-and-white result. Do you recall how to make the white parts
of the layer transparent so the canvas colors can show through? If you
said Gel or Multiply composite method, you’re absolutely right! But
check out Soft Light, too. It’s more subtle, and that’s not always a bad
thing.
So one reason to have the
effect on two separate layers is to play with composite methods. Here’s
another: you can create the effect of imperfect alignment by shifting
the layer a few pixels to the right or left and up or down. Figure 4
shows my finished woodcut with the layers just enough out of register
to help create the illusion that this is a fine art print made the hard
way.

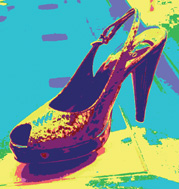
Faux Silkscreen
A silkscreen print, or serigraph,
is created by squeezing ink through a fine mesh onto paper or t-shirts,
fabric, whatever. An image is created because parts of the mesh screen
are protected from the ink with some kind of resistant fluid, or resist.
As with relief prints, several passes can be made using different
screen designs and different colors. Photographic images can be
transformed into silkscreen graphics, and these are most successful when
the original images are simplified.
Well, Painter has a
Serigraphy effect in the Surface Control group, right near the Woodcut
effect. But we’re not gonna use it. We can get better control and more
exciting options using another combination of effects to imitate a
silkscreen print.
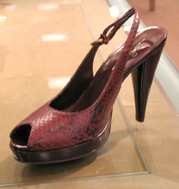
Make a copy of the shoe on
another layer, as you did for the Woodcut exercise. We’ll use Effects
> Surface Control > Apply Screen on the new layer. (It doesn’t
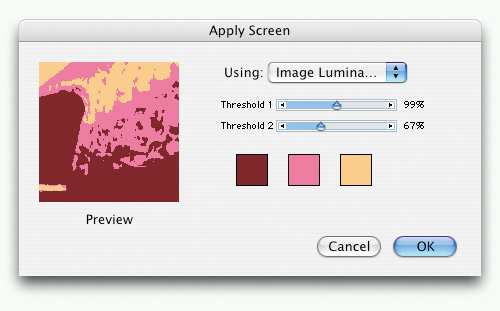
matter if you start with the canvas image.) The Apply Screen dialog,
shown in Figure 6,
allows you to reduce the full range of tonality to just three flat
colors—any three colors you want. You also get to determine the
threshold for both color changes. Click on a swatch to pick a color,
then experiment with both Threshold sliders. Choose settings that will
enhance the snakeskin texture. Be sure to switch to Image Luminance in
the Using field. My results, shown in Figure 7,
include some accidental-looking bits of pink in the background. These
are great, and don’t even think about eliminating them! They give a
realistic, gritty quality to the image.
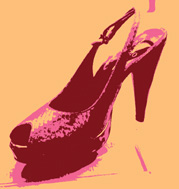
This
is already a bold graphic that could be used in a print ad or poster.
But you still have another layer to play with. Choose Effects > Tonal
Control > Posterize for the second copy, with four levels. Now comes
the fun of exploring different composite methods. You might like
several combinations, so be sure to save each one. Can you guess which
composite method is used in Figure 8?