Positioning text vertically
By
default, the first line of text is placed at the top of a box, and the
text flows down with line spacing controlled by leading. The placement
of the first line is controlled by the First Baseline settings in the
Text tab of the Modify dialog box (Item menu). You can change the
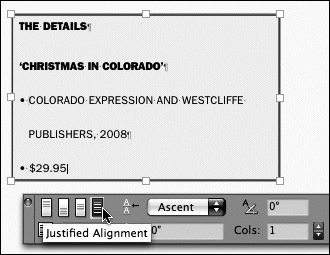
positioning by clicking the Vertical Alignment icons on the Text tab of
the Measurements palette (Figure 3). From left to right, the options are Top, Centered, Bottom, and Justified.

For justified
vertical alignment, QuarkXPress overrides the paragraph leading and
space before and after paragraphs to evenly spread the text throughout
the box. You can specify the maximum amount of space added between
paragraphs in the Interparagraph ¶ Maximum field on the Text tab of the
Measurements palette or Modify dialog box. The Justified Alignment
option works best if you remove the last paragraph return in the box.
Specifying text insets
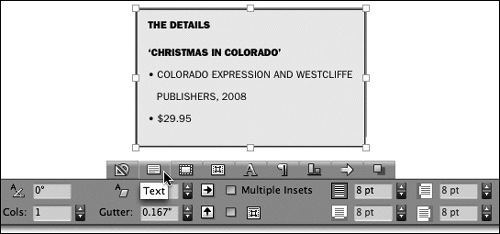
When
a text box has a background color or frame, you often need to inset it
from the edges of the text box. To do this, enter a value in the Inset
Text on All Edges field on the Text tab of the Measurements palette (Figure 4). For rectangular text boxes, you can check Multiple Insets and enter values for the Top, Bottom, Left, and Right insets.

Using a baseline grid
A baseline grid consists
of horizontal lines that text “sits” on. Setting up a baseline grid for
an entire document or an individual text frame makes it easy to align
text horizontally across columns regardless of varying leading and
spacing values before and after paragraphs. Generally, the distance
specified between gridlines in the baseline grid is the same as the
leading value for body text (around 12 points, for example). Some
graphic designers swear by the baseline grid for carefully positioning
text, whereas others find it too formulaic.
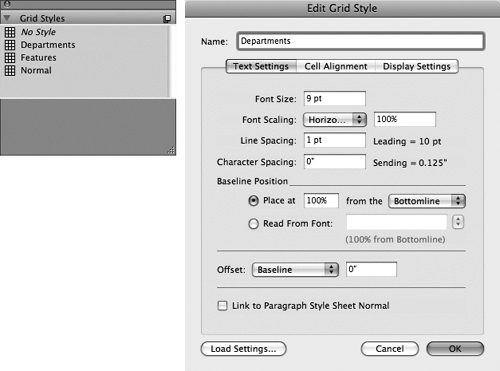
To create a baseline
grid for a master page, choose Page > Master Guides & Grid when a
master page is displayed. To create a grid for an individual text box,
use the Grid Styles palette (Window menu) shown in Figure 5.
Click the palette menu and choose New to open the Edit Grid Style
dialog box and set up the spacing and guide colors for the baseline grid
(Figure 6).
You can then drag grid styles from the Grid Styles palette to
individual text boxes. Choose View > Page Grids and View > Text
Box Grids to display baseline grids onscreen.

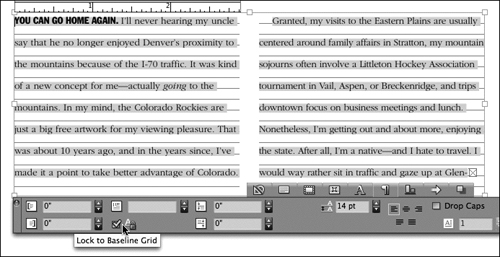
Once
you set up a baseline grid for a page or text box, you still need to
“snap” paragraphs to it. Select the paragraphs and click Lock to
Baseline Grid in the Text tab of the Measurements palette (Figure 7). You can also check Lock to Grid in the Formats tab of the Paragraph Attributes dialog box (Style menu).
