2.2. Registering an InContext Editing site
Now that you have your Web
page designed with all the InContext Editing regions in place and
available CSS classes declared, how do you get online with the Adobe
service? Here's the process:
Publish your pages as you would normally to your site.
Make sure to put the includes folder in the site root, with all the generated InContext Editing files, online.
Send invitations to your client and any other people you want to provide editing access.
The site registration
procedure is very straightforward and — for the time being — free.
You'll need your site's details, including FTP address, username, and
password. You're not hosting your pages on the Adobe site, but you are
granting them access to your site and the ability to make changes. When
you invite people to be an editor on the site, you'll have an
opportunity to assign them a specific role: Editor, Publisher, or
Administrator. The differences between these roles are detailed later in
this section.
To register a site for InContext Editing, follow these steps:
Log in with your Adobe ID.
If you don't have an Adobe ID yet, click the Join Now button and follow the prompts.
From the column labeled Actions, click Register Website.
You
can also learn more about working with InContext Editing from here and,
later, use this page to view and manage any registered sites.
When the confirmation dialog box appears, click Continue.
In the Reconfirm Password dialog box, re-enter your password and click OK.
When the Register Website dialog box appears, enter the following information:
Website Name: Enter a name for the site to be displayed in the InContext Editing interface.
Website Address (URL): Enter the Web address.
Connection Method: Choose either FTP or SFTP.
Use Passive FTP: Toggle the option on to use Passive FTP when required.
Hostname[:Port]: Enter the FTP address with port number, if required.
Host Directory: Enter the name of the folder containing your Web pages.
Username: Enter the username for the account.
Password: Enter the password for the account.
Default Pages: If the default page for the site is not listed, enter it.
Media Directory: Enter the folder you want to hold images and other media uploaded by InContext Editing.
Click
Test. If the connection was not successful, an alert is displayed and
you are returned to the dialog box. If successful, the Register Website
dialog box closes.
A list of
all your registered sites is now displayed; this is the same screen that
is displayed when you choose to View All Websites and is your home for
managing the sites.
Click the name of the just-registered site.
Currently, only one person is a designated user of your site: you. The next step is to invite further users.
When the next dialog box opens (see Figure 5),
enter the name of the person you want to invite and his or her e-mail
address. In addition, assign a role to them from the Privileges list:
Administrator, Publisher, or Editor.
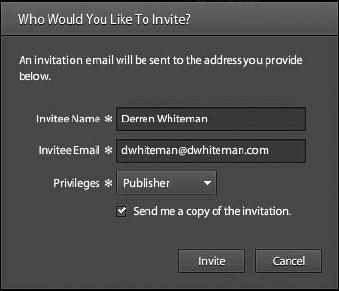
All roles can
create pages, edit content, save drafts, and duplicate pages. Only
Publishers and Administrators can publish pages. Administrators have the
additional access to configure the site, edit FTP settings, and invite
and manage users.
The e-mail sent contains a
link to the InContext Editing site where a portion of the page asks
users to accept the invitation by signing in with their Adobe ID. After
signing in, a dialog explains that they have been invited to edit the
listed site; they can either accept or decline the invitation. Should
they accept, the home page for the site appears from which they can
navigate to any InContext Editing-enabled page.
2.3. Making edits online
The InContext Editing
experience is easy-to-use and intentionally simple, with a limited
number of options. Once editing is enabled, a toolbar appears at the top
of the browser. Editable and repeating regions are identified with a
small "i" in the upper-right corner of the page area. When you select an
area for editing, the rest of the page dims slightly, highlighting the
editable area. After the editing is finished, the page can be saved as a
draft and, if the user has the proper privileges, published.
To edit an InContext Editing page, follow these steps:
Navigate to an InContext Editing page and press Ctrl+E (Command+E).
When the login screen appears, enter your username and password. Click OK.
The initial InContext Editing toolbar appears from which you can either choose to edit or duplicate the page.
Click Edit.
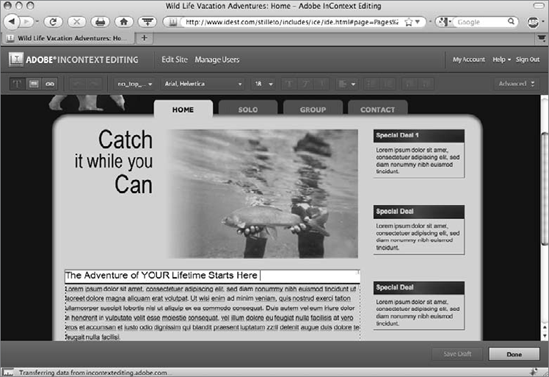
A secondary toolbar appears with several editing possibilities, initially set to display text options (see Figure 6).

Place your cursor in any editable region, as identified by a small "i" in the upper-right corner of the area.
InContext Editing dims the surrounding area to allow you to focus on the editable area, as shown in Figure 7.
Make any desired changes.
In
addition to editing text, you can add images from the site or your
system. Similarly, you can add links to existing Web pages (either in
your site or elsewhere on the Web) or link to a document on your system,
which will be automatically uploaded.
When you're finished, click Save.
InContext
Editing displays a dialog box asking if you'd like to save the changes,
discard them, or continue editing. Click Save Changes.
To push your edits live, click Publish.
The
Publish button only is available if the user is a Publisher or
Administrator. Editors can only edit, save, or discard drafts.
To see your page as others do now, click Sign Out.
There's no limit to the
number of pages in a site that can be converted to InContext Editing.
Pages are easily set up and a breeze to edit in the browser. As of this
writing, Adobe offers a free demo on the InContext Editing site so you
can try it out yourself — give it a spin and see if InContext Editing is
right for you and your clients.