In this article, you’ll take your apps
to the next level of integration by adding access to the iPhone’s
address book, email, and mapping capabilities.
Address Book
The
address book is a shared database of contact information that is
available to any iPhone application. Having a common, shared set of
contact information provides a better experience for the user than if
every application manages its own separate list of contacts. With the
shared address book, there is no need to add contacts multiple times for
different applications, and updating a contact in one application makes
the update available instantly in all the other applications.
iOS provides comprehensive
access to the address book database through two frameworks: the Address
Book and the Address Book UI frameworks. With the Address Book
framework, your application can access the address book and retrieve and
update contact data and create new contacts. The Address Book framework
is an older framework based on Core Foundation, which means the APIs
and data structures of the Address Book framework are C rather than
Objective-C. Don’t let this scare you. As you’ll see, the Address Book
framework is still clean, simple, and easy to use, despite its C roots.
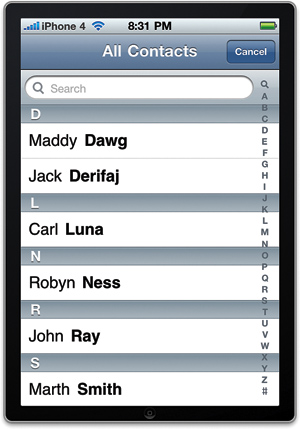
The Address Book UI
framework is a newer set of user interfaces that wrap around the Address
Book framework and provide a standard way for users to work with their
contacts, as shown in Figure 1.
You can use the Address Book UI framework’s interfaces to allow users
to browse, search, and select contacts from the address book, display
and edit a selected contact’s information, and create new contacts. As
with the iPod and Photo controls in the previous hour, the address book
will be displayed over top of your existing views in a modal view.

Email
In
the previous hour, you learned how to show a modal view supplied by the
iOS to allow a user to use Apple’s image picker interfaces to select a
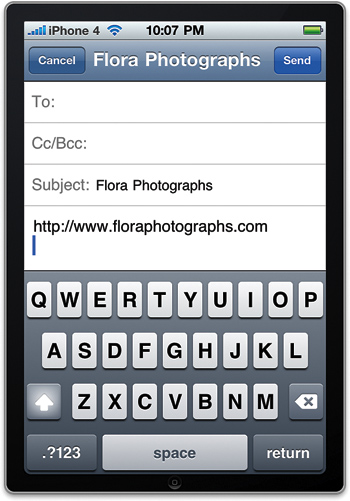
photo for your application. Showing a system-supplied modal view
controller is a common pattern in iOS, and the same approach is used in
the Message UI framework to provide an interface for sending email, as
demonstrated when sending a link from Mobile Safari (see Figure 2.)

Your application will
provide the initial values for the email and then act as a delegate
while temporarily stepping out of the way and letting the user interact
with the system-supplied interface for sending email. This is the same
interface users use in the Mail application to send email, and so it
will be familiar to them.
Mapping
The
iPhone’s implementation of Google Maps puts a responsive and fun-to-use
mapping application in your palm. You can bring this same experience to
your apps using Map Kit. Map Kit enables you to embed a map into a view
and provides all the map tiles (images) needed to display the map. It
handles the scrolling, zooming, and loading of new map tiles as they are
needed. Applications can use Map Kit to annotate locations on the map.
Map Kit can also do reverse geocoding, which means getting place
information (country, state, city, address) from coordinates.
Watch Out!
Map Kit map tiles come from
the Google Maps/Google Earth API. Even though you aren’t making calls to
this API directly, Map Kit is making those calls on your behalf, so use
of the map data from Map Kit binds you and your application to the
Google Maps/Google Earth API terms of service.
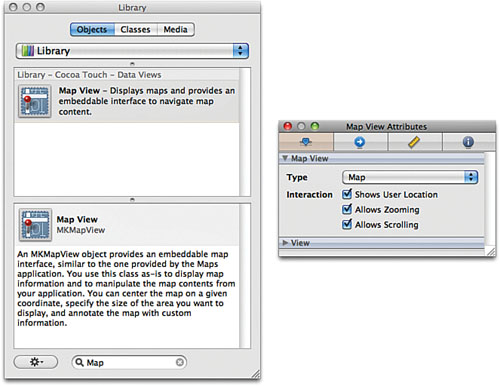
You can start using Map Kit with no code at all, just by adding the Map Kit framework to your project and an MKMapView
instance to one of your views in Interface Builder. After a map view is
added, four attributes can be set within Interface Builder to further
customize the view (see Figure 3).
You can select between map, satellite, and hybrid modes; you can
determine whether the map should use Core Location (which you’ll learn
about in the next hour) to center on the user’s location; and you can
control whether the user should be allowed to interact with the map
through swipes and pinches for scrolling and zooming.

Annotations
Annotations
can be added to maps within your applications, just like they can in
Google Maps online. Using annotations usually involves implementing a
new subclass of MKAnnotationView that describes how the annotation should appear and what information should be displayed.
To make our lives a little easier, Apple has implemented a subclass of the MKAnnotationView called MKPinAnnotationView
that displays a pushpin on the map, along with a simple callout. We’ll
take advantage of this class in our tutorial, displaying a pin based on a
location the user selects. This will require implementing an MKMapView delegate method, called mapView:viewForAnnotation, that will allocate and configure an instance of MKPinAnnotationView.
For each annotation that we add to a map, we need a “place mark,” MKPlaceMark,
object that describes its location. For the tutorial this hour, we’re
only going to need one—to show the center of a chosen ZIP code.