1. Starting the Eclipse IDE
Starting Eclipse isn't like
starting most other Windows programs. Even though we used the full
installer to install Eclipse, the installer didn't create any program
groups or icons on the Windows Start
menu, so you can't launch it from there like a typical application.
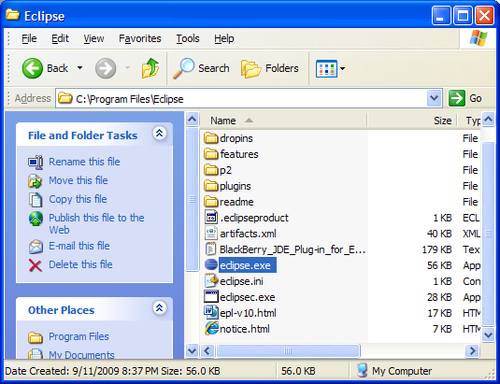
Instead, you need to open a Windows Explorer and browse to the installed
directory (the default in the setup program was C:\Program Files\Eclipse). Once there, double-click the Eclipse program and it will start up.
Your Explorer preferences may be set up slightly
differently than in the following screenshot. The important thing to
look for here is the file with the purple globe icon in it. The name may
be Eclipse or Eclipse.exe, again depending on your preferences.
Now, even though you can do this each time, it is
somewhat of a pain to do. There are a couple of different approaches
that you can take to make this easier. You could make a program group on
the Start menu and place a shortcut
to Eclipse in that group; however, it is a more advanced option. A
simpler option is to place a shortcut to Eclipse on the desktop so that
next time launching the program is a lot easier.
Like a lot of programs
available today, Eclipse has a number of steps that you have to follow
the first time you start the application.
2. Launching Eclipse for the first time
Double-click the Eclipse icon or shortcut.
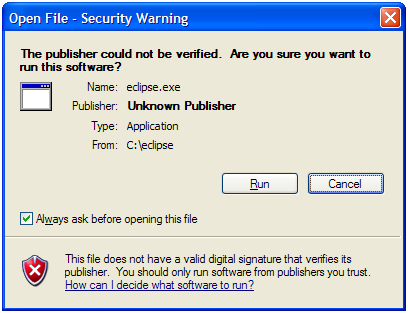
If
you installed Eclipse to a location other than the default, or you
installed Eclipse by simply downloading it directly, you may get a
warning from Windows when running the application. If this happens,
click on the Run button to continue.
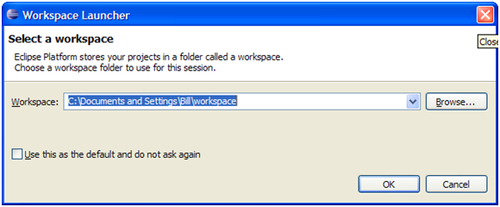
Place a check in the Use this as the default and do not ask again checkbox and then click on the OK button to accept the default workspace location.
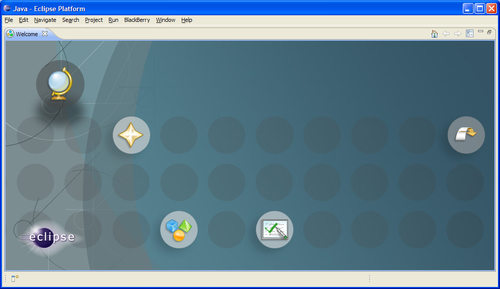
The
next screen to be shown is a stylish, but not a very useful, welcome
screen. The important part of the welcome screen is the workbench icon,
shown as a curved arrow icon, located on the right side of the screen.
The workbench is where you will do all the real work in developing an application. Click on the workbench icon now.

What just happened?
When Eclipse is started for the first time, the
"Workspace Launcher" dialog is shown asking what location to use for
saving workspace and project files. It suggests a location in your user
directory, but you can change this to any directory you wish.
At the bottom of the dialog is a checkbox allowing
you to skip the dialog next time Eclipse is launched and it is a good
idea to check that checkbox. You can always open a different workspace
later through a menu item.
After getting past the "Workspace Launcher" dialog,
you are shown a stylish welcome page. From here you can peruse general
help, links, and samples that are pre-installed with Eclipse. Each
bubble on the welcome screen represents a different topic. These can be
useful for general Java programming, but they are not specific to
BlackBerry, so we won't be using any of them.
Next time you launch Eclipse, you won't start at this
screen, but there are some things that could be useful later,
especially if you will be doing Java application development for other
platforms. If you want to come back to this screen once you navigate
away from it, you can do so by using the 'home' icon in the upper-right
portion of the screen.

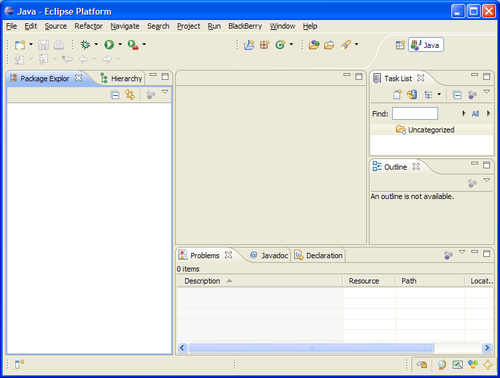
Once you get past the welcome screen you will see the
Eclipse workbench. The workbench should look familiar if you have used
other IDEs before-it's filled with lots of toolbars, windows, and other
tools that you will use when developing an application.
A note about workspaces
Eclipse uses the concept of a workspace as a way to
collect several projects so that they can be worked on together. In a
nutshell, a workspace is a container for projects. Many common IDEs also
use workspaces or similar concepts. In Microsoft Visual Studio, a
solution is a concept equivalent to an Eclipse workspace.
A project is the next level of container. A project
contains source files and generates a single compiled output, usually an
application. Generally, one workspace is used to hold all of the
projects for an organization, even if the projects are not necessarily
related.
In Eclipse the workspace is
tied to a directory, but in the JDE a workspace is a specific file.
Obviously, these two formats are not compatible. Fortunately, there is a
tool to import a JDE workspace into an Eclipse workspace, which is what
we will do shortly.