Word offers a gallery of several predefined header and footer designs, called building blocks,
that you can apply. Headers appear in the top page margin area, and
footers appear at the bottom. Headers and footers are a great way to
place repeating information on your document pages, such as a document
title, page numbers, company name, and so on. Word's predefined headers
and footers make it easy to insert the information.
Alternatively, you can create
your own header/footer building blocks — for example, one that contains
your name and contact information in the color and font of your choice —
and add that design to the gallery. That way, anytime you need to
insert that particular header or footer, instead of reconstructing it,
you can simply click it in the gallery.
In addition to creating
header/footer building blocks, you can also create building blocks with
other custom Office elements, such as cover pages, pull-quotes, and so
on. Building blocks might also contain specific text or a graphic that
you want to reuse throughout your Word documents.
1. Create a Header/Footer Building Block
 After designing the header or footer that you want to add to the header/footer gallery, select the text in the header/footer.
 Click the Insert tab.
 Click Header or Footer (depending on whether you created a header or footer).
 Click Save Selection to Header Gallery or Save Selection to Footer Gallery.
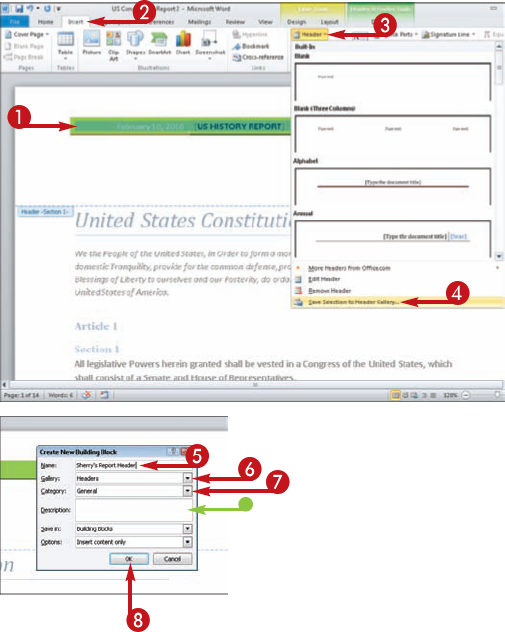
The Create New Building Block dialog box opens.
 Type a name for the header or footer.
 Specify the gallery in which the header or footer should reside.
 Select a category for the header or footer.
Optionally, you can type a description of the header or footer.
 Click OK.
The custom header/footer is added to the gallery.
2. Apply a Header/Footer Building Block
With the document into which you want to insert the header or footer open, click the Insert tab.
Click Header or Footer.
Click the header or footer you want to add. (You might need to scroll down in the gallery to locate it.)
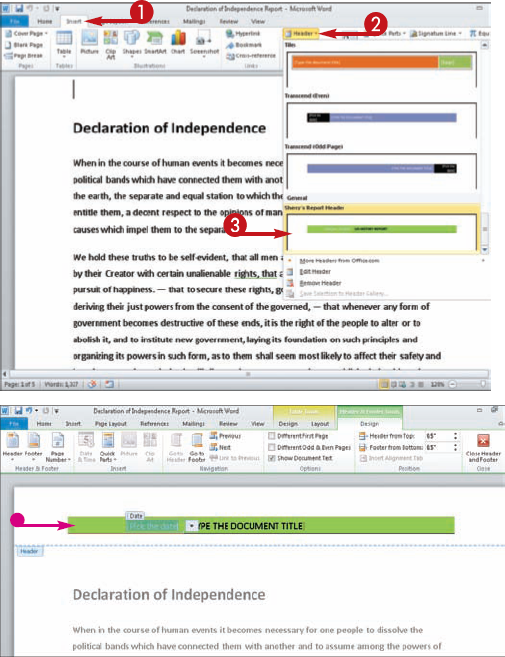
The header or footer is inserted on the document page.
|
Customize It!
If your document contains
section breaks, you can apply different headers and footers to each
section. Click in the section for which you want to create a unique
header or footer, click Header or Footer in the Insert tab, and click
Edit Header or Edit Footer. The Design tab appears in the Ribbon; click
Link to Previous to deselect it. Then create the new header/footer or
insert a header/footer building block from the gallery. (Repeat for each
section in your document.) Designing separate headers and footers for
even and odd pages is similar; just click the Different Odd & Even
Pages check box ( changes to changes to  ) in the Design tab instead of clicking Link to Previous and add the different headers/footers as normal. ) in the Design tab instead of clicking Link to Previous and add the different headers/footers as normal.
Apply It!
You can easily add headers
or footers in Word 2010 just by clicking the Insert tab on the Ribbon
and clicking the Header or Footer buttons in the Header & Footer
tool group. Either button displays a list of pre-set headers or footers
to choose from; you can you create your own from scratch by clicking
Edit Header or Edit Footer. |