Adjusting Page Margins
Margins
affect where data is printed on a page. They also determine where
headers and footers are printed. Occasionally, margins might need to be
changed to make room for a letterhead or logo on preprinted stationery.
When in Print Preview mode, Excel enables you to simultaneously alter
your column widths and margins.
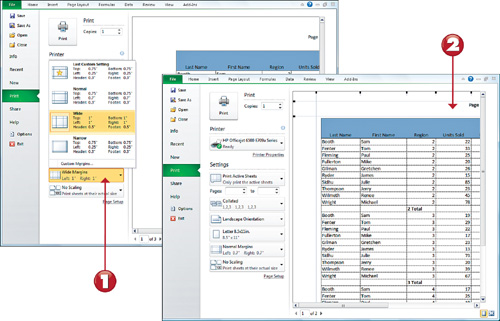
1. When in Print Preview mode, if you have a page that displays some carryover data from another page, click the Margins button. You can select from one of the default margin settings or customize.
2. Excel activates Print Preview’s margin lines. Press page up or page down to display the page in your worksheet on which you want to fit all the data.
Note: Entering Specific Margins
If you
need to enter specific margin measurements, the Page Setup dialog box
is a better option. Go to the Page Layout tab and click the Page Setup
dialog launcher. Once the Page Setup dialog box activates, you can click
on the Margins tab and alter the margins as necessary (Left, Right,
Top, Bottom, Header, Footer). Click the OK button to return to your
worksheet or Print to print immediately. |
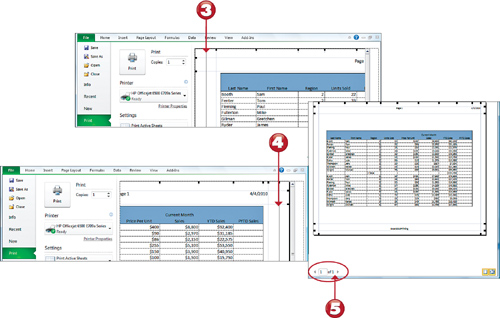
3. Drag the Left Margin line from the default 1” to 0.34”. (You can see the exact measurement in the bottom-left corner of the screen.)
4. Click and drag the Right Margin line from the default 1” to 0.34”. (Again, you can see the exact measurement in the bottom-left corner of the screen.)
5. Thanks to the margin change, the total number of pages to print is reduced.
Inserting Page Breaks
When
a worksheet page is filled to the margins with data, Excel
automatically inserts a page break for you. There may be times, however,
when you want to manually insert a page break. For example, if you
create a report with multiple topic sections, you might want each topic
to begin on a new page. Inserting a page break enables you to print each
page separately. The best way to insert page breaks is using Page Break
Preview view (instead of Normal view).
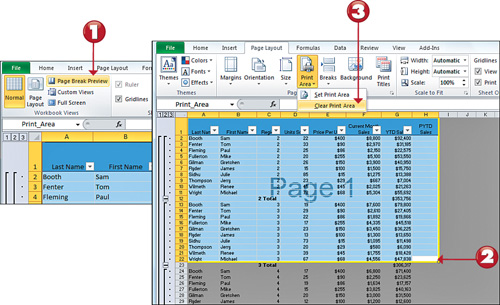
1. Open the View tab and choose Page Break Preview to change to Page Break Preview mode.
2.
Press the page up and page down keys on the keyboard to move through
your worksheet in Page Break Preview. Notice that cells outside the
print area are grayed out.
3. Open the Page Layout tab, choose Print Area, and select Clear Print Area to eliminate any current print area settings.
Note: Removing Page Breaks
To remove
a page break, place the active cell so that one of the cell borders is
touching the page break line. Then, select the Page Layout tab and
choose Remove Page Break. (You can also do this in Normal view.) |
Note: Page Break Intersection
A page
break is always inserted as an intersection between rows and columns. If
the active cell isn’t in the first column, the page break will be
inserted as four quadrants. |
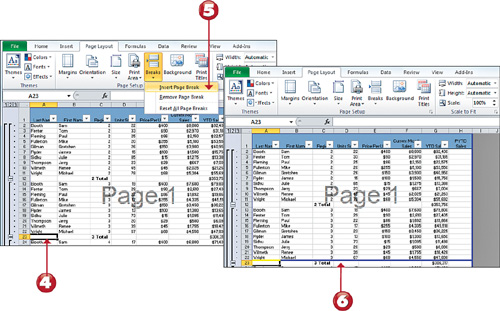
4. Click the cell below and in the left-most column in which you want to insert a page break.
5. On the Page Layout tab choose Breaks, Insert Page Break to insert the page break.
6. The page break is inserted.
Tip: Why Not Simply Add More Rows
Suppose
you want each of two tables that fit on one page to print on separate
pages. Instead of inserting a page break, you could add several blank
rows to the end of the first table, which automatically kicks the second
one onto a second page. If, however, you later add any rows to the
first table and forget to delete the same number of blank rows before
the second one, the tables might not print correctly. |