If you’d like a
refresher about notebook creation and to see how multiple notebooks show
up on the navigation bar, follow these steps to create one more
practice notebook.
Creating a New Notebook
To create a new, blank notebook, follow these steps:
1. | In OneNote 2010, click the File tab and then click New.
|
2. | Under Step 1 (Store Notebook On), click My Computer.
|
3. | Under Step 2 (Name), type a name for the notebook. For example, you could call this notebook Practice Notebook.
|
4. | Under Step 3, leave the suggested file path without making any changes.
|
5. | Click the Create Notebook button near the bottom to finish creating the notebook.
|
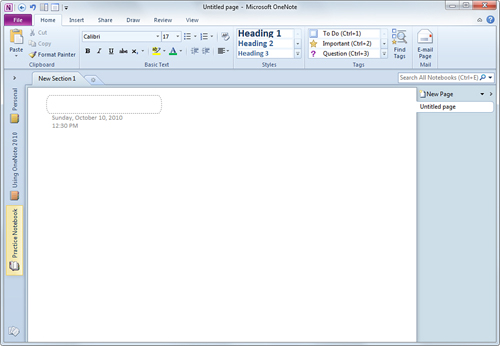
At the top is
the sample notebook called “Personal.” This is the notebook containing
useful tips that OneNote created after you first installed it. And below that is the new notebook called “Practice Notebook,” which you created in the previous steps (see Figure 1).
|
You can change the order of
notebook icons on the navigation bar. Although this doesn’t change
anything about the notebooks themselves, it can make it a bit easier to
keep the notebook you use most often near the top. For example, to move
the Practice Notebook to the top of the navigation bar, click its
notebook icon and hold the left mouse button while you drag the icon
upward, until it has switched positions with the Personal notebook icon.
|
Before you move on to
working with the sections and pages in the notebook you just created,
take a moment to learn a couple of additional notebook tasks—closing and
deleting notebooks.
With OneNote 2010, manually closing and reopening notebooks between working sessions isn’t necessary.There’s no Save functionality in OneNote because it automatically and
continually saves and remembers everything you do. This means that you
can safely shut down OneNote at any time without first closing any
notebooks that you have open. All of your information will be saved
automatically—even across multiple notebooks that may be stored in
different locations. Whenever you next start OneNote, all of the
notebooks that appeared on your navigation bar will be automatically
reopened.
Closing a Notebook
Over time, you might be
working with more and more notebooks, and the navigation bar might soon
fill up with numerous notebook icons. If you prefer to keep things
visually uncluttered, you can choose to temporarily close any notebooks
that you’re not actively working with (for example, notebooks for
projects that you have completed and won’t be working on in the future).
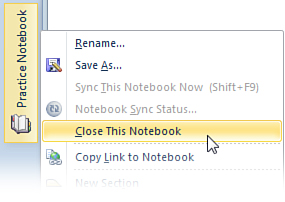
1. | On
the navigation bar, right-click the notebook that you want to close. In
this example, right-click the notebook called “Practice Notebook” (see Figure 2).
|
2. | On
the menu that appears, click Close This Notebook. The notebook icon for
the Practice Notebook disappears from the navigation bar.
|
|
When you close a notebook, it
is not deleted. Like closing a book and putting it back on the shelf,
the notebook still exists. OneNote simply closes the file and removes
the notebook icon from the navigation bar to make room for other
notebooks you might actively be working in. To put a notebook back on
the navigation bar, simply reopen it.
|
Opening a Notebook
To reopen the sample notebook again so that it appears on the navigation bar, follow these steps:
1. | On the File tab, click Open.
|
2. | Click the Open Notebook button.
|
3. | In
the Open Notebook dialog box, navigate to your OneNote Notebooks folder
(which is typically located inside of your My Documents or Documents
folder).
|
4. | Double-click
the folder called Practice Notebook and then click Open. OneNote
immediately loads the sample notebook again and displays the last page
you had open at the time when you closed the notebook.
|
|
There’s
a faster way to reopen notebooks that you have recently closed. On the
File tab, click Open and then look for the notebook’s name in the
Recently Closed Notebooks list. Clicking a notebook’s name in this list
will instantly reopen the notebook and return you to the page you last
had open.
|
Deleting a Notebook
I’m including the following
steps only for future reference, as people often wonder about the fact
that OneNote does not have a built-in command for deleting notebooks.
When you decide you no
longer need a specific notebook (including all of its sections, pages,
content, and embedded files), you can delete it. Doing so destroys the
notebook, so do this only if you’ve made a confirmed backup copy of the
notebook or you’re absolutely certain that the notebook and its contents
are no longer needed.
To delete a notebook and its contents, follow these steps:
1. | Open
Windows Explorer and navigate to the OneNote Notebooks folder, which is
typically located inside of your My Documents (or Documents) folder.
|
2. | Right-click
the folder matching the name of the notebook you want to delete and
then click Delete. Once deleted, the notebook is sent to your
Recycle Bin. To permanently destroy the notebook, right-click the
Recycle Bin icon on your Windows desktop and then click Empty Recycle
Bin.
|
|
Deleting a notebook from your
hard drive, from a Web server, or from a remote or shared location like
Windows Live SkyDrive permanently destroys the files. You cannot undo
this, and no one will be able to recover these files for you, so be sure
you only do this with notebooks you’re certain you will never need
again.
|
Now that you know the basics about notebooks, let’s learn a bit more about what makes up the contents of every notebook.