This section explains what a
master schedule is and how to create one. Master projects let you create
rolled-up reports across multiple projects and create external
dependencies between tasks in different projects.
1. Setting Up a Master Project File
A master project is a
file that contains inserted projects from other source files that can
be linked dynamically. If you choose to link to the source file, then
every time the source file is modified or changed in any way, the master
file is automatically updated to reflect those changes. You also have
the choice to make changes to project information while in the master
file; those changes are automatically reflected in the source file. In
other words, this is a bidirectional dynamic link.
If you choose not to link the inserted project file,
the current version of that file is inserted; there is no
synchronization between the files if one changes.
To set up a master project file, you can either
insert project files into an existing project file or create a new one
from scratch. In this example, you'll create a new project file from
scratch. Follow these steps to begin a new master project file:
Click the File tab to get to the backstage.
Under Available Templates, double-click Blank Project.
Click the File tab in the newly created project file.
Click Save As, and save the new blank project with an appropriate name, such as Master <_______> Project.
You now have a blank shell into which you can insert
subprojects or existing project files. Instead of entering tasks into
the Task Name column, follow these steps to insert existing project
files into the master project file, as shown in Figure 1:
Go to Project tab => Insert group, and click the Subproject button.
In the Insert Project dialog box, select the project file (or multiple files, using the Ctrl key) to be inserted.
Select the Link to Project option if you wish.
Click the Insert button to insert as read/write, or choose Insert Read-Only from the Insert drop-down list.
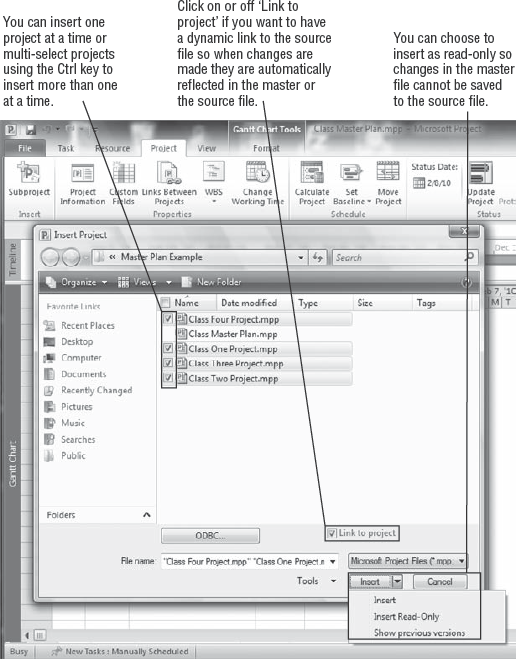
As you can see in Figure 1,
you have the choice to insert the project file as read-only. Doing so
allows the dynamic link to exist but doesn't let users of the master
file save any changes made to the source file. This is useful if you're
using the master file for reporting and communication purposes and you
don't want the users to make changes to the data in the source files.
|
I worked with a biotechnology company that needed to
track five milestones across each of its development projects. The
client wanted to be able to capture an overview of these milestones in a
one-page report. The company didn't want anyone to change the source
data from the master file; only project managers were allowed to make
changes to their respective project files. So, in this case, it made
sense to insert the project files into the master file as read-only.
After the master file was set up, I created a
filtered view specifically to display the five milestones across the
projects. Because the client wanted the milestones to be automatically
updated, project files had to be inserted with the Link to Project
option: that way, when a project manager updated the source plan, the
filtered view in the master file stayed in sync.
To generate the weekly milestones report across
projects, the client opened the master plan, clicked the Custom Filtered
view, and could quickly generate a report to print or copy into a
presentation.
|
After you create the master file, you can save it
with the inserted files embedded, so that the next time you open the
master file it automatically finds the source files. Because the
embedded files point to source plans in specific locations on your
network or hard drive, it's important to keep the source files in a
folder or location where they won't be moved. This way, when you open
the master file, Project will find the source files when it searches for
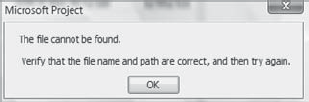
them using the embedded location. If you move the source files, Project
will force you to search for the inserted project; if it can't be
found, you'll get the message shown in Figure 2.
My recommendation is to keep the source files in the
same location and avoid moving them, so the master file is stable. If
you create a master file that isn't linked to the source file, then this
is a moot point, because the master file won't search for the source
files. This kind of master file, which doesn't link to source files, is a
static snapshot of the inserted files that can be saved as a one-off
file. Because master files are so easy to create in Project 2010, this
option is useful for sharing consolidated plans.
When you save a master file, you're first prompted to
save the master file, and subsequently you're prompted to save the
inserted files. If you make changes to the source files in the master,
you're prompted to save them; select Yes or No for each individual
inserted project, Yes to All, or No to All, to save or not save all the
projects at one time, as shown in Figure .
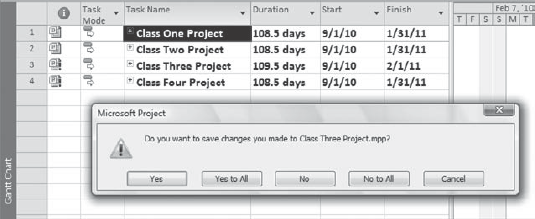
In Figure 14.3,
two of the inserted projects have red exclamation marks beside them,
indicating that they were inserted as read-only files. If you make
changes and try to save them, you'll be prompted to save under different
filenames.