4. Printing Complex, Mixed-Orientation Drawings
You may have a complex
drawing with multiple pages, different scales, different page
orientations, different sizes, and different background pages. I often
see Visio files that represent a “project” of drawings. They typically
include the following:
A title page explaining the purpose,
conventions, and symbols of the drawing. These are usually unscaled,
with landscape orientation.
A few pages
of floor plan layouts showing equipment locations, wiring paths,
lighting, and other technical details. These are usually scaled, with
landscape orientation.
Several pages of
detailed drawings showing elevation views of rack-mounted equipment and
other gadgetry. These scaled drawings usually have portrait orientation.
All
pages in the drawing that require a common frame, title, title block,
and company logo. These details are often on a single background page
shared by the rest of the document.
Visio
can handle printing such a document, but you should take extra care to
inspect each page in Print Preview and double-check your Page Setup
settings.
Because the file represents a project of drawings,
you usually want to print each page on the same size sheet of paper. So
check the Print Setup, Printer Paper setting in the Page Setup dialog
for each page in the document. (If your printer has multiple paper
trays, you may be able to send mixed-size pages to the same printer.)
If you have mixed landscape and portrait page
orientations across pages, be sure that the Print Setup and Page Size
settings for orientation agree for each page. The Page Setup dialog has
preview areas for both of these tabs that make it obvious when
orientations differ, and you receive a last-chance warning just before
printing if orientations don’t match.
After you’ve verified that the printer paper is the
same for all pages and orientations match, you can decide how to print
each page to that paper. If all your pages have the same size, you don’t
need to worry about this. Otherwise, turn your attention to the Print
Zoom setting and choose Adjust to 100% (or other zoom) or tile the
drawing using Fit to X Sheets Across by Y Sheets Down.
5. Printing Any Size Drawing on Any Size Paper
Interestingly, he never worries about the page size
of his Visio drawings at all. He freely drags, drops, connects, and
tweaks shapes all over the place and then resizes the page to fit the
content, using one of the following methods:
1. | Turning on AutoSize from the Design tab. Visio automatically adds and removes full page tiles as the diagram grows or shrinks.
|
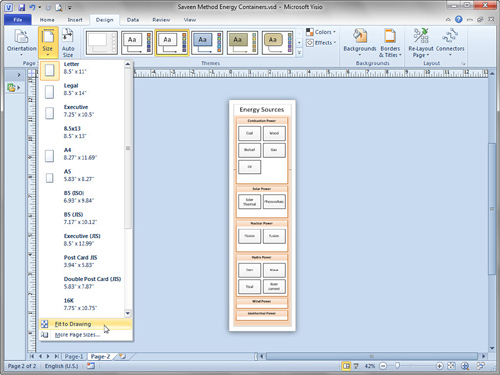
2. | Clicking
the Size drop-down on the Design tab and choosing Fit to Drawing at the
bottom of the list. The page contracts or expands to tightly enclose
all details.
|
3. | Manually resizing the page by holding Ctrl while dragging an edge of the page.
|
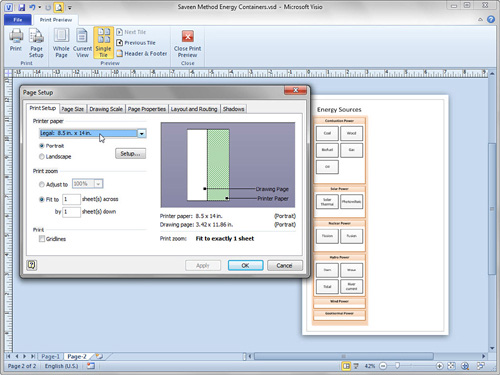
When it’s time to print, he uses only the Print Setup
tab in the Page Setup dialog. There, he chooses a paper size that
matches his target printer and sets the Print Zoom to Fit to 1 Page
Across by 1 Page Down. He can send his output to a normal office laser
printer for personal use or to a large-format plotter to create a poster
for his next meeting.
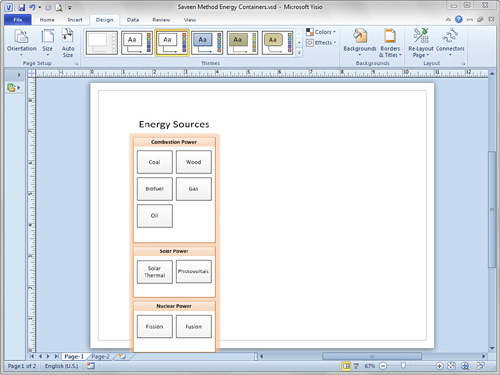
Figures 4, 5, and 6 illustrate this process for a very tall drawing.


I call this method of working
the “Saveen method,” but you might call it the “Don’t worry about page
size” method. If the actual, physical size of your printed document
isn’t important, and you don’t have style requirements or corporate
standards for page sizes, borders, and title blocks, this is a great way
to work.