NOW THAT YOU’VE CREATED the main document and have selected a data source, the next step is to enter the merge fields (also called merge codes) into the main document, thereby instructing Word exactly where you want those data fields placed.
You have the option of placing a group of
fields together or choosing the individual fields you want to enter. The
field groups come in the two different forms. The first group is for an
Address Block, which consists of the following fields: Title, First
Name, Last Name, Company Name, Address Line 1, Address Line 2, City,
State, and ZIP Code. The second group is for the Greeting Line, which
includes a greeting such as “Dear” or “To,” followed by the First Name
and Last Name, and then a punctuation choice, such as a comma.
Adding an Address Block
Begin by adding an Address Block. In the main
document, click the insertion point where you want the recipient name
and address. Choose Mailings > Write & Insert Fields > Address
Block. The Insert Address Block dialog box appears, as shown in Figure 1.
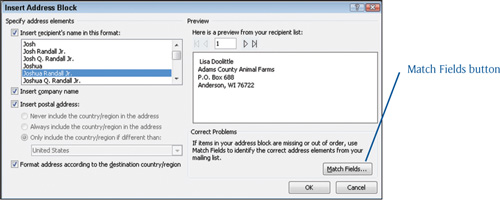
Since Word recognizes the individual fields—including
name, address, city, state, and ZIP—as part of the Address Block, using
the Address Block saves you the steps of inserting each of those fields
individually. You can, however, choose the style of Address Block you
prefer. Click on the various address formats and review in the Preview
panel just how your data looks with each format.
|
If the fields in your Address Block don’t match your
data, you can manually pair them together. For example, if you expect to
see someone’s first name, but instead you see their country, click the
Match Fields button to identify and match the fields.
|
Click
OK when you’ve decided on the format you want. Word returns to the main
document and inserts a field <> at the
insertion point. This is a hidden code to Microsoft Word. Don’t try to
just type <>.
Selecting a Greeting Line
Most form letters also include a personalized
greeting. Use the Greeting Line field box to assist you. Begin by
positioning the insertion point where you want the Greeting Line,
usually two lines under the Address Block. Choose Mailings > Write
& Insert Fields > Greeting Line. The Insert Greeting Line dialog
box appears (see Figure 2).
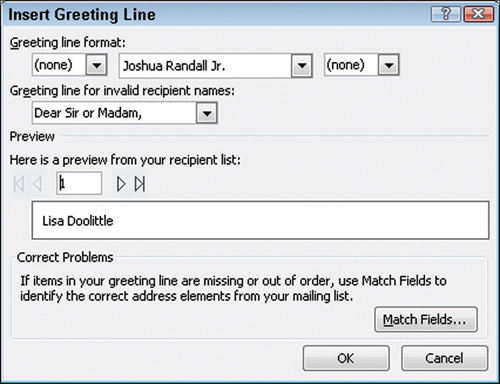
Select a greeting from the first drop-down list.
Choices include Dear, To, or nothing at all. From the second drop-down
list, select the name format you like best, and then from the third
drop-down list, choose a punctuation mark of comma or a colon, or choose
no punctuation.
In the event that one or more of your recipients
doesn’t have data in the first and last name fields, the Greeting Line
for Invalid Recipient Names drop-down list provides a couple of
alternatives. Select the one you prefer for your document. Or you might
have to click the Match Fields button and select the proper field.
Click the OK button, which returns you to the Word main document where you now see the <> field code.
Adding Individual Fields
If the field information you want to insert into your
document doesn’t fall into the Address Block or Greeting Line groups,
you can manually insert fields into desired document areas. Just click
the mouse pointer where you want the field to appear. Choose Mailings
> Write & Insert Fields > Insert Merge Field and select the
field you want in the letter.
|
It’s not necessary to use all fields in a form letter, and you can use fields multiple times in the same document.
|
Figure 3
illustrates a sample form letter with an Address Block, Greeting Line,
and an individual data field entered into the letter. To make it easier
for you to see, I highlighted the fields in yellow.