1. Opening a Notebook in OneNote 2010
When you want to do a task that you can do in OneNote 2010 but not
OneNote Web App, open your notebook in OneNote 2010. Starting in
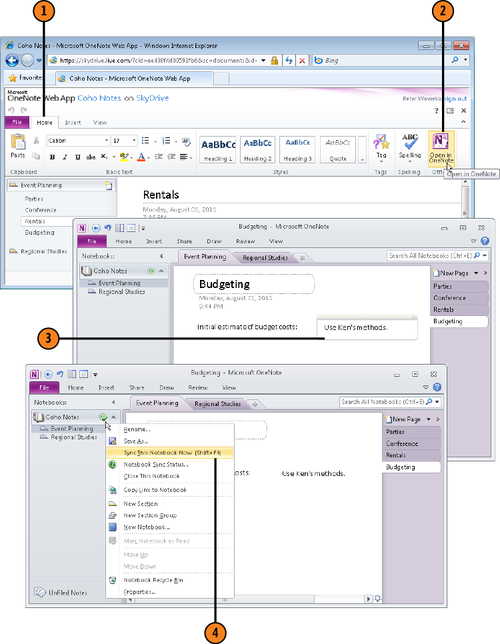
OneNote Web App, you open a notebook in OneNote 2010 with one of these techniques:
On the Home tab, click the Open in OneNote button.
Click File and choose Open in OneNote.
On the View tab, click Reading View, and then click the Open in OneNote button.
You can tell when you’ve
opened a notebook that is stored at Windows Live because the Sync
(synchronization) Status icon appears beside the notebook’s name in the
Navigation bar. If a check mark appears beside the icon, the OneNote
2010 and OneNote Web App edition of the file are in sync with one
another. You can right-click the icon and choose Sync This Notebook Now
(or press Shift+F9) to synchronize the notebooks. Right-click and choose Notebook Sync Status to find out when the notebooks were last synchronized.
1.1. Open a Notebook in OneNote 2010
In
OneNote 2010, write a note and notice that the check mark disappears
from the Sync Status icon (it disappears because the local and online
notebooks are out of sync).
Right-click the Sync Status icon and choose Sync This Notebook Now.
2. Inviting Others to Coauthor a Notebook
Windows Live offers three techniques for
inviting others to coauthor a notebook. With all three techniques,
others must be enrolled in Windows Live to edit the notebook.
Share the SkyDrive
folder in which the notebook is located with your friends on Windows
Live. Friends can open your public or shared folder and then open the
notebook.
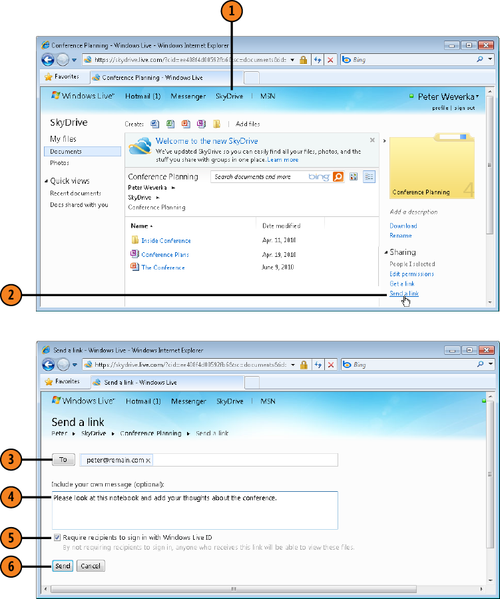
Send out
email invitations to visit the folder where the notebook is located. In
the public or shared folder on SkyDrive, click Send a Link (this link
is located on the right side of the screen). Then, in the Send a Link
window, enter an email address, enter a message, and click Send. The
recipient can click the View Folder button in the email message to
access the folder where the notebook is located.
Post
a hyperlink to the folder where the notebook is located. In the public
or shared folder on SkyDrive, click Get a Link. Then, in the Get a Link
window, click Copy to copy the folder’s URL to the Clipboard. You can
paste this URL in a document or web page.
2.1. Send an Email Invitation to Coauthor a Notebook
Open the SkyDrive folder with the notebook you want to coauthor.
Enter the recipient’s email address.
Write a note to accompany the invitation.
Select the Require Recipients to Sign in With Windows Live check box. (Recipients must sign in to edit the notebook.)