Create a Data Structure Using SharePoint 2010
To create the demonstration scenario data structure, take the following steps:
2.1 Create Site Columns
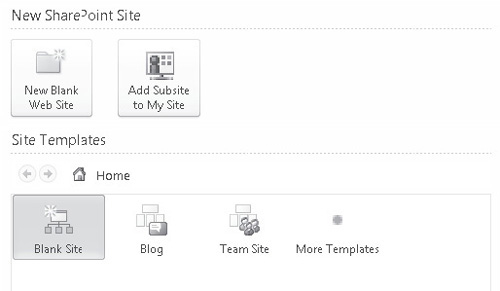
Open SharePoint Designer 2010. Click New Blank Web Site.

In the dialog box that appears, type the site name .
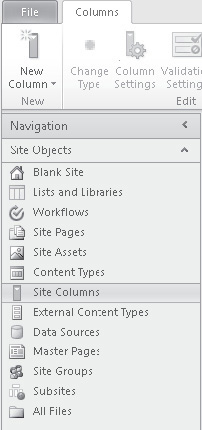
Once your new site has been created, you’ll see a Site Objects menu, as shown next. Click Site Columns.

From the ribbon menu at the top of the window, click New Column, and then choose Single Line of Text from the menu.
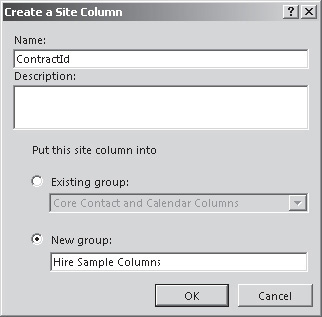
In the dialog that appears, enter the name ContractId, and then, in the Put This Site Column Into area, select New Group and enter Hire Sample Columns. The completed dialog should look like this:

Repeat steps 4 and 5 to create the following columns:
| Column Type | Name | Group |
|---|
| AssetId | Single Line of Text | Hire Sample Columns |
| AssetTag | Single Line of Text | Hire Sample Columns |
| Contract Start Date | Date & Time | Hire Sample Columns |
| Contract End Date | Date & Time | Hire Sample Columns |
| Location Code | Single Line of Text | Hire Sample Columns |
Since
each of these fields is mandatory, it’s necessary to disallow blank
values. To do this, select the column from the Site Columns list, and
then select Column Settings from the ribbon. In the dialog that
appears, uncheck the Allow Blank Values checkbox. Perform this action
on each created field.
Tip
To make it easier to find specific columns,
the column headers in the site columns list can be used to filter the
view. For example, clicking the down arrow on the far right of the
Group header allows you to select Hire Sample Columns as a filter. Only
items that match the filter are shown in the list.