2.2 Create Content Types
From
the Site Objects menu, select Content Types, and then select New
Content Type from the ribbon. In the dialog that appears, enter Hire Contract
as the content type name. Then, in the Select a Parent Content Type
From drop-down, select Document Content Types. In the Select Parent
Content Type drop-down, select Document. Create a new group to hold your custom content types. Click the New Group checkbox, and then, in text field, type Hire Sample Content Types. 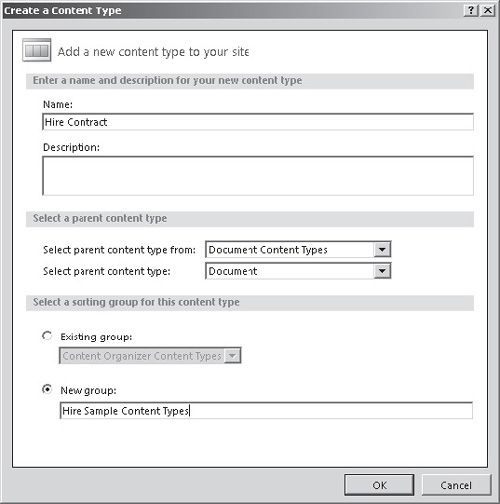 Repeat steps 1 and 2 to create another content type named On-Hire Asset, also in the Hire Sample Content Types group. This time, set the Parent Content Type drop-downs to List Content Types and Item. You
now have two new, blank content types. The next step is to associate
your site columns with these content types. To do this, highlight the
Hire Contract content type and select Edit Columns from the ribbon. A
list of the columns associated with the content type will appear.
You’ll notice that a number of columns are already defined. These
columns are inherited from the parent content type that you selected
when creating this new content type. To add in your precreated site
columns, select Add Existing Site Column from the ribbon, and then use
the dialog that appears to find and add the ContractId column, the
Contract Start Date column, and the Contract End Date column. Once
you’ve added the required columns, click the Save icon in the title bar. Repeat step 4 for the On-Hire Asset content type. This time add the AssetId column and the AssetTag column. Repeat steps 3 and 4 to create an Asset Note content type. This time add the Location Code column.
You should now have three content types within the
Hire Sample Content Types group: Asset Note, Hire Contract, and On-Hire
Asset.
2.3 Create Customer Template Site
Now that we’ve defined the content types that make
up our data structure, our next step is to create a template site that
can be deployed for each individual customer. You might have noticed a
Customer content type was not included to represent our customer. By
using multiple sites, one for each customer, the site itself
effectively becomes the Customer data container. This may seem a bit
bizarre when thinking in relational database design terms, but when you
give it a bit more thought it makes sense: In our relational data
structure, the Customer table existed only as a means of identifying
which customer corresponded to which contract. In effect, it provided a
means of segmenting the contract data (and therefore any data that was
related to contracts). By using content types within multiple sites, we
achieve similar segmentation. Each site contains only data that should
be visible to a particular customer. To see data for a different
customer, we look at a different site.
The
first thing that we need to do is generate a new subsite to act as our
template. In SharePoint Designer 2010 Site Objects menu, select Blank
Site to change the ribbon to display the Site menu. Select the Subsite
menu option from the ribbon. In the dialog that appears, select Blank
Site. Type in the location of the new site: http://<your_Server_Name>/Chapter14/CustomerTemplate. Then click OK. 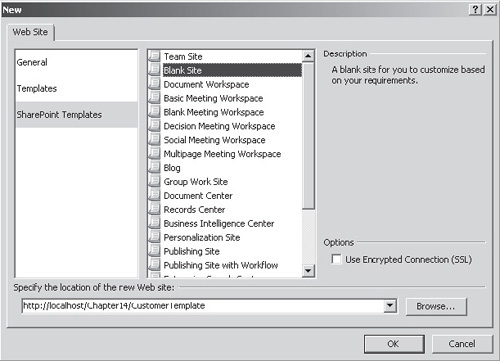 After
the subsite has been created, a new instance of SharePoint Designer
2010 will open automatically. You’ll see from the title bar that it’s
pointing to the new subsite. If you select Content Types or Site
Columns from the Site Objects menu, you’ll notice that the content
types and columns that were created in the preceding steps are
available to this new site. By default, content types are inherited by
all subsites within a site collection; as a result, our content types
will be available to any sites that are created as subsites of our http://localhost/Chapter14/ site. Now
that we have a new blank site, we need to add lists to hold our data.
To do this, select Lists and Libraries from the Site Objects menu.
Then, from the ribbon, select Custom List. Type On-Hire Assets as the name of the list. Repeat step 2 to create another custom list named Asset Notes. Since
hire contracts are documents rather than simple collections of data,
we’ll create a document library instead of a list. To do this, select
Document Library from the ribbon, and then choose Document Library from
the list of options. Type Hire Contracts for the name in the dialog that appears.
|