External Data Picker Control
We’ve now created a new Product external content
type that has a relationship with our existing Model content type. To
see the effects of this association in action, create a new external
list based on the Product content type. In the Create List and Form
dialog, set the List Name to Products.
By browsing to the new Products list using Internet
Explorer, you’ll see that when editing an item in the list, models can
be selected from a list using an External Data Picker control, as shown
here:
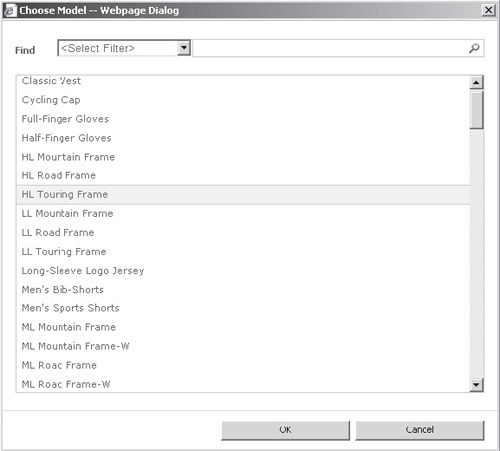
You should notice a few things when you’re using the
data picker. First, the list displays all rows from the Models table.
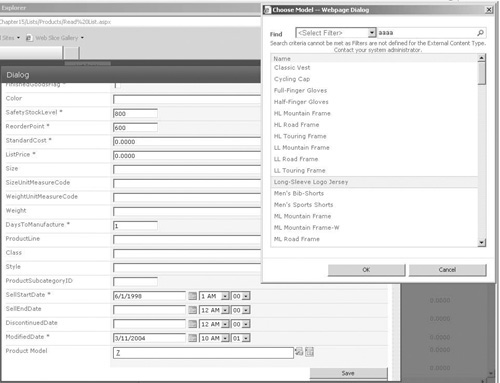
If you enter criteria in the Find box, you’ll get an error message, as
shown next. Second, if you select an item from the list and then click
OK, the Product Model control contains the ID of the selected item rather than the user-friendly text you might expect.
Both of these problems are easy to resolve and take us back to our Model content type.
Setting Picker Display Text
When opening the Model content type in Summary View, you’ll notice a list of fields on the right side of the page.
Select the Name field, and from the ribbon, click the Set As Title button.
Save the changes to the external content type, and then review the Products list in Internet Explorer.
This time, when editing an item, the model name is displayed when a model is selected rather than the ID.
Each external content type can have a title column
defined. If no title is defined, the ID is used instead. Any column in
the entity can be flagged as the title.
Adding Picker Search Functionality
The next problem requires a few more mouse clicks to
resolve. Open the Model content type in Operations Design View. Since
we want to change the way lists of items are returned, we need to
adjust the settings for the Finder operation.
In
SharePoint Designer, Finder operations are created using the Read List
type. Highlight the Read List operation, and then select Edit Operation
from the ribbon.
In the Filter Parameters step of the Edit Operation wizard, click Add New Filter Parameter to add an additional filter.
Set the Data Source Element to Name, and then click the Click To Add link to show the Filter Configuration dialog.
Create a new filter named Search Filter and set the Filter Type to Wildcard.
Since
we don’t want to apply this filter where no criteria have been entered,
check the Ignore Filter If Value Is checkbox. The default option of
Null is fine.
A couple additional checkboxes warrant some explanation:
The
Is Default checkbox determines whether the filter should be selected by
default in the picker control. You’ll remember that the picker control
contains a drop-down list of search types as well as a text box for the
user to enter search criteria. A check in the Is Default checkbox means
the filter will automatically be selected as the default in the search
types drop-down.
The Use To Create Match
List In Data Picker checkbox also relates to the default search.
However, rather than setting the default search in the search types
drop-down, the checkbox defines which filter should be used when the
user types a value in the External Data Picker control without clicking
the picker button. So, for example, on an edit page containing an
External Data Picker control, the control is rendered as a text box
with two buttons. The rightmost button opens up the picker, and the
left button performs a behind-the-scenes search using the value entered
in the text box. If a single match is found, the item is selected. If
not, a list of suggestions are presented.
With an understanding of the Is Default and Use To Create Match List In Data Picker options, set both of these options to true.
Click Finish to apply the changes, and then save the external content type.
This time, when viewing the changes in the edit form, try entering jersey
in the product model text box, and then click the button to the
immediate right. You’ll see an error message indicating that no exact
match was found, and you can click the underlined text to see a list of
suggestions, as illustrated here:

The picker now behaves as expected, filtering
results based on the criteria entered in the textbox and allowing
search within the pop-up dialog.
Tip
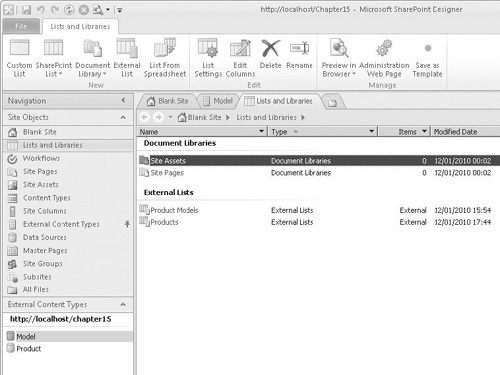
When
moving between different object types in SharePoint Designer, it’s
possible to pin one category of objects to the left sidebar. In Figure 1,
the External Content Types explorer is pinned to the navigation bar
while the List and Libraries explorer is visible in the main pane,
making it easy to switch to a particular external content type without
first having to bring up the explorer.