The Windows
programmers seem to understand this because they built three new
file-management techniques into Windows Explorer, all of which become
more powerful and more useful the more metadata you’ve applied to your
files. These techniques are grouping, stacking, and filtering.
Grouping Files
Grouping
files means organizing a folder’s contents according to the values in a
particular property. You could do this in Windows XP, but you’ll see
that Windows Vista implements a couple of new techniques that make its
grouping feature far more useful.
The first thing that Vista does better than XP
is display property headers full time, whereas in XP they appeared only
in Details view. This means that you can group your files (as well as
stack and filter them, as you’ll see in the next two sections) no matter
which view you’re using.
In the Vista version of Windows Explorer, each
property header has a drop-down list that includes a Group command.
Clicking this command groups the files according to the values in that
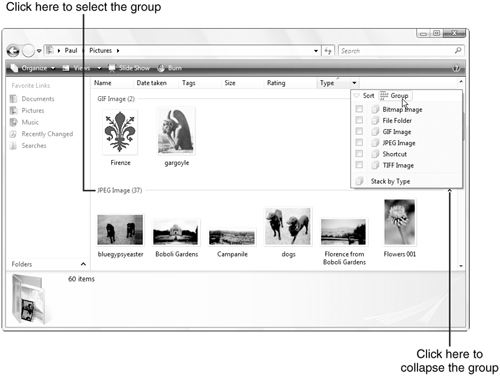
property. Figure 1 shows the Pictures folder grouped by the values in the Type property.

As Figure 3.19 shows, Vista enhances the grouping feature with two new techniques:
You can select all the files in a group by clicking the group title.
You
can collapse the group (that is, show just the group title) by clicking
the upward-pointing arrow to the right of the group title. (You can
collapse all the groups by right-clicking any group title and then
clicking Collapse All Groups.)
Stacking Files
Stacking
files is similar to grouping them because it organizes the folder’s
contents based on the values of a property. The difference is that a
stack of files appears in the folder as a kind of subfolder. You stack
files according to a property’s values by pulling down the list
associated with that property’s header and clicking the Stack command.
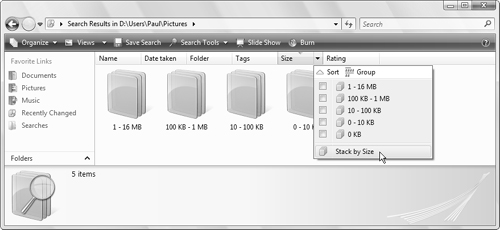
For example, Figure 2 shows the Pictures folder stacked according to the values in the Size property.

Filtering Files
Filtering
files means changing the folder view so that only files that have one
or more specified property values are displayed. Returning to the Type property example, you could filter the folder’s files to show only those where Type was, say, JPEG Image or File Folder.
When you pull down the list associated with a
property’s header, you see an item for each discrete property value,
along with a check box for each value. To filter the files, activate the
check boxes for the property values you want to view. For example, in Figure 3 I’ve activated the check boxes beside the Bitmap Image and TIF Image values in the Type property, and only those two types appear in the folder.