Specifying Shape Outlines
To specify the outline of a
shape—either a line or any other shape such as a circle or
rectangle—select the shape and on the Drawing Tools—Format tab, click
the down arrow to the right of the Shape Outline button. The Shape
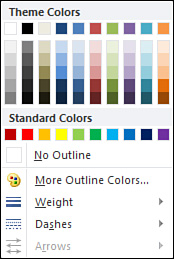
Outline palette appears, as shown in Figure 7.

Choose from the following options:
- Apply one of the theme or standard colors. The theme colors are compatible with your slide’s color scheme.
- Click No Outline to hide the existing line.
- Click
More Outline Colors to open the Colors dialog box, in which you can
select from many other colors or create a custom color.
- Click Weight to specify the outline weight—from 3/4 point to 6 points.
- Click
Dashes to specify a dash style, such as square dot, dash dot, or long
dash. Unless you create a thick outline, dashes probably won’t be
visible.
- Click Arrows to specify an arrow style. Note that this option is available only if the selected shape is a line or an arrow.
|
For more options, select More Lines or More Arrows from the Weight, Dashes, or Arrows menus to open the Format Shape dialog box.
|
Applying Shape Effects
You can add shadow, glow, bevel,
and 3-D effects to shapes by using the tools on the Shape Effects
palette. To apply shape effects to a selected shape, on the Drawing
Tools—Format tab, click the down arrow next to the Shape Effects button.
The Shape Effects menu appears. Each menu choice leads to a gallery of
additional options.
Depending on the shape you
select, not all options are available. To preview a potential shape
effect on your presentation, pause the mouse over it in the gallery.
Choose from the following options on the Shape Effects menu:
Preset— Apply 1 of 12 ready-made effects designed to work well with your shape.
Shadow— Apply an outer, inner, or perspective shadow to the shape. Select No Shadow to remove the shadow.
Reflection— Apply one of several reflection variations, such as half or full reflection. Selecting No Reflection removes the shape effect.
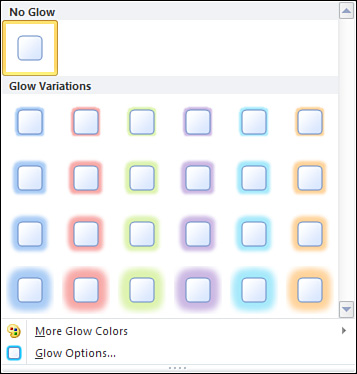
Glow— Apply one of several glow variations in different colors and sizes (see Figure 8).
Select No Glow to remove the glow effect. Select More Glow Colors to
open the Colors palette, where you can select another color.

Soft Edges— Apply a soft edge, ranging in width from 1 to 50 points. Select No Soft Edges to remove the effect.
Bevel— Apply one of several bevel options, such as a circle or divot. Select No Bevel to remove the effect.
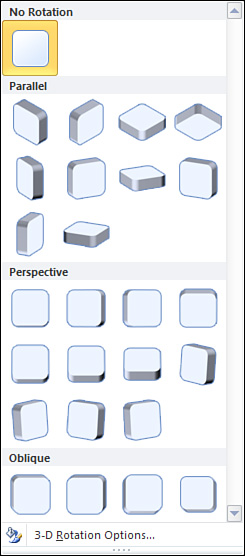
3-D Rotation— Apply a parallel, perspective, or oblique rotation to the selected shape. Remove the effect by selecting No Rotation. Figure 9 illustrates the 3-D Rotation gallery.

Editing Shapes
On the Drawing Tools—Format
tab, click the Edit Shape button in the Insert Shapes group to open a
submenu with the following choices:
|
For more options, select the
Options link at the bottom of each gallery to open the Format Shape
dialog box. The exact wording of the Options link varies based on the
name of the gallery, such as Shadow Options or 3-D Rotation Options.
|
Change Shape— Change the applied shape to another shape available in the Shapes gallery.
Convert to Freeform— Convert the selected shape to a freeform shape for more design flexibility.
Edit Points— Edit the points of selected shapes.
Reroute Connectors— Force a connection between two objects to be the shortest distance.
Be aware that depending on the type of shape you select, not all editing options are available.