The collection of “Save As” file types in Visio is extensive and includes options to create the following image types:
JPEG Joint Photographic Experts Group
GIF Graphic Interchange Format
PNG Portable Network Graphic
TIFF Tagged Image File Format
SVG Scalable Vector Graphics
WMF Windows Metafile
EMF Enhanced Metafile
BMP Bitmapped Picture
Tip:
If you need a detailed
description of any of these file formats, you can find plenty of
information on the Internet. For example, the Wikipedia article at en.wikipedia.org/wiki/Image_file_formats describes most of the formats in the previous list.
Creating images in Visio is a
shape-oriented, not a page-oriented, operation. To say that another way,
Visio does not provide a built-in method to create an image of an
entire page. If you create a graphic by clicking Save As for the current
page, Visio will create an image that is only as big as the rectangle
surrounding all shapes on the page. White space between that shape
rectangle and the page boundaries will not be included. You will see an
example of this behavior in the first steps of the following exercise
and will also learn an easy workaround for this limitation.
In this exercise, you will create JPEG and PNG images from a Visio drawing.
Save As

On the File tab, click Save As.
Note:
You can also open the Save As dialog box by pressing Alt+F, A.
In the File name field, type Not quite full page.
Click the Save as type
arrow to display the list of file formats in which you can save all or
part of a Visio drawing. The list includes the image file types
mentioned in the list prior to this exercise, along with additional file
types that will be discussed in subsequent exercises.
Tip:
Visio uses a standard
Windows Save As dialog box. Although it is not shown in the following
graphic, in the upper part of the dialog box, you can change the folder
in which the image file will be saved. The default save location is the
same folder that contains the Visio drawing.
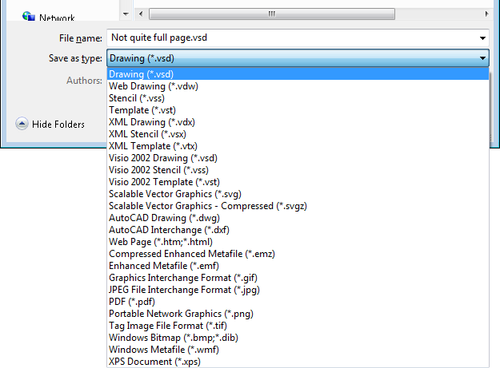
Click JPEG File Interchange Format, and then click Save. The JPG Output Options dialog box opens.
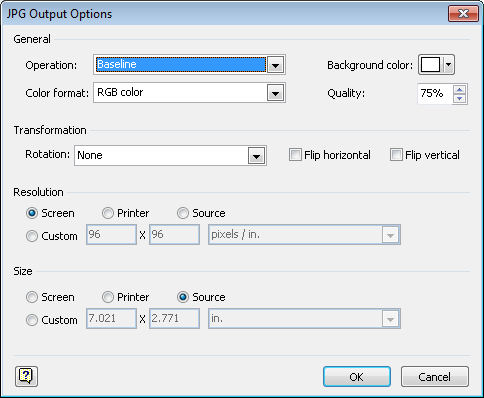
For most situations you can
accept all default settings by clicking OK. However, if you require a
specific JPG file format that differs from the defaults shown in the
previous graphic, use the various drop-down lists, text boxes, and
options to satisfy your needs.
Open the Not quite full page image in any image viewing program. On most systems, you can do this by double-clicking the file name in Windows Explorer.
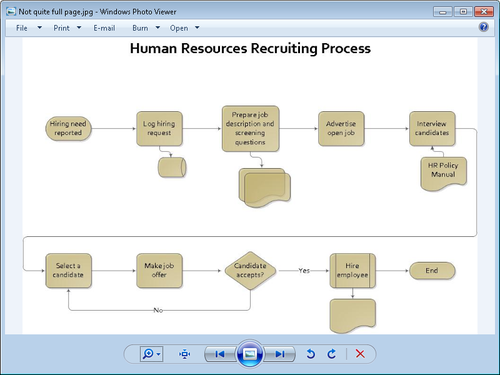
You can see that the image
created by Visio does not include the full drawing page, but rather is
just big enough to contain all of the shapes on the page. The image
barely includes the vertical lines at the left and right edges and stops
at the top of the page title and at the bottom of the document shape
beneath the Hire employee shape. As noted in the text before this exercise, this is normal Visio behavior when creating image files.
Tip:
If you want to create an
image of an entire Visio drawing page, you must place one or more shapes
at the page boundaries to force Visio to capture the entire page. The
easiest techniques for accomplishing this are to: 1) draw a rectangle
with no fill at the page margins, effectively creating a border around
the page; or 2) place a pair of very small shapes in opposite corners of
the page.
If you use the first
technique, you can make the line nearly invisible by making it very thin
and/or giving it a color that is almost the same as the page
background. If you use the second method, you can make the small shapes
nearly invisible by making them very, very tiny or by making their fill
color nearly that same as the page background. In either case, do not
use a color that is exactly the same as the page background. If your
shapes and the background are the same color, Visio will not “see” your
added shapes and will not include them, so you will fail to capture the
full page.
Next you will create a PNG image of a portion of the Visio recruiting diagram.
Use a bounding box to select the Hiring need reported, Log hiring request, and Prepare job description and screening questions shapes. Include the database and document shapes below the latter two shapes.
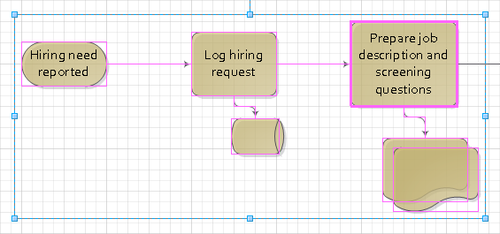
On the File tab, click Save As.
In the File name field, type Process shapes.
In the Save as type list, click Portable Network Graphics, and then click Save.
The PNG Output Options dialog box opens.
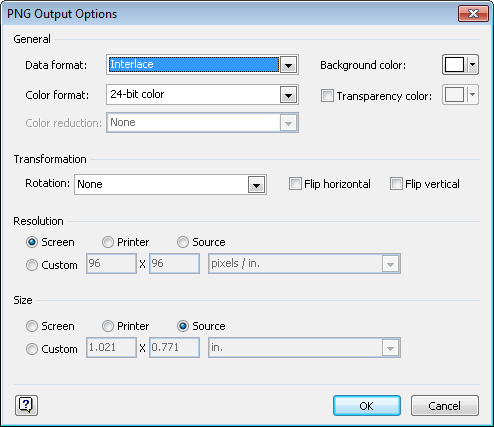
As with JPEG images, you
should be able to accept the default settings for PNG images unless you
have specific requirements that mandate other settings.
Click OK in the PNG Output Options dialog box to create the PNG file.
Open the Process shapes image in any image viewing program.
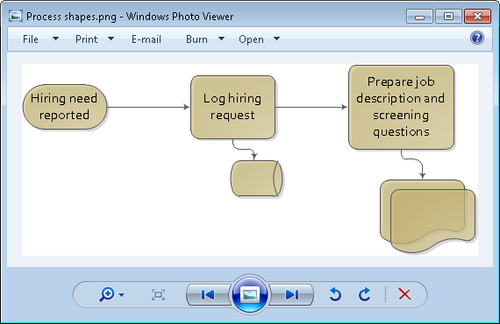
Notice
that this image of a set of selected shapes exhibits the same behavior
you saw when you created an image that contained all of the shapes on
the page: the image is exactly as large as the set of shapes. If you
require white space at the outside edges of your image, you will need to
use one of the techniques described in the tip after Step 6.