| Scenario/Problem: | You want to provide pictures as a choice mechanism on your form. |
| Solution: | Use picture buttons within multiple sections to set the values and show the appropriate selections. |
Using
picture buttons as options is a great way to jazz up your form and
provide a great user experience. This can be implemented using a
picture button for each option within small sections that are
configured to display based on the selected option.
To set this up, follow these steps:
1. | First,
add the field that will be the option and store the selected value. For
example purposes, I am adding a PhoneType field with a default value of
Home, as shown in Figure 1.
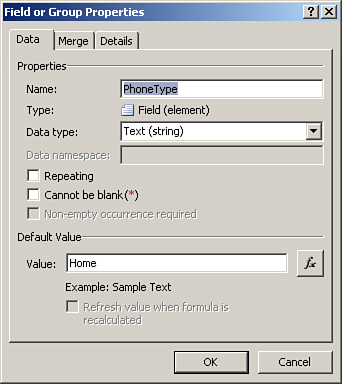
|
2. | The
next step is to create image files for each option along with a
selected version of the image (similar to the tabbed navigation
scenario). For this example, I will use a home and a cell phone image.
|
3. | For each option, create a new section in your form to house the picture buttons as shown in Figure 2. In my example, I created a sectionHomePhone and a sectionCellPhone.
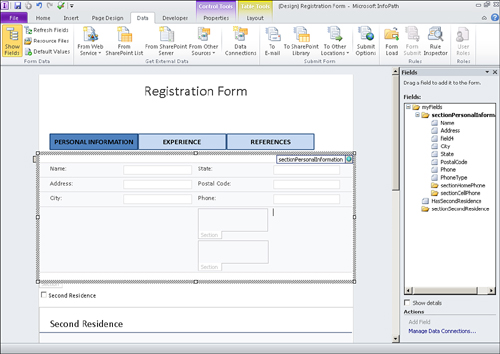
|
4. | Create picture buttons inside each section using the selected version of the image for the corresponding section as shown in Figure 3.
This provides the selected appearance. In my example, the selected home
image is in the sectionHomePhone section and the selected cell phone
image is in the sectionCellPhone section.
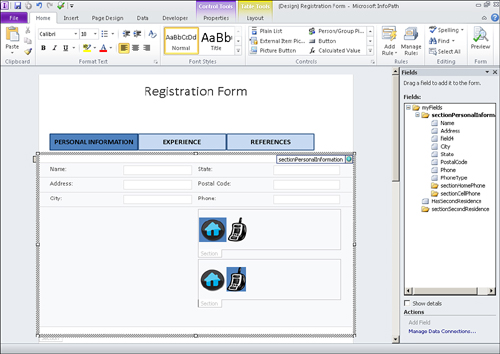
|
Tip
You can use the Hover Picture settings here, too!
Now you need to set the actions of the picture buttons by adding the appropriate rules:
1. | In the first section, select a non-elected picture button. For my example, I selected the cell phone image.
|
2. | Add
a rule to the button with the Set a Field’s Value action and set the
field for your choice to the appropriate value, as shown in Figure 4. This is the value that will be set when the picture button is clicked. For my example, I am setting the PhoneType to Cell.
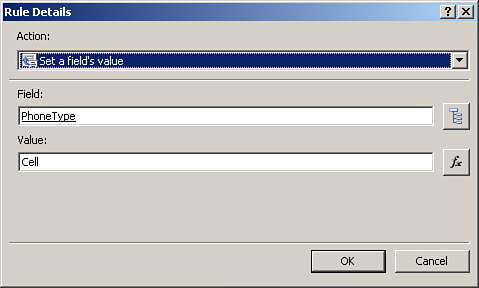
|
3. | Repeat steps 1-2 for any other nonselected picture buttons in the first section.
|
4. | Repeat
steps 1-3 for each additional section. In my sectionCellPhone section,
I selected the home button and added the appropriate rule to set the
PhoneType to Home.
|
The final set of steps involve creating formatting rules on each section as follows:
1. | Select the first section and add a new formatting rule.
|
2. | Add a condition for the rule such that the field is not equal to the value that the section represents, as shown in Figure 5,
because we are going to hide the section. In my example, for
sectionHomePhone, the condition is the PhoneType is not equal to Home.

|
3. | Check the Hide This Control option in the rule under the Formatting section.
|
4. | Repeat steps 1-3 for each additional section.
|
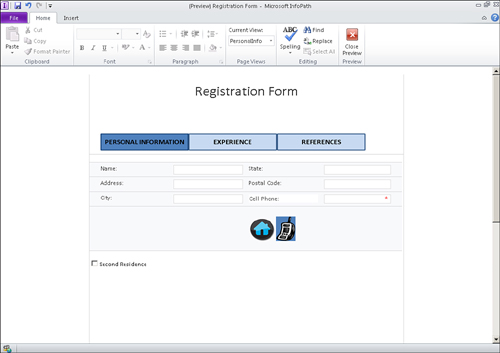
Preview the form the test the implementation.
Clicking a nonselected picture changes that button to the selected
option, as shown in Figure 6.
Tip
Use a read-only text box to change the label of any dependent fields based on the selected option. In Figure 6, notice that the phone label now states Cell Phone.