1. | Navigate to the Collections folder in the SMS Administrator Console.
|
2. | Right-click
the Collections folder, choose New from the context menu, and then
choose Collection to display the Collection Properties dialog box,
shown previously in Figure 1.
|
3. | In the General tab, enter a descriptive name for your collection along with a descriptive comment if you like.
|
4. | In
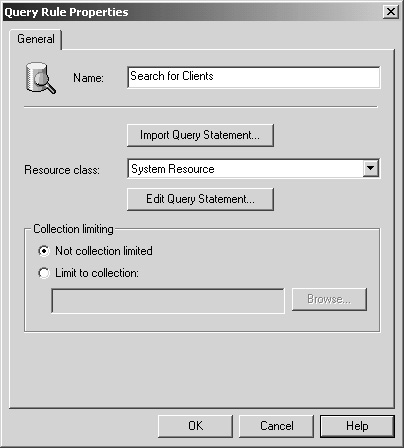
the Membership Rules tab, click the Query Rules button (the database
with the yellow star) to display the Query Rule Properties dialog box,
shown in Figure 8.
|
5. | In the General tab, enter a name for your query, or click Import Query Statement to choose from a list of existing SMS queries.
|
6. | Select
the resource class for a set of related objects you want to add to the
collection. The Systems Resource option is selected by default. In the
Collection Limiting frame, select Limit To Collection if you want to
narrow the query to a specific collection’s membership. Click Browse to
select from a list of existing collections.
|
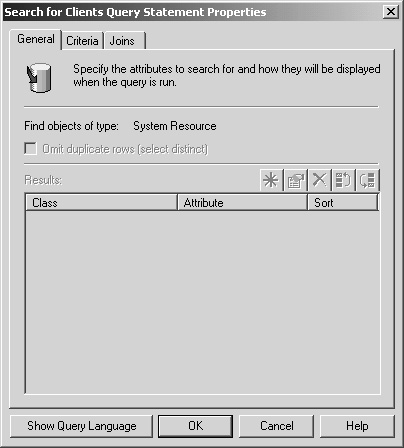
7. | Click Edit Query Statement to display the Query Statement Properties dialog box, shown in Figure 9.
|
8. | In
the General tab, you’ll notice that you don’t have the ability to
create or modify a Query Results list. This is because the query is
being used to populate a collection membership instead of displaying
resource attributes.
|
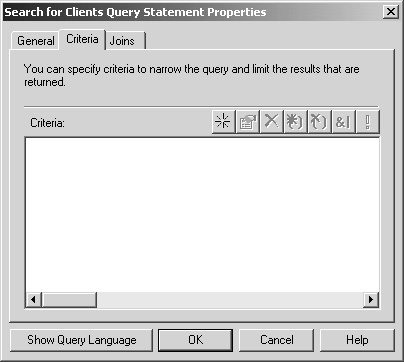
9. | Select the Criteria tab, as shown in Figure 10, where you can define how to populate the collection.
|
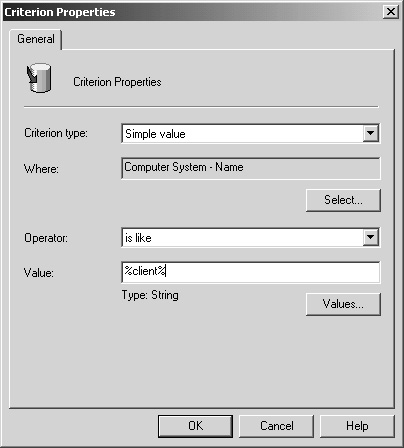
10. | Click the New button (the yellow star) to display the Criterion Properties dialog box, shown in Figure 11.
|
11. | Select
the criterion type. The available choices are Null Value, Simple Value,
Attribute Reference, Subselected Values, and List of Values.
|
12. | Click the Select button to define the attribute class and attribute on which you’re basing the query.
|
13. | Select
an operator and enter a value appropriate to the attribute class and
attribute you defined or click Values to make your selection from a
list of values recorded in the SMS database. When you’ve finished,
click OK.
Caution String
values require an exact value entry. If you wish to use a wildcard
character, use the operator Is Like or Is Not Like, and then use the
percent sign (%) like you see in Figure 11 or one of the other wildcard characters . |
|
14. | Repeat steps 10 through 13 to add selection criteria.
Note As mentioned, a collection can be mixed—that is, it can contain computers, users, and groups. |
|
15. | Click OK to return to the Query Rule Properties dialog box. Click OK again to return to the Collection Properties dialog box.
|
16. | Select the Membership Rules tab, shown in Figure 12.
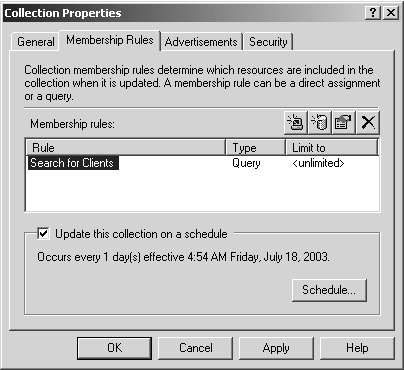
Select
the Update This Collection On A Schedule option to define the frequency
at which you want Collection Evaluator to run the query and update the
collection. By default, the collection will be updated once every hour.
|
17. | Click OK to create the collection and add it to the Collections folder.
As with direct membership collections, the Advertisements tab of the
Collection Properties dialog box lists all advertisements that have
targeted that collection. The Security tab lets you specify who can
access this collection—and collections in general—and to what extent
they can administer the collections.
|